3D Rendering for a Neighborhood Meeting
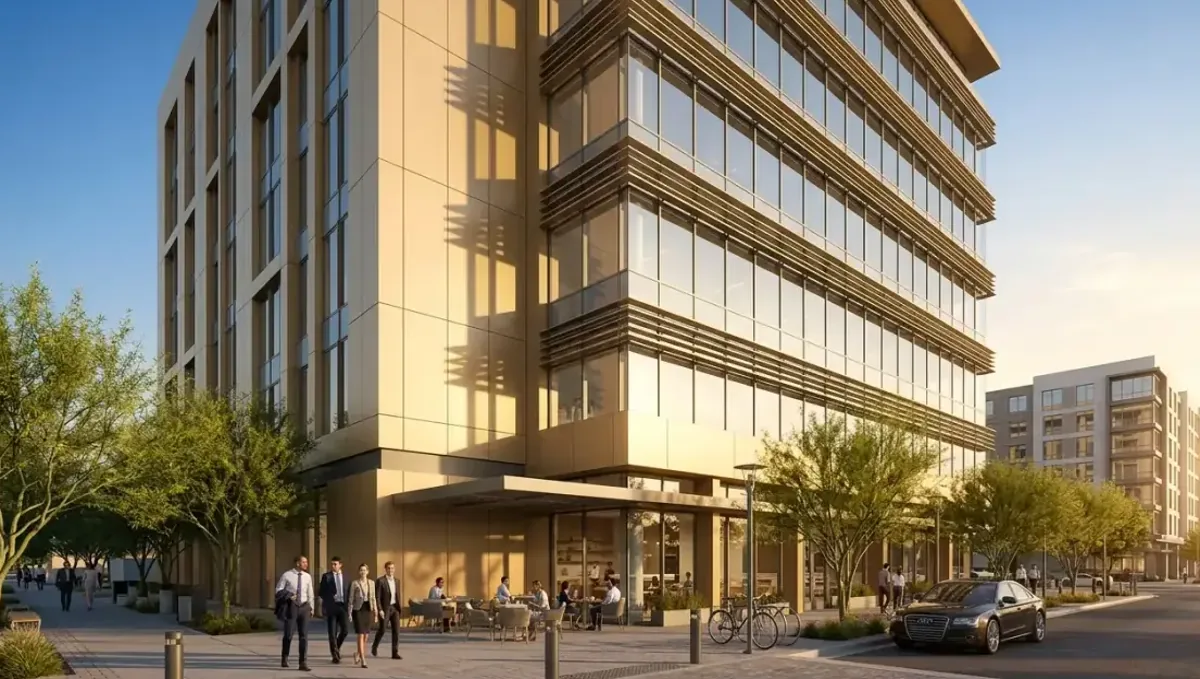
Quick answer: A 3D rendering for a neighborhood meeting shows the project honestly from the street and the neighbor side, giving everyone the same reference and making concerns specific and easier to address.
Why neighborhood meetings matter
Many projects that need a public hearing, a rezoning or a variance benefit from meeting the neighbors first, and some jurisdictions require or encourage it. People fear what they cannot see: a tall building, a new use, more traffic. A clear image turns a vague worry into a concrete conversation. A neighborhood meeting is not a vote, but the tone and the outcome often influence the official process. This guide is part of using a 3D rendering for permits, HOA and bank approval.
What a rendering does in the room
It gives everyone the same reference. Without it, each neighbor imagines a different building, usually a worse one. With it, questions become specific: can the fence be taller, can the light be moved, can the trees stay. The image also shows respect, because you have done the work to explain the project. It does not close the discussion, it starts it on solid ground.
What it should show
- The building as it will look from the street and from the side facing neighbors.
- Its height and mass compared with nearby buildings.
- The main materials and colors.
- Landscaping and screening that you really commit to.
- Parking, entrances and any feature that generates concern, such as a loading area or lighting.
Honesty is the whole point
An image that hides a problem will be discovered, and it will damage trust for the rest of the process. Show heights, distances and the neighbors as they are, mark what is fixed and what is negotiable and be open about what is not decided yet. A modest, accurate picture that answers questions builds more goodwill than a polished one that neighbors think is a sales piece.
Views from the neighbor side
Neighbors care about what they will see from their windows and yards. A view from an adjacent property, or a sight line diagram with a matching image, answers the top concern directly. If a tree screens the view, show it at its real size. If it does not, say so and offer options such as screening or a window change. The image shows you have thought about them, not only about your building.
Formats for a meeting
For a room, use large boards or a projector with a few clear images, and provide a handout with a small version and your contact details. For an online meeting, prepare a short slide deck. Ask the studio for print sizes, web sizes and a PDF. Keep text short on the boards, and include a scale or a note explaining that the image is an illustration.
What to send the studio
- A site plan or survey and the proposed drawings.
- Photos of the site, the street and the adjacent properties.
- Materials, colors and landscaping decisions.
- The concerns you expect from neighbors.
- The meeting date and format.
- Any city requirements about notice and exhibits.
Preparing the conversation, not only the image
Plan how you will run the meeting: a short presentation, plenty of time for questions, a sign in sheet, someone taking notes. Bring the drawings and the survey to answer technical questions. Decide in advance what you can change and what you cannot. The rendering supports the conversation, but attitude decides the result: listen, respond honestly and follow up on promises.
Expect objections and use them
Neighbors will raise concerns about height, privacy, noise, parking, trees, light and property values. Write them down. Where you can adjust the design, do so and ask the studio to show the updated version. Sending it to the attendees afterward demonstrates that the meeting had an effect. Even when you cannot satisfy every concern, a documented effort is valuable at the hearing.
Trees, light and shade
Neighbors often worry about shade, lost trees and new lighting. If your project affects any of these, ask the studio to show the existing trees, the ones you will keep and the new plantings at a realistic size. For exterior lighting, show the fixtures and describe how they are shielded. If you have a sun study prepared by your designer, present it alongside the image. Answering these concerns with facts prevents them from growing into objections that dominate the hearing.
Construction impact and phasing
People also ask about the construction period: noise, trucks, parking on the street and duration. A rendering does not answer those questions, but a simple phasing sketch and a contact person do. Bring a one page summary with working hours, expected phases and a phone number for complaints. Do not promise dates you cannot control, and describe the schedule as an estimate. Neighbors accept disruption more easily when they know who to call and what to expect.
A simple one page handout
Prepare a single page for attendees with one image, a short description of the project, the key dimensions, the hearing date and your contact information. Attendees can take it home, share it with people who could not come and refer to it later. Keep the language plain and avoid promotional claims. A handout that neighbors can check against the drawings is far more valuable to your credibility than a glossy brochure that they suspect is only marketing.
Community groups and associations
Beyond adjacent neighbors, a neighborhood association or a civic group may want a presentation. Ask for their meeting date and format, and adapt the material to the time available. A short presentation with two or three images and time for questions is more effective than a long slideshow. The association may also advise on the concerns most important in the area, which helps you prepare.
Language and accessibility
If the neighborhood includes people who speak other languages, offer captions or a handout in those languages, and consider large print. Make images available online for those who cannot attend. An accessible meeting produces better feedback and helps you document the outreach. The image itself is a bridge, because pictures communicate across language barriers, but the accompanying explanation should also be clear.
Recording what you heard
Keep a simple record: the date, the attendees, the concerns, your responses and the changes you agreed to consider. Summarize it in a letter to the attendees and attach it to your application if allowed. A board that sees documented outreach and a design that responded to it is more likely to view the project as a good neighbor, even when some opposition remains.
Using the image after the meeting
After the meeting, the same image can support your application, your contractor briefing and your lender package, as long as it matches the current design. Update it when the design changes and retire outdated copies. Sharing a consistent picture across audiences avoids contradictions, and it lets you tell the same story to neighbors, officials and financing partners without confusion.
When a meeting is required
Some jurisdictions require applicants to notify neighbors or hold a meeting before certain hearings, and they may ask for proof such as a sign in sheet or a report. Ask the planning office what is required and keep the evidence. The rendering can be attached to the report to show what was presented. Following the process exactly protects your application from procedural challenges later.
Handling opposition and misinformation
In a contentious project, rumors circulate. A public, accurate image and a fact sheet counter them. Publish the same material on a project page or a shared folder, so nobody depends on secondhand descriptions. Stay factual and avoid arguing about motives. If a person misstates a dimension, point to the drawing calmly. Credibility is your main asset, and it is easier to keep than to rebuild.
Timing before the hearing
Hold the neighborhood meeting early enough to change the design if needed, and late enough to have real drawings. Leave time between the meeting and the application deadline for updates. See how long a 3D rendering takes. Rendimension offers an express option, subject to the queue, but early planning gives you more room to respond to what you hear.
Questions to ask the studio
- Can you show the project from the neighbor side?
- Can you prepare boards, a slide deck and a handout?
- Can you update the image quickly after the meeting?
- How many revision rounds are included?
- Can you deliver by the meeting date?
A checklist before the meeting
- Accurate drawings and a survey.
- Two to four labeled images.
- A list of expected concerns and possible responses.
- Formats for the room and for online.
- A plan for notes and follow up.
Revision rounds and how to keep them small
For a neighborhood meeting, the large decisions belong in the first preview: the massing, the materials, the colors and the camera. After that, send changes as one consolidated list. A reviewer or lender will judge the image against your written documents, so any correction should keep the two consistent. See how revision rounds affect timelines.
Timing
Approval dates are usually set by someone else: a meeting calendar, a filing deadline, a closing date. Count backward from that date, leave room for one revision round and answer the studio quickly. See how long a 3D rendering takes. Rendimension offers an express option, subject to the queue, when a date is fixed.
Common mistakes
- Hiding or softening a real impact.
- Showing only the street view.
- Using promotional language.
- Going to the meeting without drawings.
- Not following up after the meeting.
- Promising changes you cannot deliver.
A worked example
A developer plans a small three story building next to single family houses. He asks the studio for a view from the street and one from the rear neighbor yard, with the trees at their real size. At the meeting, the rear neighbor sees a wall taller than she expected and asks for a stepped design. He agrees to study it, and the studio prepares an updated image that he sends to attendees before the hearing.
Where to go next
Ask the reviewing body for its checklist, then send the checklist, your drawings or sketch and your references to the studio. For the general overview, see using a 3D rendering for permits, HOA and bank approval, and for the pitfalls to avoid, see common mistakes using a rendering for approvals.
Frequently asked questions
Do I need a rendering for a neighborhood meeting?
It is not required, but it usually makes the conversation clearer and calmer.
What should the image show?
The street view, the view from the neighbor side and the height compared with nearby buildings.
Should I show negative impacts?
Yes. Honesty builds trust and prevents surprises at the hearing.
What formats do I need?
Boards or a projector for the room, a handout and a slide deck for online.
Can I update the image afterward?
Yes, and sending the update shows the meeting had an effect.
Will neighbors approve because of the image?
Not necessarily, but it makes their concerns specific and easier to address.
Is it required by the city?
Requirements vary, so ask the planning office.
Is there a faster option?
Rendimension offers an express option, subject to the queue.
Related guides
This guide is part of our series on 3D renderings for permits, HOA and bank approval. Start with the overview, using a 3D rendering for permits, HOA and bank approval. Related: rendering for a design review board, rendering for a small business loan application, rendering for an HOA architectural review. When you are ready, send what you have through our quote request.