How Do I Specify Materials and Finishes for a 3D Rendering?
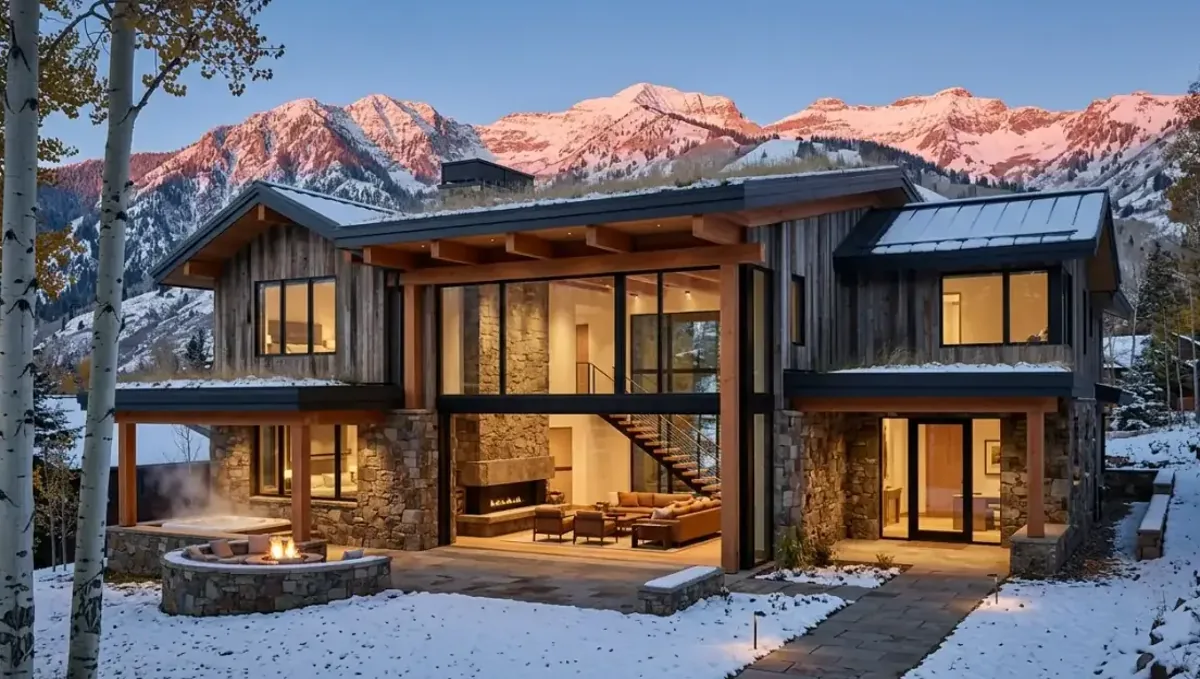
Quick answer: Specify materials for a rendering by listing surfaces, giving a matchable source for each and marking what is still undecided.
The short answer: name each surface, show a source and mark what is still open
To specify materials and finishes for a 3D rendering, list every major surface, say what it is made of, and give the studio a source it can match: a product link, a photo of a sample, a code from a schedule or a reference image. Where you have not decided yet, say so, and the studio will use a neutral placeholder that you can change later. A clear list at the start is the single best way to reduce revisions.
This guide explains what to include, which sources work best, how accurate the result can be, how to handle undecided choices and how the process affects cost and time. It is the overview for a series of guides by format, role, project type, use and deliverable.
Start with a list of surfaces
Walk through the space and write down every surface a viewer will see: floors, walls, ceilings, countertops, backsplashes, cabinet fronts, trim, doors, windows, roofing, siding, paving and landscaping. Next to each, write the material, the color and the finish, such as matte, satin or polished. The list does not have to be perfect. It only has to be complete enough that the studio is not guessing about the large areas that dominate the image.
Prioritize the large and visible surfaces
Not every surface matters equally. Floors, main walls, cabinets, countertops, roofing and cladding cover the most area and set the mood, so specify those first and most carefully. Small items such as switch plates or screws rarely need detail. Spending your attention on the dominant surfaces gives the biggest improvement in accuracy, and it keeps the brief short enough that the studio can follow it without confusion.
Choose a source the studio can match
The more direct the source, the closer the result. A manufacturer product page gives the studio the name, color and often a texture image. A clear photo of a physical sample shows the true color and grain. A code from a paint or laminate system identifies a color precisely. A mood board expresses intent when nothing is chosen. Combine sources when useful, and mark which one takes priority when they disagree, so the studio does not have to guess.
Physical samples and photos
Photograph samples in daylight, on a neutral background, with the whole sample visible and, if possible, a ruler or coin for scale. Include a close up of the grain or pattern and a wider shot for the overall look. Avoid harsh flash and strong colored light, which distort the color. Label each photo with the name of the product and where it will be used. Good photos are the most accessible source for most clients.
Product links and specification sheets
When a material is a known product, send the link or the specification sheet. The studio can read the name, the color and the finish, and often find the texture image the manufacturer publishes. Include the exact color or style, not just the product line, since a single line may offer dozens of colors. If a link may disappear, save the page or the sheet as a file and send that too.
Color codes and paint systems
Paint and laminate systems assign each color a code. Sending the brand and the code is far more reliable than describing a color in words. Remember that a code identifies a color in a standard condition, and that the finished surface can look different under real light, so treat the rendering as an accurate illustration and confirm important colors with a physical swatch on site before ordering.
Wood, stone and other natural materials
Natural materials vary from piece to piece. For wood, name the species, the stain or finish and the board width, and send a photo of the grain you like. For stone, send the slab or tile selection and note the veining. The studio can reproduce a chosen pattern, but it cannot promise that the real material will match, since natural products differ. Use the rendering to approve the look, and choose the real slab in person.
Metals, glass and hardware
Metals such as brass, steel and aluminum vary by finish: brushed, polished, matte or oil rubbed. Name the finish and, if possible, the product. Glass can be clear, frosted or tinted, and reflections change how it reads. Hardware, fixtures and lighting are small, but they add character, so list the ones that matter and skip the rest. A short note on each is usually enough.
Consistency across the whole set
When several views show the same space, the materials must match in every one. Give the studio a single palette and ask that it be reused throughout. Inconsistent finishes between views make a project look careless and confuse decisions. A single approved palette also lets you add new views later without redoing the material decisions, which saves both time and budget on any future changes.
Lighting changes how materials read
The same material looks different in morning light, evening light and artificial light. Warm lights make woods richer and cool lights make stone feel colder. Tell the studio the mood you want and the time of day for each view. Ask to see materials under the lighting you expect, since a finish that looks right in one setting may disappoint in another one.
Scale of patterns and textures
The size of a pattern affects how a surface reads. A large tile, a wide plank and a small mosaic feel very different even in the same color. Give the dimensions of tiles, boards and panels, and the direction in which they run. Correct scale keeps proportions believable and helps you judge whether a bold pattern will overwhelm a small room or suit a large one.
Sustainability and technical requirements
Some projects require materials that meet fire, moisture or environmental standards. The rendering shows appearance and does not verify performance. If a technical requirement drives the choice, mention it so the studio uses a product with the right look, and confirm the specification with your architect, builder or supplier before purchasing anything based on an image.
Budget awareness in material choices
Materials strongly affect the project budget, and images can make expensive finishes look attractive. Decide the price range before choosing, and specify materials that fit it. A rendering is a good way to compare an expensive option with a cheaper alternative, since you can see the visual difference before paying for it. This often shows that a modest option delivers most of the effect.
Working with your contractor and suppliers
Contractors and suppliers know availability, lead times and installation limits. Share the draft palette with them before the images are final, so you avoid approving a finish that cannot be delivered in time. Their feedback also catches incompatible combinations. Bringing them in early is one of the simplest ways to make sure the image matches what will actually be built.
Keeping a record of approved materials
After approval, save the final images together with the materials list, including product names, codes and sample photos. This record protects you from misunderstandings during construction and helps anyone who joins the project later. If a substitution is needed, you can compare it against the approved look and decide with full information instead of relying on memory.
Handling undecided materials
Many clients have not chosen everything when they order. That is fine. Tell the studio which choices are open, and ask it to use a neutral placeholder or to show two options. You can then decide with the images in front of you. Avoid guessing a finish just to fill the brief, since a wrong guess that looks good can anchor the decision. Marking open items honestly saves time and money.
How accurate materials can be
A rendering can reproduce a chosen material convincingly, but it remains an illustration. Color depends on screen settings and light, and textures depend on the source images. The result is accurate enough to compare options and approve a direction, and it is not a substitute for a physical sample. See how accurate materials are in a rendering and whether a rendering can match your exact samples for a fuller explanation of what to expect.
What to send the studio
- Drawings, sketches or photos showing where each material goes.
- A list of surfaces with material, color and finish.
- Product links, specification sheets or codes.
- Photos of physical samples in daylight.
- A note on which choices are still open and the deadline.
Budget and timing
Rendimension quotes each project based on the plans and the goal, with an express option subject to the queue. A complete materials list keeps the number of revision rounds small and the schedule predictable.
Revision rounds and how to keep them small
For a project where the materials are still being chosen, settle the big material decisions in the first preview: main surfaces, colors, wood tones, metals and the overall palette. Afterwards, send changes as one consolidated list. Every changed finish needs new lighting checks, so a clear palette from the start finishes faster. See how revision rounds affect timelines.
Timing
Material decisions are one of the biggest causes of delay, because choices arrive late or change after the first preview. Send selections early, answer the studio quickly and leave room for one revision round. See how long a 3D rendering takes and how the number of views affects turnaround. Rendimension offers an express option, subject to the queue, when a date is fixed.
Common mistakes
- Describing colors only in words.
- Sending low quality or poorly lit sample photos.
- Specifying the product line without the exact color.
- Forgetting to mention which surfaces are still undecided.
- Changing many materials after the first preview.
- Treating the rendering as a substitute for a physical sample.
A worked example
A homeowner remodeling a kitchen sends photos of a quartz countertop sample, a link to the cabinet color, a paint code for the walls and a photo of a floor tile. The studio flags the backsplash as undecided and shows two options. After the first preview the homeowner picks one and confirms the countertop in person before ordering.
Guides by file type
- How to send material samples for a rendering
- How to specify materials with manufacturer product links
- How to specify finishes from a finish schedule or spec sheet
- How to use a mood board to specify materials
- How to specify colors with paint codes
- How to send tile and stone selections
- How to specify wood species and stain
- How to specify metal and hardware finishes
Guides by role
- How an architect specifies materials
- How an interior designer specifies finishes
- How a home builder specifies materials
- How a real estate developer specifies finishes
- How a homeowner chooses materials
- How a cabinet or millwork maker specifies finishes
- How a showroom or material supplier shows finishes
Guides by project type
- Materials and finishes for a kitchen rendering
- Materials and finishes for a bathroom rendering
- Materials and finishes for a home exterior rendering
- Materials and finishes for a pool and outdoor space rendering
- Materials and finishes for a restaurant or retail interior
- Materials and finishes for a multi-unit building rendering
Guides by use
- How accurate materials are in a rendering
- How to compare finish options in a rendering
- How to choose materials when you have not decided yet
- Why materials look different in a rendering than in real life
Guides by deliverable
- Whether a rendering can match your exact samples
- What to do when a material is discontinued or unavailable
- How to change materials after the first preview
Avoid the common mistakes
Where to go next
Send the drawings, the material information and your reference photos to the studio, and agree the palette together. For the general overview, see how to specify materials and finishes for a 3D rendering, for expectations about accuracy, see how accurate materials are in a rendering, and for the pitfalls, see common mistakes when specifying materials.
Frequently asked questions
How do I specify materials for a 3D rendering?
List the surfaces and give a matchable source for each: a product link, a sample photo, a color code or a reference image.
Can the studio match my exact samples?
It can reproduce a sample closely from good photos, but the rendering remains an illustration and the real material may differ slightly.
What if I have not chosen materials?
Tell the studio which choices are open and it can use neutral placeholders or show two options.
Do I need to specify every surface?
No. Prioritize the large and visible surfaces and skip minor items.
How should I photograph samples?
In daylight, on a neutral background, with a close up and a wide shot, and labeled with the product name.
Are colors in a rendering exact?
They are accurate illustrations, but screens and light change appearance, so confirm with a physical swatch.
Can I change materials after the first preview?
Yes. Send changes as one consolidated list to keep revisions small.
Is there a faster option?
Rendimension offers an express option, subject to the queue.
Where to go next
Each guide in this series goes deeper on one part of the question. When you are ready, send what you have through our quote request.