Renders in Interior Design Portfolios: A Practical Guide
Renders in Interior Design Portfolios: A Practical Guide
TL;DR:
- D renders are essential for interior design portfolios because they clearly communicate design intent and accelerate client approvals. Using targeted images like hero stills, material studies, and before/after sequences demonstrates process thinking and appeals to clients, developers, and marketing efforts.
Yes, 3D renders belong in every serious interior design portfolio. They communicate design intent more clearly than floor plans, accelerate client approvals, and signal professional credibility to hiring firms and developers. Here is what to include at minimum: at least one photorealistic hero still per project, one material study, and a before/after or process sequence that shows your thinking. When commissioning, provide your plans and a material reference board upfront so the studio can deliver a first draft without a back-and-forth delay.
One note on photography: final on-site photos still matter for completed projects. They confirm real-world execution and add authenticity. Renders carry the portfolio before and during construction; photography closes the story afterward.
Table of Contents
- Why 3D renders matter for your portfolio and client work
- What to include in your portfolio for each project
- Which render type should you use, and when?
- How renders change client and stakeholder conversations
- How to commission renders from a studio
- A Rendimension project in practice
- How to present renders inside a portfolio or pitch
- Common misconceptions about renders worth correcting
- Your 3-step action plan for adding renders to your portfolio
- Key Takeaways
- What most designers get wrong about renders in portfolios
- Rendimension’s portfolio render packages
- FAQ
Why 3D renders matter for your portfolio and client work
The shift from mood boards to photorealistic CGI has changed what clients expect to see before they sign off on anything. Clients who have seen photorealistic interior renders from other firms arrive at meetings with a higher baseline. A mood board and a floor plan no longer close the deal the way they once did.
The practical benefits stack up fast:
- Clearer client understanding: Renders translate spatial relationships, scale, and material combinations into something a non-designer can read instantly.
- Faster approvals: When a client can see exactly what they are getting, decision cycles shorten. Fewer rounds of “can you show me what that would look like?”
- Fewer change orders: Spatial and proportion problems that hide in 2D plans surface in a render before construction begins, which cuts costly late-stage revisions.
- Multi-channel marketing assets: A single high-resolution render can run in a portfolio, a planning submission, a press release, and a social media campaign simultaneously.
- Stronger hireability: Portfolios with photorealistic visualization stand out to developers, hospitality groups, and high-end residential clients who expect that level of presentation.
Photorealistic interior renders are now used as primary marketing assets and can be published before a build is complete, shortening go-to-market time considerably. For developers, that means launching pre-sales campaigns at practical completion rather than waiting months for a professional photoshoot. For designers, it means your portfolio entry is live and working for you while the project is still under construction.
Stakeholder benefits split along clear lines. Clients respond to photorealism because it removes ambiguity. Developers and investors respond to context renders that show massing, adjacencies, and return potential. Marketing teams want high-resolution files they can drop straight into a campaign without reshooting.

What to include in your portfolio for each project
A persuasive portfolio entry does not need a dozen images. It needs the right five or six, sequenced to show how you think.
The core deliverable set per project:
- Hero interior still: One fully lit, photorealistic view of the primary space. This is the image that stops the scroll.
- Supporting context shot: A secondary angle that shows scale, adjacency, or a detail the hero misses (a kitchen island from a different sightline, a bathroom vanity close-up).
- Material study: A flat-lay or close-up render of the key material palette, showing how finishes, textiles, and hardware relate to each other.
- Plan or axonometric view: A clean top-down or 3D axonometric that gives spatial context. This is especially useful for complex floor plans or open-plan layouts.
- Before/after or process sequence: Two to three images showing the space before intervention (or an early concept sketch) alongside the final render. This is the single most effective way to demonstrate design thinking.
- Walkthrough or 360 (where relevant): A 60–90 second walkthrough or a stereoscopic panorama for larger residential, hospitality, or commercial projects where spatial flow is a selling point.
Caption format that actually works: Each image caption should answer three things: what decision this render supported, what constraint it solved, and what the viewer should notice. “Photorealistic kitchen render used to confirm island proportions and stone selection before fabrication” tells a hiring manager far more than “kitchen render.”
Example sequencing for a single portfolio entry:
- Hero still (primary living area, final material palette)
- Secondary angle (dining zone, showing ceiling detail)
- Material study (stone, wood, and textile palette)
- Axonometric plan (open-plan layout with circulation)
- Before/after (early concept sketch alongside final render)
- 60-second walkthrough (embedded or linked)
That sequence takes a viewer from the finished result back through your process, which is exactly what a portfolio reviewer or a prospective client needs to see.
Which render type should you use, and when?
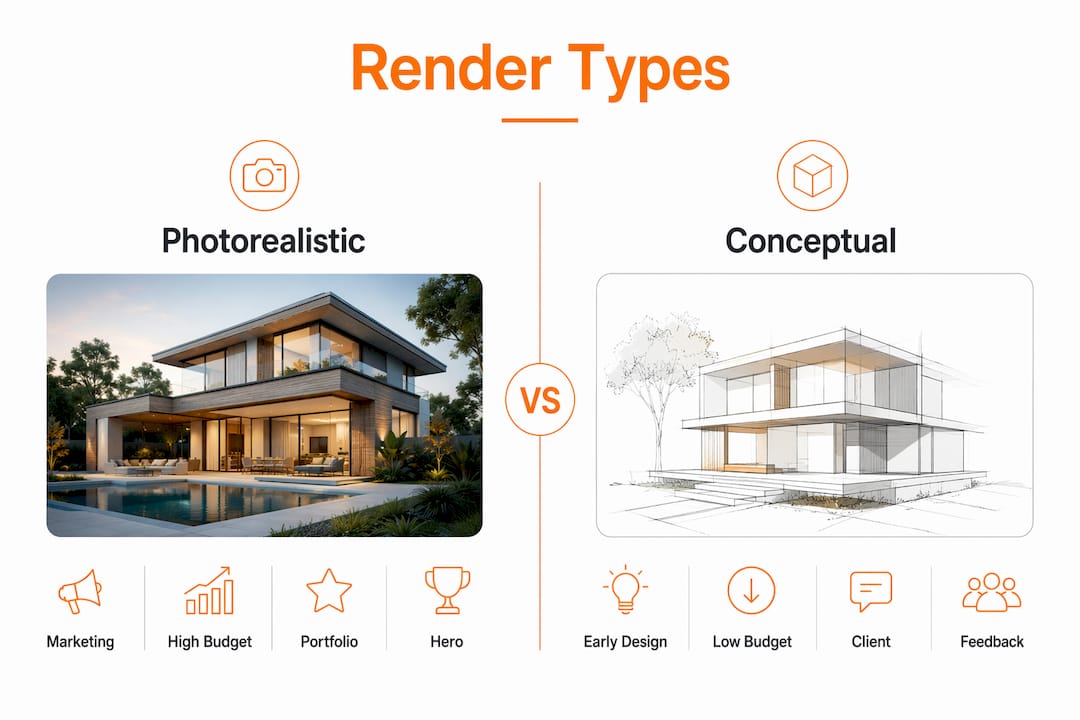
Not every project needs the same deliverable. Choosing the wrong render type wastes budget and can actually underserve the audience you are trying to reach.
Render types at a glance:
- Photorealistic interior stills: Fully lit, high-resolution CGI images. Primary use: marketing, portfolio hero shots, pre-sales campaigns.
- Concept renders: Lower-fidelity, often stylized images used during early design development. Primary use: internal reviews, client ideation sessions, early stakeholder alignment.
- Material studies: Close-up renders focused on surface finishes, textures, and color relationships. Primary use: specification sign-off, procurement decisions, client material selection meetings.
- 3D walkthroughs and animations: Cinematic video sequences that move through a space. Primary use: stakeholder presentations, developer sales suites, portfolio showreels.
- VR/360 panoramas: Immersive handoffs that let stakeholders explore a space independently. Primary use: absent decision-makers, large-group presentations, high-value residential or hospitality projects.
| Render type | Best for | Budget tier | Portfolio value |
|---|---|---|---|
| Photorealistic still | Marketing, portfolio hero | Mid to high | Very high |
| Concept render | Early ideation, internal review | Low | Moderate (process shots) |
| Material study | Specification, procurement | Low to mid | High (shows detail thinking) |
| Walkthrough/animation | Stakeholder presentations, sales | High | High (showreel anchor) |
| VR/360 panorama | Immersive client review, absent approvers | High | High (differentiator) |
If you have one slot in a portfolio entry, use a photorealistic hero still. It communicates the most information in the least time and works across every channel from a printed book to an Instagram grid.
How renders change client and stakeholder conversations
The difference a render makes in a client meeting is not subtle. It changes the questions clients ask, and that changes how fast decisions get made.
Three scenarios where renders shift the dynamic:
-
Initial concept review. Without a render, clients react to floor plans and mood boards with vague concerns they cannot articulate. With a concept render on screen, they point to specific elements: “Can we make that ceiling higher?” or “I want the sofa closer to the window.” Those are answerable questions. The meeting produces decisions instead of open loops.
-
Materials selection meeting. A material study render showing the stone, wood, and textile palette in context closes specification debates that physical samples alone cannot resolve. Clients can see how a warm-toned oak reads against a cool limestone under the project’s actual lighting conditions. That visual confirmation reduces the “let me think about it” delay that pushes timelines out.
-
Stakeholder or planning approver briefing. Architectural visualization translates technical drawings into images that non-technical reviewers understand immediately. Contextual renders answer common approver questions early: sightlines, landscaping integration, circulation. Fewer review cycles means faster permits.
Interaction pattern for each scenario:
- Present the render before explaining it. Let the client react first.
- Note the specific questions or objections that surface.
- Use the render to answer each one directly, pointing to the relevant area of the image.
- Confirm the decision in writing before the meeting ends.
On the question of static versus interactive: static stills work well for initial presentations and printed materials. Interactive presentations that let clients switch materials or lighting in real time convert a passive review into a collaborative decision session, which is particularly effective for high-value projects where multiple stakeholders need to align. VR handoffs go further still, letting absent decision-makers re-enter the project on their own schedule.
How to commission renders from a studio
Getting a render brief right the first time saves a revision round and often a week of turnaround time.
What to provide when you brief a studio:
- Architectural drawings: floor plans, elevations, and reflected ceiling plans at a minimum.
- Material references: product links, finish codes, or physical samples photographed against a neutral background.
- Furniture and fixture specifications: manufacturer names, model numbers, or reference images with dimensions.
- Camera angle preferences: reference photos or annotated plan views showing where you want the “camera” positioned.
- Lighting brief: time of day, natural light direction, and any artificial lighting fixtures to feature.
- Deliverable list: number of stills, resolution (typically 4K for print, 1920×1080 for web), file formats (JPEG, PNG, PSD, EXR), and whether you need a walkthrough or 360.
- Revision rounds: confirm how many are included before you sign off.
Typical studio timelines (North American market):
| Deliverable | First draft | Revision window | Final delivery |
|---|---|---|---|
| Single interior still | 5–7 business days | 2–3 rounds, 2–3 days each | 10–15 business days |
| Full room set (3–5 stills) | 7–10 business days | 2–3 rounds | - |
| 60–90s walkthrough | 10 business days | 1–2 rounds | - |
| VR/360 panorama | 7–10 business days | 1–2 rounds | - |
Ballpark pricing in the North American market: Interior stills typically range from $300–$800 per image for residential projects, with complex commercial or hospitality stills running $800–$2,000 depending on scene complexity and level of detail. Walkthroughs generally start around $1,500–$3,500 for a 60–90 second sequence. VR/360 packages vary widely based on the number of scenes and interactivity level. What drives cost upward: high furniture density, custom millwork, complex lighting rigs, tight turnaround, and a large number of revision rounds.
Key contract questions to ask during a quote meeting:
- Who owns the final files and raw assets? Do you receive the EXR or PSD source files?
- Are you licensed to use the renders for marketing, press, and planning submissions?
- What happens if the brief changes mid-project?
- How are revision rounds defined? Does a “round” mean one set of consolidated feedback or one image at a time?
- What is the milestone structure for payment?
Pro Tip: Consolidate all feedback into a single annotated document before sending a revision request. Studios that receive fragmented feedback across emails and calls almost always take longer and produce less accurate revisions.
A Rendimension project in practice
A mid-sized residential developer in South Florida approached Rendimension with a luxury condominium project: 12 units across three floors, pre-construction, with a sales launch planned before the foundation was poured.
Deliverables produced:
- 6 photorealistic interior stills (living areas, primary suite, kitchen, amenity lounge)
- 2 material study renders (stone and cabinetry palette)
- 1 axonometric site plan showing unit layouts and amenity adjacencies
- 1 ninety-second walkthrough of the primary living and kitchen sequence
What changed when renders were available:
- The developer’s sales team launched a digital campaign and pre-sales brochure at the same time construction permits were filed, rather than waiting for a photoshoot at practical completion.
- The interior designer used the material study renders in a specification meeting with the stone supplier, eliminating two rounds of physical sample revisions.
- The planning submission included contextual renders that answered the approver’s sightline questions in the first review cycle.
How the assets were reused:
- Portfolio entry for the interior designer (hero stills + walkthrough)
- Planning submission (axonometric + contextual stills)
- Pre-sales marketing campaign (hero stills + walkthrough)
- Social media content (cropped stills, walkthrough clips)
- Press release to local real estate media (hero still + project description)
Rendimension’s deliverables gave us a complete marketing and approval package from a single brief. The walkthrough alone shortened our investor presentation from forty minutes to fifteen.
That reuse pattern is the real return on a rendering investment. One well-briefed project produces assets that work across five or six channels simultaneously, which is why construction visualization examples consistently show renders appearing in planning, marketing, and portfolio contexts from the same shoot.
How to present renders inside a portfolio or pitch
A render is only as persuasive as the context around it. Layout, sequencing, and captions do as much work as the image quality itself.

Portfolio spread layout:
Lead with the hero still at full bleed or near-full bleed. Follow with one or two supporting images at half-width, then the material study and process shots at smaller scale. The eye moves from the aspirational image to the detail, then to the evidence of thinking. Never open a project spread with a floor plan or a sketch. Those belong in the middle or at the end, as proof of process.
Export specs:
- Web portfolio: JPEG at 72–96 dpi, sRGB color space, longest edge 2000–2500px. Keep individual files under 500KB for load performance.
- Print portfolio or PDF: TIFF or high-quality JPEG at 300 dpi, Adobe RGB or CMYK depending on your print vendor.
- Presentation decks: PNG at 150–200 dpi, sRGB, sized to the slide dimensions (typically 1920×1080px for 16:9).
Sequencing for design evolution: Start with the finished result, then work backward to show your process. Clients and hiring managers want to see the outcome first; they read the process as evidence of competence, not as the main event. A before/after pairing placed third or fourth in a sequence lands harder than one placed first.
Mixing renders with sketches and photography: Hand sketches placed alongside a final render show the distance traveled from concept to delivery. A site photograph paired with a render of the proposed intervention makes the design decision legible to anyone. The combination signals that you can think and execute, not just produce beautiful images.
Pro Tip: Write captions that name the decision, not the room. “Render used to confirm ceiling height and pendant scale before ordering” is more persuasive than “Living room render.” Decision-focused captions tell a reviewer exactly how you used the visualization as a working tool.
Common misconceptions about renders worth correcting
Renders are powerful, but they are not magic. A few persistent myths lead designers to misuse them or set client expectations that the finished space cannot meet.
Myths to stop repeating:
- “Photoreal equals perfect.” A photorealistic render shows the design as modeled, not as built. Material batches vary, lighting conditions change, and construction tolerances introduce differences. Renders set a direction, not a guarantee.
- “Renders replace photography.” They do not. Final photography of a completed space captures real texture, real light, and real atmosphere in ways CGI cannot fully replicate. Renders carry the project before completion; photography closes it.
- “Renders eliminate the need for physical samples.” A material study render narrows the field and confirms palette relationships, but physical samples remain necessary for tactile sign-off, especially for textiles, stone, and painted finishes where color accuracy on screen varies by monitor calibration.
- “High fidelity is always better.” Early in a project, a concept render at lower fidelity is often more useful than a photoreal image. It keeps the conversation at the right level of abstraction. A fully polished render in week two of a design process can lock clients into details they should still be questioning.
When to use concept renders instead of photoreal: If the project is in schematic design, the client is still choosing between two layout options, or the budget does not support full photoreal production, a concept render at mid-fidelity communicates spatial intent without implying finality. Reserve photoreal for the marketing and approval stages.
The over-polishing trap: A render that looks better than the finished space will ever look creates a credibility problem at handover. Keep lighting, material accuracy, and styling honest. A slightly conservative render that the real space exceeds is a far better outcome than one the space cannot live up to.
Your 3-step action plan for adding renders to your portfolio
The gap between knowing renders matter and actually having them in your portfolio is usually just a lack of a starting point.
-
Prioritize two or three existing projects that have strong design stories but weak visual documentation. These are your first render candidates. Look for projects where the design decision was complex, the space is photogenic, or the client outcome was measurable.
-
Decide which render types each project needs. A residential living room needs a hero still and a material study at minimum. A hospitality project benefits from a walkthrough. A complex open-plan commercial space warrants an axonometric. Match the deliverable to the story you need to tell.
-
Commission a studio with a complete brief. Gather your plans, elevations, material references, and camera angle notes before you make the first call. A complete brief produces a faster first draft and fewer revision rounds. For most portfolio entries, a package of three hero stills plus one material study covers both portfolio and marketing needs.
Integrate one before/after sequence and at least one hand sketch or site photo per project to show the full arc from concept to delivery. Then request a quote from Rendimension with your project files and a deliverable list, and you will have a timeline and pricing within 24–48 hours.
Key Takeaways
3D renders are now a baseline expectation in professional interior design portfolios, and the designers who use them strategically win faster approvals, stronger client relationships, and better marketing assets from a single investment.
| Point | Details |
|---|---|
| Renders are portfolio essentials | Photorealistic stills, material studies, and before/after sequences are the minimum per project entry. |
| Multi-use assets justify the cost | One render set can cover portfolio, planning submission, marketing, and press simultaneously. |
| Brief the studio completely upfront | Providing plans, material references, and camera angles on day one cuts revision rounds and turnaround time. |
| Match render type to decision stage | Use concept renders for early ideation and photoreal stills for marketing and approval stages. |
| Rendimension delivers full packages | Rendimension produces interior stills, walkthroughs, VR tours, and material studies as reusable asset sets for portfolio and marketing use. |
What most designers get wrong about renders in portfolios
The conventional wisdom says: add renders to look more professional. That framing misses the point entirely.
Renders are decision-making tools that happen to double as marketing assets. The designers who get the most out of them treat every render as a working document first and a portfolio image second. They use concept renders to stress-test spatial ideas before a client meeting, not to impress after the fact. They commission material studies to resolve specification debates, not to decorate a PDF. And they sequence their portfolio entries to show that process, because a hiring manager or a prospective client who can follow your thinking from sketch to final render trusts you more than one who sees only polished outcomes.
The other thing most guides skip: renders are most valuable when they are slightly conservative. A render that the finished space exceeds builds credibility. One that the space cannot match creates a problem at handover that no amount of beautiful CGI can fix. Rendimension’s approach to photorealistic interior rendering is grounded in that principle: accuracy and fidelity to the actual design, not a stylized version of it.
Rendimension’s portfolio render packages
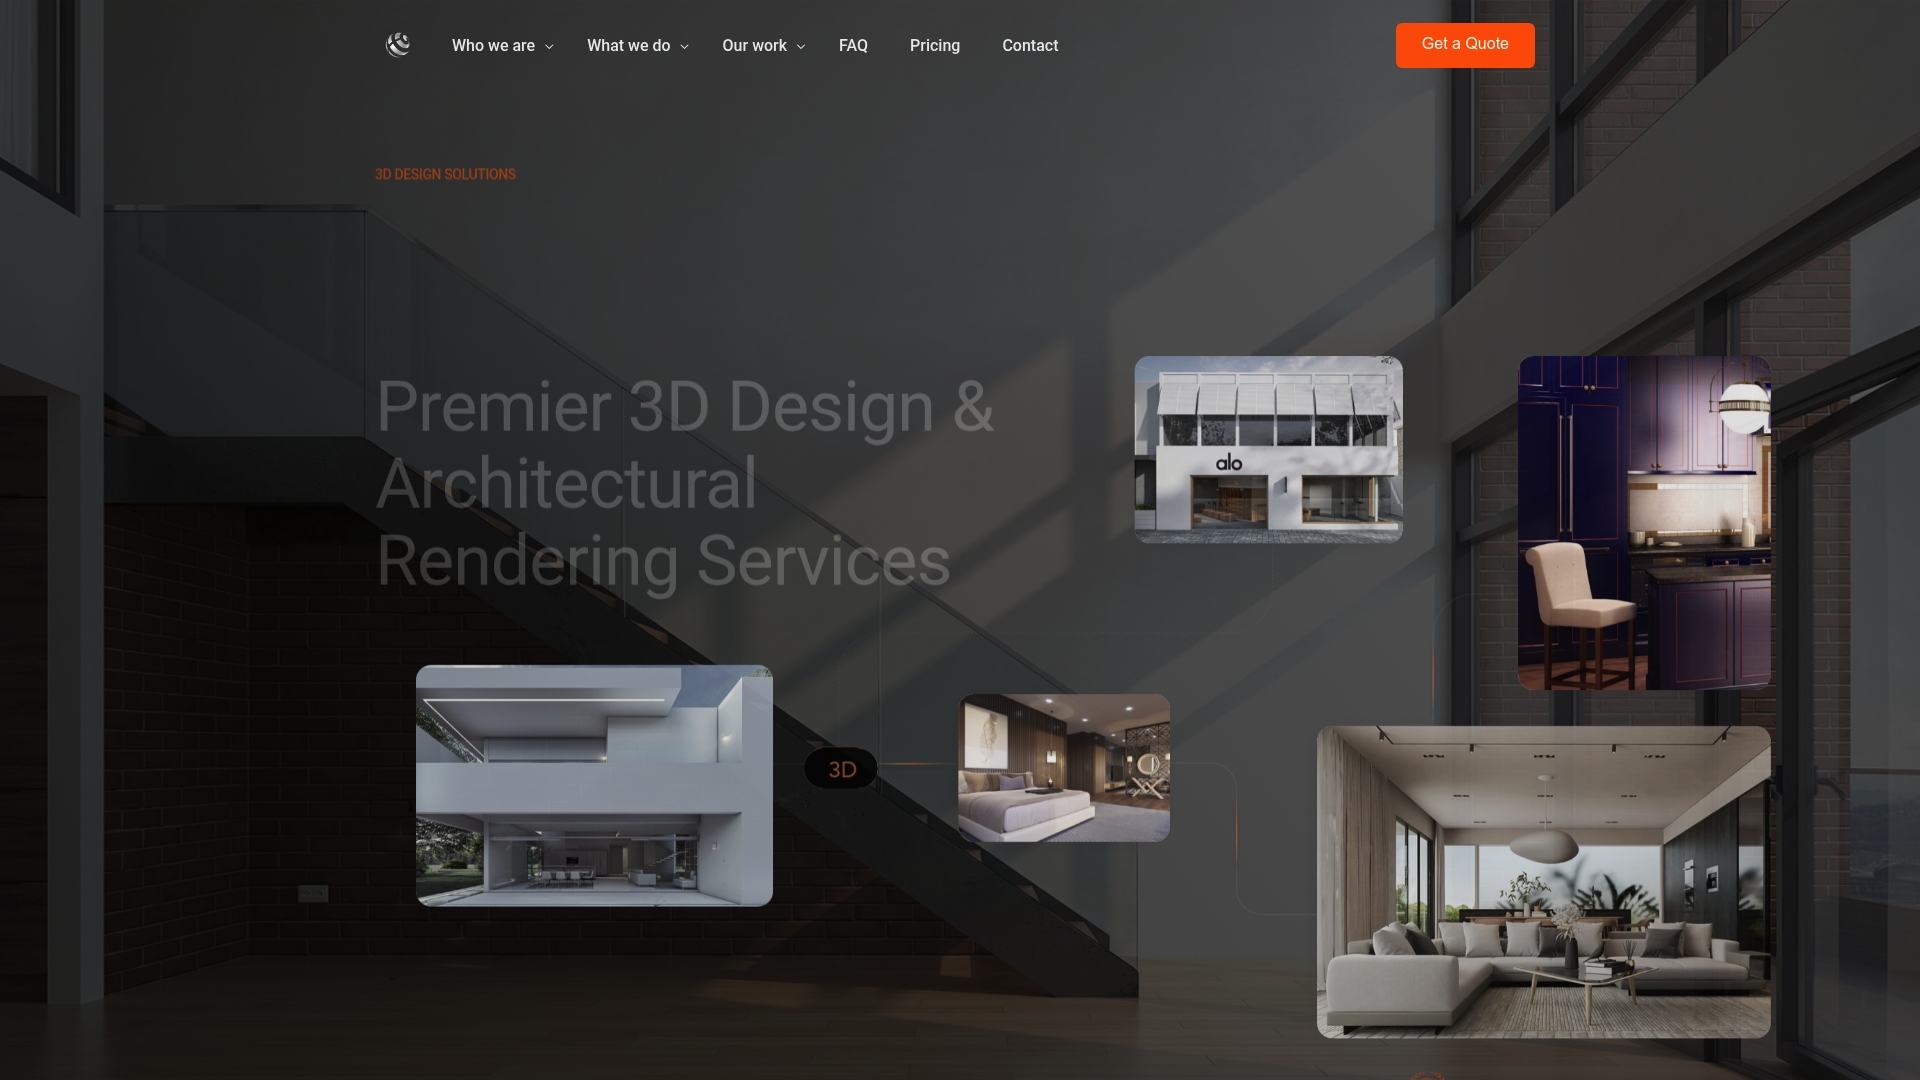
Rendimension produces the full asset set interior designers need to build a portfolio that works before, during, and after construction. The practical starting point for most portfolio projects is three photorealistic interior stills, one 60–90 second 3D walkthrough, and two material studies. That combination covers your portfolio hero shots, your client presentation, and your marketing campaign from a single brief.
For larger residential or commercial projects, Rendimension adds VR/360 panoramas and axonometric site plans to the package. Every deliverable is produced in high-resolution formats suitable for print, web, and planning submissions, with file rights for marketing use included. Typical turnaround for a three-still package runs 10–15 business days with two revision rounds. Get a quote with your project files and a deliverable list, and Rendimension will return a scoped proposal within 24–48 hours.
FAQ
Do renders really help interior designers get hired?
Yes. Portfolios with photorealistic visualization consistently stand out to developers, hospitality groups, and high-end residential clients who expect that level of presentation as a baseline.
How many renders should one portfolio project include?
Five to six images covers most projects well: one hero still, one supporting angle, one material study, one plan or axonometric view, and a before/after or process sequence. Add a walkthrough for larger or more complex spaces.
What files should I send a rendering studio to get started?
Provide floor plans, elevations, reflected ceiling plans, material references with finish codes or product links, furniture specifications, and annotated camera angle preferences. A complete brief on day one produces a faster first draft.
When should I use a walkthrough instead of stills?
Use a 3D walkthrough when spatial flow, sequence, or scale is central to the design story, or when you need to present to a group of stakeholders who cannot all attend a live meeting. For single-room portfolio entries, stills are usually sufficient.
Can renders replace final photography of a completed project?
No. Renders carry the project before and during construction. Final photography of the completed space captures real texture, real light, and real atmosphere that CGI cannot fully replicate, and it confirms that the design was executed as intended.
Recommended
- Rendering styles for interiors: Enhance designs effectively
- 3D Rendering for Interior Designers | Rendimension
- Expert Guide To Render Interior Design In 2026
Frequently asked questions
Do renders really help interior designers get hired?
Yes. Portfolios with photorealistic visualization consistently stand out to developers, hospitality groups, and high-end residential clients who expect that level of presentation as a baseline.
How many renders should one portfolio project include?
Five to six images covers most projects well: one hero still, one supporting angle, one material study, one plan or axonometric view, and a before/after or process sequence. Add a walkthrough for larger or more complex spaces.
What files should I send a rendering studio to get started?
Provide floor plans, elevations, reflected ceiling plans, material references with finish codes or product links, furniture specifications, and annotated camera angle preferences. A complete brief on day one produces a faster first draft.
When should I use a walkthrough instead of stills?
Use a 3D walkthrough when spatial flow, sequence, or scale is central to the design story, or when you need to present to a group of stakeholders who cannot all attend a live meeting. For single-room portfolio entries, stills are usually sufficient.
Can renders replace final photography of a completed project?
No. Renders carry the project before and during construction. Final photography of the completed space captures real texture, real light, and real atmosphere that CGI cannot fully replicate, and it confirms that the design was executed as intended.