3D Rendering of a Whole Home Renovation to Win Client Approval
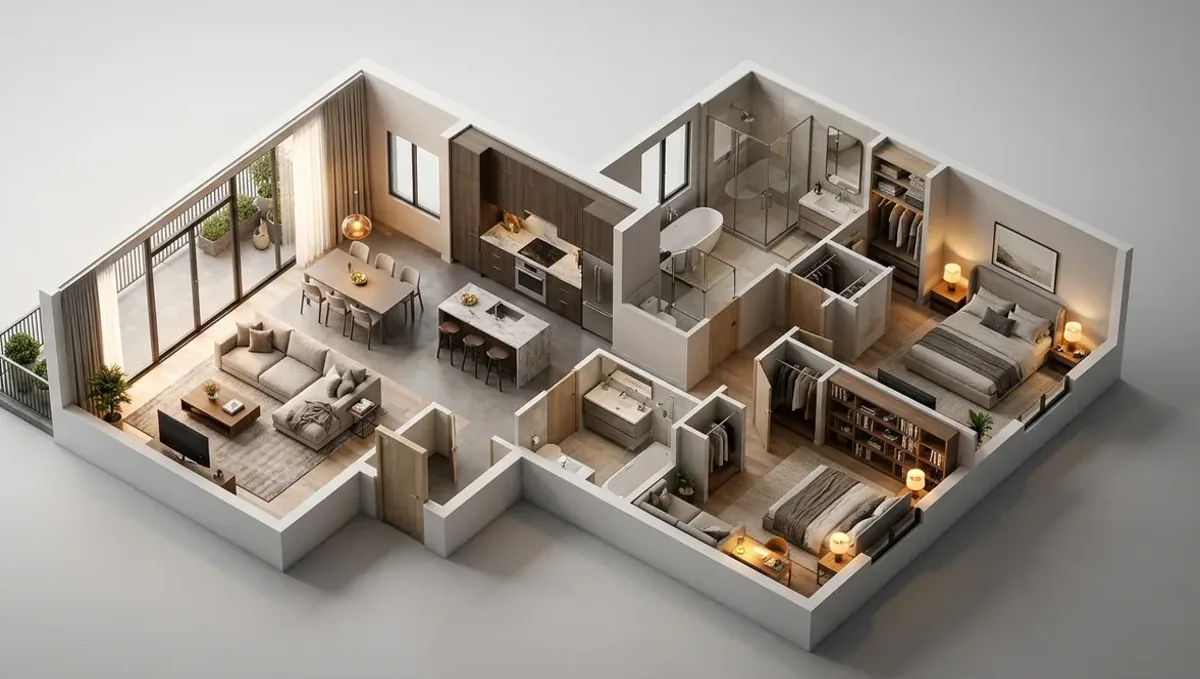
Quick answer: A 3D rendering of a whole home renovation helps a client understand flow, materials and phasing across the house before construction begins.
Why whole home renovations need visual approval
A whole home renovation touches every room, costs a great deal and lasts for months. Clients must decide on layout, finishes, systems and phasing while imagining a house that does not yet exist. It is easy for small misunderstandings to multiply across rooms. A 3D rendering gives the client a clear picture of the whole plan. This guide belongs to using a 3D rendering to convince a client to approve a design and focuses on whole home projects.
What clients need to see
- The overall flow between rooms.
- Key spaces such as kitchen, living areas and primary suite.
- Consistent materials and colors through the house.
- Exterior changes that affect the look from the street.
- How natural light enters new and existing rooms.
- What is preserved and what is replaced.
Choose the views that matter
A whole home has too many rooms to render every one. Choose the views that carry the decisions: main living space, kitchen, primary suite, a key bathroom and the exterior. Each view should answer a question the client has. Fewer, better images are more persuasive than a large set that overwhelms. Additional views can follow once the main direction is approved.
Show flow, not only rooms
Clients often worry about how spaces connect. Provide a plan with numbered camera positions and views that show transitions, such as the entry to the living room or the kitchen opening to the dining area. Seeing sight lines helps them judge whether walls to be removed will make the home feel open or exposed. Flow is a common source of regret when it is not visible before construction.
Consistent design language
Whole home projects fail visually when rooms feel unrelated. Show a coherent set of materials, colors and details that repeat across rooms. A concept board beside the renderings makes the connections clear. Explain where the design changes deliberately, such as a bolder bathroom, and where it stays calm. Clients approve more easily when they perceive a single, understood direction.
Existing structure and hidden conditions
Older homes hide surprises: uneven floors, old wiring, structural limits. Be honest that a rendering shows the intended design and that hidden conditions may change the plan. Include an allowance discussion in the contract. Explaining uncertainty early builds trust and prevents the client from feeling deceived if a wall cannot be moved as drawn.
Phasing the work
Some clients cannot leave home for months, so work may be phased. Show what each phase delivers and how the house will look and function in between. A phasing plan with images helps the client plan life during construction and helps the contractor sequence trades. Clients accept a phased plan more readily when they see the end result and the path to it.
Budget and priorities
Whole home budgets stretch quickly. Rank rooms and features by importance, and show options such as a full renovation of some rooms and a lighter refresh of others. Provide contractor estimates for each. A client who sees the trade offs can choose priorities calmly. Avoid promising that the rendering budget equals the construction budget or that costs will not change.
Exterior and street presence
Exterior changes influence how neighbors and the client see the home. Show the facade, entry, roofline and landscaping changes. Check local rules and any association guidelines before promising a look. A street view rendering helps the client approve exterior work with confidence and helps identify approvals required before construction begins.
Bathrooms and wet areas
Bathrooms combine tile, fixtures, waterproofing and ventilation, so small choices carry big consequences. Show the layout, glass, niches and vanity at realistic sizes and confirm the tile pattern with samples. Discuss which fixtures are fixed by existing plumbing. A clear view of the bathroom before demolition helps the client decide calmly and helps the contractor avoid costly rework behind finished walls.
Storage and everyday life
Whole home plans often improve looks and forget daily routines: coats, shoes, laundry, deliveries. Ask the client to describe a normal day and check the design against it. Show closets, a mudroom or a laundry area if they matter. Clients approve with more confidence when the plan clearly supports how they actually live, rather than only how the house will photograph.
Change orders and the approved image
Changes will happen in a long project. Agree on a simple process: describe the change, show its effect on the image if visual, state the cost and time impact and get written approval. Comparing every change with the approved rendering keeps the project coherent and stops small decisions from drifting the design away from what the client originally chose.
Living in the house during construction
Many families stay in the house while work proceeds. Discuss which rooms will be usable and for how long, and where dust and noise will be worst. A schedule with approximate ranges, prepared with the contractor, reduces anxiety. Do not promise exact dates because inspections, deliveries and weather can shift them. Honest planning keeps the relationship stable during a long project.
Systems that do not appear in the image
Heating, cooling, wiring, plumbing and insulation consume a large share of a whole home budget but do not appear in a rendering. Explain them to the client with a simple list. Clients who understand that the invisible work matters are less likely to question the price, and more likely to appreciate the quality of the finished house.
Color and material consistency
Rooms viewed from one another must agree. Provide a palette page with the main materials and repeat them across views. Check that the flooring runs consistently through open areas. Changes in tone at doorways or between views can look accidental. A palette also helps the client and the team make later selections that fit the approved direction.
Permits and approvals
Whole home renovations typically require permits and inspections. Explain that renderings are not submission drawings and that approvals may affect the design. Ask a qualified professional about local requirements. Setting these expectations early keeps the client from assuming that an approved image means an approved permit, which is a common and costly misunderstanding.
Future flexibility
Clients change their lives: children grow, family members age, work moves home. Discuss flexibility in the design, such as a room that can serve as an office now and a bedroom later. Show the alternative use in a second view if it matters. Thinking ahead adds value and helps the client feel the investment is durable.
Recording the whole project
Keep the approved images, selections and change orders in one shared folder organized by room. When questions arise months later, the record shows what was agreed. It also becomes a useful reference for maintenance and future work, and it helps the client trust the contractor who keeps the project organized.
Decision milestones
Break the approval into milestones: layout, exterior, kitchen and baths, finishes and fixtures. Ask for a decision at each step and document it. This prevents endless revisiting of settled items and gives the client a sense of progress. When a decision is made, mark it in the plan and the image set so the whole team works from the same information.
Involving the household
Every family member lives in the home. Share the images with them and record needs such as bedrooms, workspaces and accessibility. Conflicts are easier to solve before walls are built. When each person sees their space in the rendering, they take ownership of the project, which reduces later complaints and speeds the approval process.
After approval
When the client approves, record the selections and attach the images to the contract as illustrations, and confirm that the written scope governs. Have an attorney review contract wording. Share the images with trades. During construction, compare progress photographs with the images and discuss any deviation immediately. Consistent communication is the best protection against surprises in a long project.
What to send the studio
- Plans, measurements and photographs of every affected room.
- The list of priority views and camera positions.
- Material and finish selections or references.
- Exterior information and any regulatory constraints.
- The phasing plan, if any, and the presentation date.
Budget and timing
Start with the key views and expand after the main direction is approved. Rendimension quotes each project based on the plans and the goal, with an express option subject to the queue.
Revision rounds and how to keep them small
For a whole home renovation rendering, settle the big decisions in the first preview: massing, materials, colors, landscaping and camera. Afterwards, send changes as one consolidated list. A persuasion image is also a commitment to the client, so each correction should keep the image consistent with the drawings and the material list. See how revision rounds affect timelines.
Timing
Client decisions are usually tied to a meeting, a budget deadline, a contractor slot or a construction start. Count backward from that date, leave room for one revision round and answer the studio quickly. See how long a 3D rendering takes. Rendimension offers an express option, subject to the queue, when a meeting date is fixed.
Common mistakes
- Trying to render every room at once.
- Failing to show flow between spaces.
- Presenting rooms with unrelated materials.
- Ignoring hidden conditions in older homes.
- Approving everything in one meeting.
- Attaching the images to the contract without stating that the written scope governs.
A worked example
A contractor proposes a whole home renovation of a 1960s house. The studio prepares five key views: living area, kitchen, primary suite, a bath and the exterior. Camera positions are marked on a plan. The client approves the layout first, then finishes in a second meeting, and the contractor attaches the images to the contract as illustrations with the written scope governing.
Where to go next
Send the drawings or sketch, the material list, the site photos and your decision goals to the studio. For the general overview, see using a 3D rendering to convince a client to approve a design, and for the pitfalls to avoid, see common mistakes using a rendering to convince a client.
Frequently asked questions
Do I need a rendering of every room?
No. Choose the views that carry the main decisions.
How do I show flow between rooms?
Mark camera positions on a plan and render transitions.
What about hidden conditions?
Explain that they may change the plan and include an allowance.
Can I phase the work?
Yes. Show what each phase delivers.
Should the exterior be included?
Yes, and check local rules first.
Are images part of the contract?
As illustrations, with the written scope governing.
Does it replace construction drawings?
No.
Is there a faster option?
Rendimension offers an express option, subject to the queue.
Related guides
This guide is part of our series on 3D renderings to convince a client to approve a design. Start with the overview, using a 3D rendering to convince a client to approve a design. Related: a backyard and pool rendering to win approval, a restaurant or cafe interior rendering to win approval, an office fit-out rendering to win approval. When you are ready, send what you have through our quote request.