3D Rendering for a Property Manager Convincing an Owner
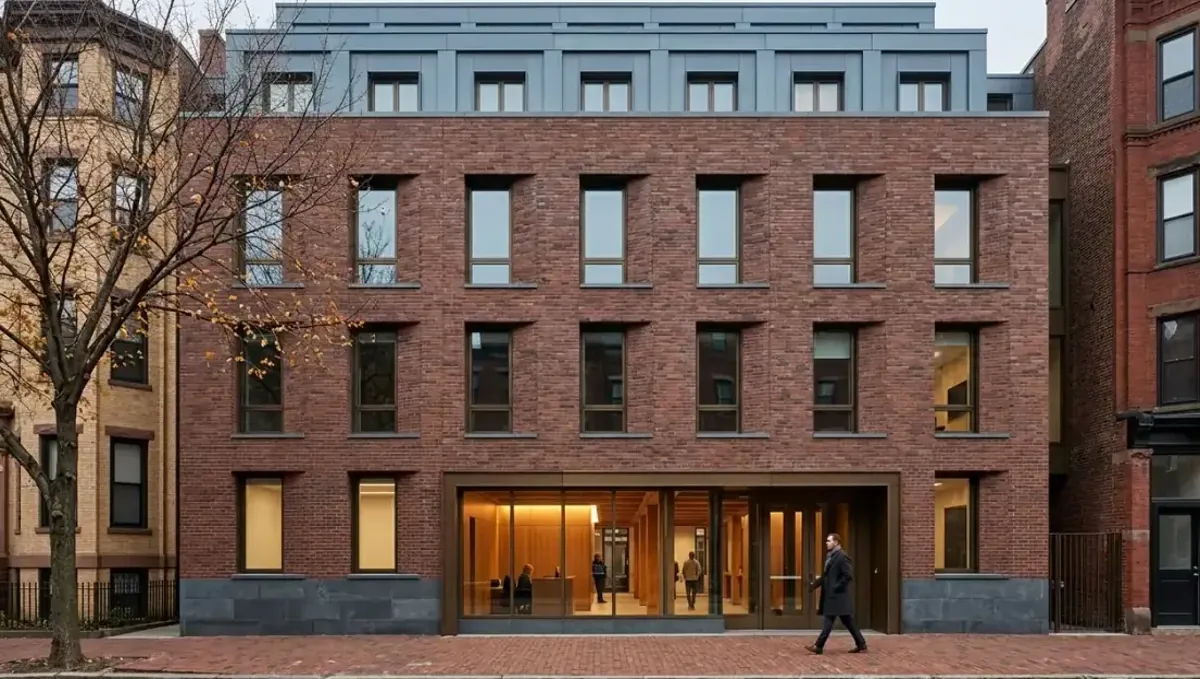
Quick answer: A 3D rendering helps a property manager convince an owner by showing what an improvement changes, and by tying each image to scope, cost and phases.
The property manager problem: asking an owner to spend
A property manager often recommends improvements to an owner who is not on site and who watches costs closely. The owner wants to know what the money will change and whether it is worth it. A 3D rendering helps the manager explain the proposal clearly. This guide belongs to using a 3D rendering to convince a client to approve a design and looks at the question from the manager side.
Why owners hesitate
Owners worry about cost, return, tenant reaction and disruption. They may live far away and rely on the manager for judgment. They have seen proposals that did not deliver. A rendering shows the plan, and a clear explanation of the scope, cost and benefits builds credibility with an owner who has reason for caution.
What a rendering adds to an owner proposal
- It shows the scope in a way that is easy to forward.
- It lets the owner see the visual effect of the spending.
- It supports discussion with lenders, partners or a board.
- It shows options at different budget levels.
- It helps tenants or residents understand upcoming changes.
- It reduces the risk of misunderstanding about finishes.
Which improvements benefit from renderings
Lobbies, common areas, amenities, facades, units being repositioned and exterior spaces benefit most. Small repairs do not. Use renderings when the change is visible, the cost is significant and the owner cannot visit easily. The image gives the owner a reliable view of what will happen at the property.
Before and after for existing conditions
Photograph the current condition and show the proposed condition from the same viewpoint. A comparison helps the owner see the need for the work and the change it makes. Keep the before photographs honest and dated. They also document the condition of the property before work begins, which is useful for records and for planning.
Linking images to the budget
Present each image with its cost from your bids. Group items into phases if the owner wants to spread spending. Avoid claiming rent increases or returns unless you have real data and appropriate qualifications. The rendering supports the proposal, and the financial analysis comes from your own numbers and professional judgment.
Options and phases
Offer a base and an enhanced option, or split the work into phases. Show each with the same camera. Owners appreciate control over spending and timing. Explain what each phase delivers and how it affects occupants. A phased plan often gets approved sooner than a single large request because the commitment feels manageable.
Tenants, residents and communication
Improvements affect people who live or work in the property. Use images to inform them about what is coming and when. Clear communication reduces complaints and rumors. Be careful to avoid promising dates or outcomes that you cannot control. A short notice with an image and a schedule range is enough.
Approvals and regulations
Some works require permits, association approvals or lender consent. State this in the proposal. The rendering is an illustration and not a submission drawing. If approvals are pending, say so. Clear expectations protect the manager credibility and prevent the owner from believing the work is already authorized.
Timing proposals with the budget cycle
Owners usually approve capital spending at particular moments, such as annual budgets or refinancing discussions. Prepare the images and the summary before that moment, not after it. A proposal that arrives when the owner is already deciding how to spend money has a better chance than one that lands in a quiet period and gets postponed indefinitely.
Documenting condition before work starts
Photograph the areas in detail before construction and store the files with dates. If a dispute arises about damage or existing defects, these records protect the owner, the manager and the contractor. The same photographs can serve as the base for the rendering, which keeps the before and after comparison honest and the proposal consistent with the actual site.
Choosing durable finishes for high traffic areas
Common areas suffer heavy wear. Show finishes that suit the traffic, and explain the choice in the proposal, such as scratch resistant flooring in a lobby. Owners respond well when the manager links appearance to maintenance cost. Ask contractors and suppliers for care instructions and confirm that the finishes in the image are the ones actually included in the bids.
Handling a first no from the owner
A refusal is not always final. Ask what concern lies behind it: cost, timing, risk or doubt about the result. Then adjust one element, such as a smaller scope, a later phase or a different finish, and show the revised image. Owners often say yes to a second version that responds directly to the objection they raised.
Multi property portfolios
Managers who handle several properties can create a standard set of image types: lobby, corridor, amenity, exterior. Consistent images make it easier for owners to compare proposals across buildings. They also save time for the manager and establish a recognizable format that owners learn to read quickly, which shortens the decision process.
Sustainability and operating costs
Some upgrades, such as lighting or windows, reduce operating cost. A rendering shows the look but not the savings. Combine it with figures from qualified professionals, and avoid promises that depend on usage or utility prices. Owners value proposals that separate visual improvement from measured performance, since each has its own evidence and risk.
Resident experience
Show how the space will be used by residents or tenants: seating, lighting, wayfinding. A design that improves daily experience is easier to justify. Include accessible routes and safety features where relevant. Honest attention to use, not only appearance, shows the owner that the manager considers the property as a place where people live and work.
Presenting to an owner committee
Some properties are governed by boards or ownership groups. Prepare a short set of images with a one page summary and options. Send it in advance and bring printed copies. Ask members to mark preferences. Committees decide better when they can compare pages and when the manager clarifies costs and phases rather than defending one solution.
Handling objections
Owners may object that the current condition is good enough. Respond with facts: condition reports, tenant feedback and comparable properties, if you have reliable sources. Use the rendering to show the difference. If the owner still declines, record the recommendation and move on. A respectful record protects the manager if problems appear later.
Keeping the relationship long term
Approved images and completed photos become part of the property history. Keep them organized by area and date. When the next proposal comes, the owner already knows the format and the manager track record. That continuity is valuable, and it starts with a first proposal that was clear and honest.
Working with contractors and vendors
Share the rendering with contractors so bids are based on the same scope. Different bidders often interpret words differently. A common image reduces variation and makes the bids easier to compare. It also helps avoid change orders that appear because a vendor assumed something different from what the owner approved.
Reporting to the owner
After approval, send progress updates with photographs from the same viewpoints as the renderings. Owners appreciate clear reports. At completion, compare the final photograph with the approved image. This closes the loop and builds trust for future proposals, which is valuable for a manager who wants a long relationship.
What to send the studio
- Photographs and measurements of the property area.
- The proposed scope and finishes.
- The options or phases to be shown.
- The audience and the decision date.
- Any brand or design standards.
Budget and timing
Plan the images ahead of the owner meeting or budget cycle. Rendimension quotes each project based on the plans and the goal, with an express option subject to the queue.
Revision rounds and how to keep them small
For a property manager proposal to an owner, settle the big decisions in the first preview: massing, materials, colors, landscaping and camera. Afterwards, send changes as one consolidated list. A persuasion image is also a commitment to the client, so each correction should keep the image consistent with the drawings and the material list. See how revision rounds affect timelines.
Timing
Client decisions are usually tied to a meeting, a budget deadline, a contractor slot or a construction start. Count backward from that date, leave room for one revision round and answer the studio quickly. See how long a 3D rendering takes. Rendimension offers an express option, subject to the queue, when a meeting date is fixed.
Common mistakes
- Claiming returns or rent increases without data.
- Showing finishes that the bids do not include.
- Ignoring approvals from associations or lenders.
- Promising dates the contractors have not confirmed.
- Presenting one large option with no phases.
- Failing to report progress against the approved image.
A worked example
A property manager proposes a lobby refresh to an owner abroad. The proposal includes a before photo, a rendering from the same viewpoint, a base and an enhanced option and a two phase plan tied to contractor bids. The owner approves the base option and phase one, and the manager sends monthly photos matching the rendering viewpoint.
Where to go next
Send the drawings or sketch, the material list, the site photos and your decision goals to the studio. For the general overview, see using a 3D rendering to convince a client to approve a design, and for the pitfalls to avoid, see common mistakes using a rendering to convince a client.
Frequently asked questions
Why do property managers use renderings?
To help owners see what improvements will change and to make proposals easy to forward.
Which projects need them?
Lobbies, common areas, amenities, facades and repositioned units.
Can I claim rent increases?
Only with real data and proper qualifications.
Should I show options or phases?
Yes, they make approval easier.
Do I need approvals?
Where required, such as permits or association consent.
How do I report progress?
With photos from the same viewpoints as the renderings.
Will it guarantee approval?
No. It helps the owner understand the proposal.
Is there a faster option?
Rendimension offers an express option, subject to the queue.
Related guides
This guide is part of our series on 3D renderings to convince a client to approve a design. Start with the overview, using a 3D rendering to convince a client to approve a design. Related: rendering for a consultant convincing a committee, rendering for an interior designer convincing a client, rendering for an architect convincing a client. When you are ready, send what you have through our quote request.