Avoid Full Rerenders: Motion Blur Rendering for Studios
Avoid Full Rerenders: Motion Blur Rendering for Studios
Use your renderer’s true 3D motion blur for hero elements, foreground vehicles, and anything the camera lingers on, and reserve fast vector or velocity blur for background motion and look-dev iterations. Before touching either, check three settings: shutter angle, whether you need deformation or just transform blur, and whether you’re exporting a motion vector AOV. Get those three right and everything downstream, noise, memory, render time, falls into place.
TL;DR:
- Use true 3D motion blur for hero elements like foreground vehicles and product shots, while reserving vector or velocity blur for background or faster iterations.
- Start deformation blur with 2 to 3 steps for vertex-driven objects and increase only if visible banding or sharp curvature changes occur.
- Set the shutter angle between 90° and 180° for most product and architectural shots, and up to 360° for highly dynamic scenes to achieve realistic streaks.
- Export velocity AOVs during the final geometry cache pass so that color adjustments in compositing can change blur intensity without re-rendering.
- Focus on shot planning before rendering by verifying scale, polishing animation curves, and using dedicated passes, rather than relying solely on sample count adjustments.
Table of Contents
- What Are the Types of Motion Blur in Rendering?
- How Do Transform and Deformation Blur Differ in Renderers?
- What Shutter Angle Should You Use for Realistic Motion Blur?
- How Do You Manage Noise and Render Time With Motion Blur?
- What’s the Motion Blur Checklist Before Final Render?
- How Rendimension Applies Motion Blur in Client Projects
- The Honest Take on Motion Blur Workflows
- Get a Motion Blur–Ready Render Quote From Rendimension
- Sources
- FAQ
What Are the Types of Motion Blur in Rendering?
Post-process (vector) blur calculates a 2D velocity vector per pixel after the frame renders, then smears the color buffer along that vector. It’s fast, cheap on samples, and great for quick look-dev passes, but it breaks down on transparency, overlapping edges, and anything with real parallax, because it has no depth information about what’s actually behind what. Blender’s Eevee engine leans on this approach combined with accumulation steps precisely because it is built for real-time speed, not physical accuracy.
True 3D motion blur, by contrast, samples actual geometry across the shutter interval, tracking camera, object, and vertex motion directly during rendering. It knows what’s in front of what, so occlusion and transparency stay correct even when a glass railing slides past a moving car.
The rule of thumb that holds up across nearly every production:
- Use true 3D blur on hero elements: the car in the foreground, the elevator door closing on camera, a rotating product shot.
- Use vector/post blur for background traffic, distant crowds, or anything you’re iterating on quickly during look-dev.
- Combine both in the same frame when budget allows. It’s standard practice, not a compromise.
How Do Transform and Deformation Blur Differ in Renderers?
Transform blur, sometimes called rigid blur, only tracks an object’s position, rotation, and scale across the shutter window. It’s cheap because the renderer just interpolates a matrix. Deformation blur tracks individual vertex positions, which is what you need for anything that changes shape while moving, cloth, a flag, a person walking, water. It costs far more memory and render time because the engine has to store and interpolate geometry samples rather than a single transform.
Redshift’s documentation recommends starting deformation blur at 2 to 3 motion steps for typical scenes, and only pushing higher when you see banding or the deforming geometry has sharp curvature changes. Most renderers cap transform-based motion at up to 31 steps for smooth curved camera paths, but you rarely need anywhere near that for deformation work.
- Start with 2 to 3 deformation steps on any vertex-animated object.
- Watch for visible stepping or banding in fast curved motion before adding more steps.
- Reserve higher step counts for hero close-ups only, not the whole scene.
On the data side, decide early whether you need a velocity channel baked into your geometry cache or whether per-frame samples are enough. Alembic supports exporting velocity attributes directly, which lets compositors reconstruct motion blur without re-rendering, useful when a client wants a slightly different blur amount after the fact.
Pro Tip: If you’re handing off Alembic caches to a compositor, export velocity once during your final geometry cache pass. It saves a full re-render if the edit changes pacing later.
What Shutter Angle Should You Use for Realistic Motion Blur?
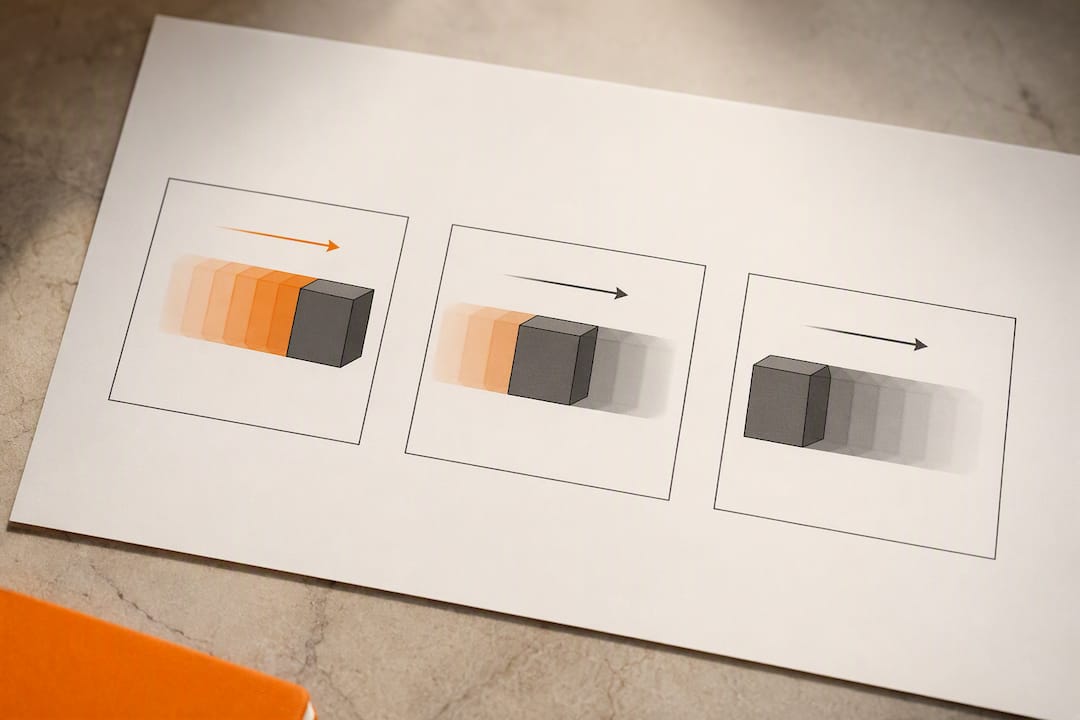
Shutter angle sets how long the virtual shutter stays open relative to one frame’s duration, and it’s the single biggest lever on how much streak you see. At 24 fps, a 180° shutter angle equates to roughly a 1/48 second exposure per frame, the same ratio film cameras have used for decades because it reads as natural to the eye.
Different shot types call for different ranges:
- Architectural walkthroughs and product spins: 90° to 180°, enough to soften motion without smearing detail clients need to evaluate.
- Fast product rotations: 120° to 180°, keeping edges legible while still selling motion.
- Dynamic action or fast camera moves: 200° to 360°, pushing streak length for a more stylized, kinetic feel.
A 180° shutter at 24 fps produces roughly a 1/48-second exposure per frame, which is why it’s the default most renderers ship with and the benchmark Chaos’s CGconnect team points to for photographic believability.
Shutter offset (start, center, or end) shifts where in the frame the exposure window sits, which changes whether the blur trails behind the object or leads ahead of it. Center offset is the safest default for most work; end offset feels a beat more responsive on fast camera pans.
How Do You Manage Noise and Render Time With Motion Blur?
Motion blur adds variance to every pixel it touches, because the renderer is now sampling multiple points in time instead of one. That variance shows up as noise, and it’s the main reason motion-blurred frames take longer to clean up than static ones.
A few knobs matter more than the rest:
- Raise sample counts selectively on moving objects rather than globally across the frame.
- Tune Noise Threshold and Max Subdivs rather than brute-forcing higher fixed sample counts; V-Ray’s guidance on optimizing motion blur treats this as the first lever to pull before anything else.
- Use proxies and instances for background crowds or traffic instead of full deformation geometry.
- Export a velocity AOV and composite vector blur on background elements, saving the full-cost 3D blur budget for hero objects only.
Memory matters just as much as noise. Redshift’s own documentation notes that enabling a motion vector AOV disables its beauty-pass motion blur entirely, and that transformation steps on many animated instanced objects can push VRAM usage up sharply. If you’re rendering a parking lot full of animated cars in the background, bake or proxy them rather than letting deformation blur run wild across every instance.
Pro Tip: Render a velocity AOV pass once and keep it. If a client asks for a different blur intensity in the final composite, you adjust it in comp instead of re-rendering the whole frame.
What’s the Motion Blur Checklist Before Final Render?
Before you commit to a final pass, run through this order:
- Confirm world scale is correct. A scene modeled ten times too large or small will produce blur that reads as either frozen or smeared, regardless of shutter settings.
- Confirm your frame rate and shutter mapping actually match (24 fps and a 180° shutter is not the same math as 30 fps).
- Polish animation F-curves with ease-in and ease-out before enabling blur. Motion blur can’t fix bad spacing, according to SideFX’s own guidance for Houdini artists; it just smears the mistake more visibly.
- Bake simulations rather than blurring live sim data, which can cause flickering.
- Enable a motion vector pass if you plan any comp adjustment later.
- Isolate hero-object blur rather than applying one blanket setting to the whole scene.
The most common failure isn’t a wrong number, it’s applying one global blur setting to everything. That flattens depth cues the eye relies on. Linear camera keyframes and missing wheel rotation on vehicles are the next two most common tells that break the illusion. For quick client review, render a low-res multi-step preview or a “no motion blur” comparison take, and use region renders to test blur settings on just the moving element before committing to a full frame.
How Rendimension Applies Motion Blur in Client Projects
Selective blur is the default on every Rendimension walkthrough. Hero elements, an elevator interior, a rotating kitchen island, a car pulling into a driveway, get true 3D deformation blur. Peripheral motion, distant traffic or background pedestrians, gets vector blur composited in afterward, which keeps render budgets sane without sacrificing the shots clients actually scrutinize frame by frame.
The pipeline behind that decision runs in a consistent order:
- Scale verification against real-world units before any animation work starts.
- Animation curve polish, ease-in and ease-out, before motion blur gets switched on.
- Alembic velocity exports on any geometry likely to need comp adjustment later.
- Compositing handoffs with dedicated velocity AOVs, so clients can request blur tweaks without a full re-render.
- Low-res QA previews before committing to final frame counts.
That structure shows up across Rendimension’s 3D walkthrough work and its broader animation rendering guidance for architects and developers, where camera pacing and shutter timing get treated as design decisions, not afterthoughts.
The Honest Take on Motion Blur Workflows
Most guides treat motion blur as a settings problem: pick a shutter angle, pick a sample count, done. That’s backwards. The research is consistent on this point: blur can’t fix bad animation, it only makes bad spacing more visible at higher resolution. If your F-curves are linear or your world scale is off by a factor of ten, no amount of deformation blur tuning will save the shot.
The overrated advice is “just crank the samples.” It burns render time for something a velocity AOV and a five-minute comp adjustment would fix for free. The underrated move is deciding, before you touch a single slider, which objects in the frame actually need true 3D blur and which can ride on a cheaper vector pass. That one decision affects render budget more than shutter angle, motion steps, and noise threshold combined.
What should change first for most studios: stop treating motion blur as a final-render checkbox and start treating it as a shot-planning decision made during animation blocking, when fixing a bad curve costs minutes instead of hours.
, Rendimension
Get a Motion Blur–Ready Render Quote From Rendimension
If you’ve read this far, you already know that clean motion blur is a pipeline decision, not a render-settings afterthought, and that’s exactly where a dedicated studio earns its fee instead of leaving it to a freelancer juggling five other projects. Rendimension builds every animated deliverable, architectural rendering, 3D walkthroughs, and product visualization work, around the same production discipline covered above: scale checks first, animation polish before blur, and velocity AOVs exported so clients can request comp-level adjustments without paying for a full re-render.
Every walkthrough package includes compositing-ready passes and QA previews before final delivery, ensuring client options to adjust blur settings if needed. Whether you need a single hero flythrough or a full visualization package for a product launch, request a quote or ask for a sample showreel to see how the studio handles motion on a shot similar to yours.
Sources
For deeper technical grounding, GPU Gems’ chapter on motion blur covers the velocity-based math behind post-process blur. Renderer-specific settings live in Redshift’s documentation and Blender’s Eevee manual, while V-Ray’s optimization notes address production noise control directly.
- Redshift motion blur documentation (Maxon)
- Motion blur in CGI, CGconnect (Chaos)
- Blender Eevee motion blur docs
- V-Ray tip: optimizing motion blur (Novedge)
FAQ
Does Motion Blur Ruin Image Quality?
No, when applied correctly it improves believability rather than harming it. Quality suffers only when blur is applied globally without adjusting shutter angle or scale, which is a setup mistake rather than a flaw in the technique itself, as Chaos’s CGconnect notes.
How Do You Add a Motion Blur Effect in a Render?
Enable your renderer’s motion blur setting, choose a shutter angle appropriate to the shot (90° to 180° for most architectural and product work), then decide whether the moving object needs transform blur alone or full deformation blur. Export a velocity AOV if you expect to adjust blur intensity later in compositing.
Does Motion Blur Increase or Decrease Frame Rate?
Motion blur doesn’t change a video’s playback frame rate; it affects how each individual frame looks by smearing motion across the shutter interval. In real-time contexts like game engines the confusion often comes from perceived smoothness, not an actual fps change.
Should You Turn Off Motion Blur for Performance?
In offline rendering, disabling motion blur reduces noise and render time because the renderer no longer needs extra time samples per pixel, which is why studios use selective blur, true 3D on hero objects, cheaper vector blur elsewhere, rather than switching it off entirely. Studios like Rendimension apply this selectively rather than as an all-or-nothing toggle, keeping hero shots sharp on motion while controlling overall render budget.