5 Stage Exploded View Animation Workflow for Engineers
5 Stage Exploded View Animation Workflow for Engineers
An exploded view animation separates a product’s parts and sequences their movement to reveal assembly order and internal function. Teams use it for assembly instructions, technical sales presentations, and maintenance training. Deliverables range from rendered video and still frames to interactive 3D models viewers can rotate and control in a browser.
TL;DR:
- Exploded view animations are most valuable when assembly order is complex, requiring motion to demonstrate sequence rather than static layouts.
- Producing a detailed explosion animation typically demands four to six weeks, depending on part complexity and revision scope.
- CAD cleanliness, careful storyboarding, and collision-free explosion paths are crucial steps to ensure accurate and efficient animation creation.
- For web or interactive use, platforms like Vectary support clickable hotspots, while SOLIDWORKS and KeyShot are better suited for engineering accuracy and photorealism, respectively.
- Cost varies proportionally to part count, material realism, animation length, and the number of revision rounds needed.
Table of Contents
- Why Teams Invest In Exploded View Animation
- Animation, Stills, or Cross-Section: Which One Fits?
- How To Build An Exploded View Animation Step By Step
- Tool-Specific Tips: SOLIDWORKS, KeyShot, And Vectary
- Planning Your Timeline, Team, And Budget
- Getting Export And Delivery Right
- How Rendimension Approaches Exploded View Animation Projects
- Request A Sample Reel Or Quote For Your Assembly Animation
- Sources
- FAQ
Why Teams Invest In Exploded View Animation
The value comes down to speed of comprehension. A well-built exploded assembly drawing shows how thirty parts fit together in fifteen seconds, something a written manual takes three pages to explain badly. Engineers use it to catch fit issues before tooling gets cut. Sales teams use it to make a complex product look impressive on a trade show loop that runs unattended for eight hours a day. Service technicians use it to figure out which bracket comes off first without calling the manufacturer.
Exploded diagrams also cut real support costs. Industrility’s research on machinery diagrams found that clear exploded views reduce repair time and improve parts-ordering accuracy for OEM customers, since a tech looking at the wrong part number wastes a truck roll.
Common outcomes teams report after adopting exploded animation:
- Faster internal design reviews because stakeholders can see interference issues visually instead of reading a change log
- Shorter sales cycles when a rotating exploded view replaces a static cutaway slide in a pitch deck
- Fewer support calls tied to reassembly, since a short looping clip answers the question a phone rep used to
- Reusable footage that gets repurposed across a product page, a trade show monitor, and a technician’s tablet
Animation, Stills, or Cross-Section: Which One Fits?
Not every assembly needs a full animation. A product with six parts and one obvious insertion order is often better served by a single annotated still. Complexity is the first filter: if the assembly order isn’t obvious from looking at the parts, animation earns its cost. Audience is the second filter: a technician wants motion showing sequence; a procurement buyer scanning a catalog wants a clean still.
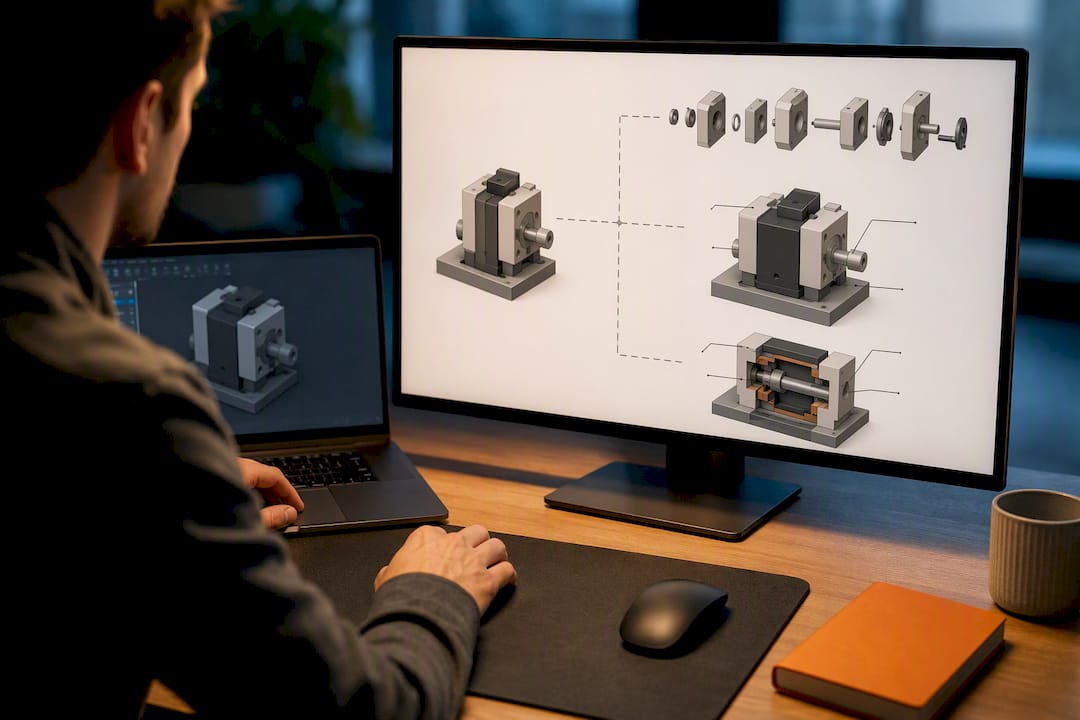
Cross-sections do a different job. They show what’s happening inside a sealed component, like a valve body or a gearbox housing, where nothing actually separates. An exploded view assumes parts can be pulled apart; a cross-section assumes they can’t.
Quick decision guide:
- Choose animation when assembly order matters and the audience needs to follow sequence, not just structure
- Choose an annotated still when the part count is low and the layout is already self-explanatory
- Choose a cross-section when the interesting detail is internal to a sealed part, not between separate parts
- Choose interactive 3D when the same asset needs to serve engineers, marketing, and a self-service web page at once
How To Build An Exploded View Animation Step By Step
Production breaks into five stages, and skipping the prep stage is where most projects go sideways.
- Clean up the CAD model. Name every part logically, group fasteners into subassemblies, and hide screws and washers that add visual noise without adding understanding. A model with 400 unnamed parts is unusable for animation planning.
- Storyboard the sequence. Decide assembly order before touching animation tools. Research on VR based assembly-sequence planning shows that automated tools can compute explosion direction, order, and distance for assemblies with hundreds of parts in real time, but every system still needs a human checking the logic against how the product actually goes together.
- Set explosion directions and distances. Pick directions that avoid parts crossing paths mid-explosion, and stagger distances so nothing pops out at the same time as something behind it. Bounding-box tools in most CAD packages help set safe travel distances automatically.
- Animate the motion. Apply easing so parts accelerate and decelerate naturally instead of moving at a robotic constant speed, mirror the explosion sequence to build the collapse animation instead of hand-keying it twice, and run a collision check frame by frame.
- Set camera and render. Choose a focal length that avoids fisheye distortion on close assemblies, block one anchor shot that shows the full exploded state, and add a slow orbit for dramatic reveal shots.
Pro Tip: Build your collapse sequence by mirroring the explosion animation rather than animating it separately. It halves your keyframe work and guarantees the two sequences match exactly.
For render and export, lock frame rate and resolution before final render passes begin, decide early whether you need alpha channel for compositing over a web page background, and export a lightweight interactive version alongside the video if the same asset needs to live on a product page.
Tool-Specific Tips: SOLIDWORKS, KeyShot, And Vectary
Each tool solves a different part of the pipeline, and picking the right one for the job saves rework.
- SOLIDWORKS builds exploded views directly from your assembly configuration. Create linear and radial explode moves in the configuration manager, then use the animation wizard to generate explode and collapse sequences without hand-keying every part, and fine-tune timing on the motion timeline afterward.
- KeyShot takes over once geometry and explosion logic are set. KeyShot’s own workflow guidance recommends mirroring the explosion animation to build the collapse, applying custom motion ease so transitions don’t feel mechanical, and adding a camera orbit pass for the dramatic hero shot.
- Vectary targets interactive, web-based delivery instead of linear video. It supports interactive exploded states with clickable hotspots, useful for a product page where the visitor drives the explosion instead of watching a fixed sequence, and embeds directly into a webpage.
Choose CAD-native tools like SOLIDWORKS when engineering accuracy is the priority and the audience is technical. Choose a renderer like KeyShot when photorealism sells the product. Choose interactive platforms like Vectary when a self-service web experience matters more than cinematic polish.
Planning Your Timeline, Team, And Budget
Complex exploded animations typically run four to six weeks from storyboard to final render, with part complexity and revision rounds as the two biggest schedule drivers. Simpler assemblies with tight review cycles can move faster.
A production team usually needs three roles working together: an engineer who verifies the assembly sequence is mechanically correct, an animator who handles motion, timing, and camera work, and a producer who manages revisions and delivery formats. Cost scales with part count, how photoreal the materials and lighting need to be, animation length, and how many revision rounds the client requests.
Key planning points:
- Storyboard approval before animation work begins prevents expensive late-stage direction changes
- First-pass review should happen on rough motion, not final render, to catch sequence errors cheaply
- Photorealistic materials and lighting add render time and cost compared to clean technical shading
- Final deliverables should include the master video file plus any interactive or still-frame formats the client needs downstream
Getting Export And Delivery Right
Match the export format to where the animation will live. Video destined for a website or presentation needs H.264 or H.265 at a resolution that matches the display, with alpha channel exports reserved for footage that gets composited over another background.
- Use MP4/H.264 for general web and presentation delivery, and ProRes or a similar codec when the file heads to further editing
- Export glTF or GLB formats for lightweight, embeddable interactive viewers that load fast on a product page
- Keep iframe embeds simple and test load time on mobile, since a heavy 3D viewer can stall a slow connection
- Generate still frames or sprite strips for print catalogs and printed service manuals where video isn’t an option
How Rendimension Approaches Exploded View Animation Projects
Rendimension treats exploded animation the same way it treats architectural visualization: as a collaborative process with client review built into every phase, not a black box. An engineer or reviewer on the client side signs off on assembly sequence before full animation and rendering begin, which catches mechanical errors while they’re still cheap to fix. That review discipline matters more for a product exploded view than almost any other 3D deliverable, because a mis-sequenced part reads as a factual error, not a stylistic choice. For a manufacturer weighing whether to build this in house or hand it to a specialist, the deciding factor is usually whether the team has both CAD accuracy and animation craft on staff. Few do.
, Rendimension
Request A Sample Reel Or Quote For Your Assembly Animation
Exploded view animation can be challenging to coordinate between a CAD department and a freelance animator. You get one team handling both mechanical accuracy and finished production value, from 3D animation work through camera choreography and final render, without the handoff gaps that cause sequencing errors.
The studio’s broader 3D rendering services cover product visualization, photoreal stills, and animation for manufacturers who need assembly, marketing, and technical documentation assets built from a single CAD source. If your product has an assembly sequence worth showing, whether for a trade show floor, a technician’s tablet, or a landing page, request a quote through Rendimension’s 3D rendering page and ask for a sample reel before committing to a full production run.
Sources
- Real-Time Exploded View Animation Authoring in VR Based on Simplified Assembly Sequence Planning
- Creating an Exploded View Animation with KeyShot
- Animating an Exploded View in SOLIDWORKS
- 3D Exploded View Video Production: Clarify Internal Mechanics
FAQ
How do you make an exploded view animation?
Start by cleaning up the CAD assembly, storyboard the part sequence, set explosion directions and distances that avoid collisions, then animate motion with easing before rendering or exporting the final file.
How do I animate an exploded view in SOLIDWORKS?
Build your exploded configuration in the configuration manager using linear or radial moves, then use the animation wizard to generate the explode and collapse sequence automatically.
What’s an example of this kind of object animation?
A common example is a consumer appliance, like a coffee maker, animated so its housing lifts away first, followed by the water reservoir, heating element, and internal wiring, revealing assembly order from outside in.
How do you create an exploded assembly drawing versus an animation?
A static exploded assembly drawing shows one final separated position with callout labels for documentation, while an animation adds motion and timing to show the actual sequence parts travel through, which is more useful for training and sales.
How much does an exploded view animation cost?
Cost depends mainly on part count, how photorealistic the materials need to be, animation length, and revision rounds, with complex projects commonly taking four to six weeks to produce.