Real Estate Visualization Guide for Pros

Step by Step Real Estate Visualization Guide for Pros

TL;DR:
- Accurate source data validation is crucial to prevent costly re-renders and delays in real estate visualization.
- Matching visualization formats to target buyers maximizes marketing impact within project timelines.
Clients don’t buy what they can’t picture. That’s the core problem every real estate professional faces when marketing a property that isn’t built yet, recently renovated, or simply hard to photograph well. A step by step real estate visualization process changes that. It turns floor plans and data into compelling, photorealistic experiences that move buyers from curious to committed. This guide walks you through every stage, from gathering accurate source data to deploying interactive virtual tours, so your visuals do the selling before a single showing is booked.
Table of Contents
- Key takeaways
- Step by step real estate visualization: preparation first
- Creating compelling real estate visuals: step by step
- Common challenges and how to solve them
- Verifying and deploying visuals for maximum impact
- What I’ve learned about visualization that most guides won’t tell you
- See what professional visualization can do for your listings
- FAQ
Key takeaways
| Point | Details |
|---|---|
| Start with clean data | Accurate floor plans and measurements prevent costly re-renders and wasted production time. |
| Match format to buyer | Choose between still renders, walkthroughs, or VR based on your property type and buyer profile. |
| Lighting drives realism | Natural and artificial lighting setup is the single biggest factor in photorealistic quality. |
| Virtual tours multiply reach | Listings with immersive tours dramatically outperform static image listings in views and engagement. |
| Verify before publishing | A quality assurance pass before release catches spatial and color errors that erode buyer trust. |
Step by step real estate visualization: preparation first
Every effective property visualization guide starts well before a single polygon is modeled. The preparation phase determines whether the entire workflow runs smoothly or spirals into expensive revisions.
Gathering source data and floor plans
The most overlooked step in any real estate design process is data validation. Errors in floor plans propagate through every downstream AI and modeling tool, triggering cascading re-renders that multiply costs and delay delivery. Before you hand anything to a visualization team, verify that architectural drawings match current construction or interior conditions. Walk the property if possible, or commission a fresh measured survey.
You need at minimum: dimensioned floor plans for every level, ceiling heights per room, window and door schedules, and site orientation data for accurate solar lighting. If the project is off-plan, confirm that the drawings are the latest revision from the architect, not an early concept set.
Pro Tip: Ask your architect to export DWG files alongside PDFs. DWG files load directly into modeling software like AutoCAD, SketchUp, or Revit, saving hours of manual tracing and reducing measurement transcription errors.
Selecting the right tools and visual format
Not every property needs the same treatment. A luxury penthouse targeting international buyers benefits from immersive virtual tours and cinematic walkthroughs. A suburban rental property may need only high-quality still renders of key rooms and the facade. Matching format to audience is how visualization budgets get maximized.
| Format | Best use case | Typical turnaround |
|---|---|---|
| Still renders (exterior/interior) | Pre-sale marketing, print, digital ads | 5-10 business days |
| Animated walkthrough | Developer launches, investor decks | 2-4 weeks |
| Interactive virtual tour | Remote buyers, luxury listings | 2-4 weeks |
| VR experience | High-value new developments | 4-6 weeks |
Standard professional visualization projects take two to four weeks for delivery, so build that into your campaign calendar. Complex revisions extend that significantly.
Once format is confirmed, select tools accordingly. Autodesk 3ds Max, Lumion, and Unreal Engine 5 each serve different output types. Your visualization partner will typically own this decision, but knowing the options helps you ask the right questions.
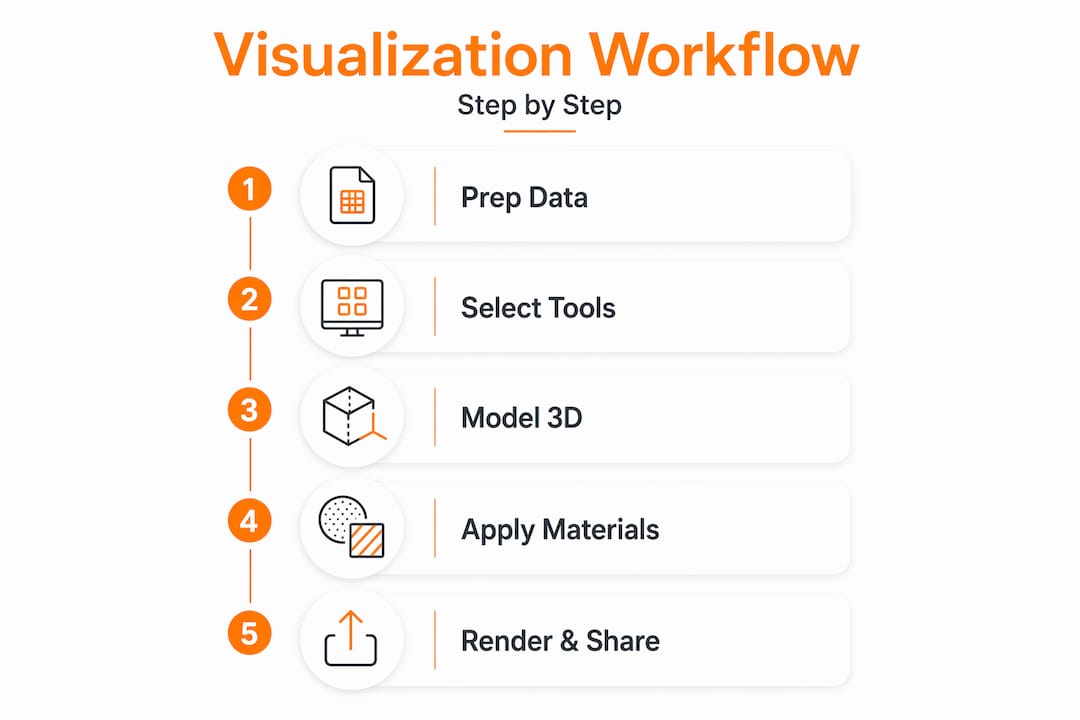
Creating compelling real estate visuals: step by step
This is where a step by step property visualization moves from planning to production. Each stage builds on the previous one, and skipping ahead creates problems you’ll fix at triple the cost.
Stage 1: import and clean architectural data
Load your DWG or Revit file into the 3D modeling software. Check for duplicate lines, misaligned walls, and zero-thickness elements. These look like minor issues but cause geometry errors visible in final renders. Clean the model before modeling anything on top of it.
Stage 2: model interiors and exteriors to scale
Build wall thicknesses, slab depths, and window reveals to real dimensions. Buyers and agents notice when a bathroom looks proportionally wrong, even if they can’t explain why. Pay particular attention to ceiling heights: standard renders tend to flatten rooms unless heights are modeled accurately.
Stage 3: apply materials and textures
This stage is where visualization starts to feel like marketing. Material selection should reflect the actual finish schedule or, for off-plan projects, the specification document. Timber flooring, stone countertops, and painted plaster all have distinct reflectance values that affect how a room reads under light.
Pro Tip: Apply a consistent naming convention to every material in your scene library from day one. When a client requests a swap from white oak to walnut flooring across 40 rooms, a named material takes seconds to replace; an unnamed one requires hunting through the entire scene.
Stage 4: set up lighting
Lighting is the single most technically demanding and visually impactful step in the real estate design process. Set up an HDRI sky for exterior daylight and use photometric data (IES files) for interior fixtures. Render at multiple times of day for exterior shots: morning light suits east-facing facades, late afternoon suits west-facing ones.
Narrative flow in visual presentations helps buyers mentally map properties, which means your lighting sequence should guide attention from arrival (entry, facade) through living spaces to private areas. Treat it as storytelling, not just technical setup.
Stage 5: render still images
Export at a minimum resolution of 3000 x 2000 pixels for digital marketing use, and 4K or higher for print. Use a physically based renderer like V-Ray, Corona, or Arnold. Enable denoising to reduce render time without sacrificing perceived sharpness.
Stage 6: develop walkthroughs and virtual tours
Virtual tours and walkthrough videos are particularly effective for remote buyers who cannot attend in person and for complex properties where spatial relationships are difficult to communicate through stills alone.
For real-time virtual tours, VR requires a specialized pipeline with level-of-detail management and baked lighting to maintain smooth performance on typical buyer devices. This is different from simply exporting a render animation. Work with your visualization partner to set frame-rate targets before production begins, not after.
A full step by step guide to creating immersive 3D walkthroughs covers the technical pipeline in greater depth if your team handles production in-house.
Common challenges and how to solve them
Even experienced teams hit friction points in the visualization workflow. Knowing where the problems cluster saves time and money.
Data errors compound early. An inaccurate room dimension discovered during rendering means rebuilding geometry, re-applying materials, and re-lighting. Data capture quality controls before 3D modeling prevent this from becoming a budget crisis. Treat the source data review as a billable phase, not a free preliminary.
Render times blow out timelines. Physically based renderers produce excellent results but are computationally expensive. Optimize by reducing polygon counts in background objects, using proxy models for repeating furniture, and leaning on cloud-based render farms for large scenes. Most studios batch overnight renders to avoid wasting working hours.
Balancing photorealism with tour performance is a genuine technical tradeoff. A scene that looks extraordinary as a static render may perform poorly as a real-time tour. Balancing photorealism and interactivity requires choosing the right medium for each marketing channel rather than forcing one output to serve all uses.
“Choosing a visualization partner means understanding architectural psychology to highlight a project’s unique selling points for its specific buyer demographics.”
Managing client feedback loops is where many projects stall. Set a clear revision protocol at the start: define how many rounds are included, what constitutes a revision versus a new scope item, and what file formats feedback should arrive in. A marked-up PDF or annotated screenshot is far more actionable than a paragraph of verbal description.
When working with multi-functional or mixed-use developments, aligning visuals across different space types benefits from coordinated spatial design principles that keep the overall visual narrative coherent.
Verifying and deploying visuals for maximum impact
Producing great visuals is only useful if they are deployed correctly. This final phase of the property visualization guide determines whether your assets actually drive the marketing outcomes you need.
Run a quality assurance checklist before any asset goes live:
- Check color accuracy against the actual finish schedule or brand palette
- Confirm correct north orientation on exterior renders
- Verify all room proportions against the original floor plan dimensions
- Review lighting consistency across image sets (a kitchen shouldn’t feel night-lit when the living area is in daylight)
- Test virtual tours on mobile devices, not just desktop, since most buyers browse listings on phones
Listings that include virtual tours see 87% more views than static listings, which makes deployment timing and platform choice critical. Publish immersive content to property portals that support embedded tours, not just as linked external URLs.
Spatial data also improves AI ranking on major portals, reducing days on market by helping the algorithm qualify interested buyers faster. Attaching accurate floor plans and dimensions to your listing isn’t just good practice; it feeds the algorithms that surface your property to the right audience.
Pro Tip: Create a phased asset release plan. Lead with the hero exterior render to generate initial interest, follow with interior stills and floor plans to qualify buyers, then deploy the virtual tour or walkthrough as a conversion tool for serious prospects. This sequence mirrors a natural buyer decision journey.
Track engagement metrics: time spent in virtual tours, click-through rates on render images, and inquiry rates per asset type. Iterate on the next project based on what actually converted, not what looked impressive in the studio.
What I’ve learned about visualization that most guides won’t tell you
I’ve worked through over a thousand real estate visualization projects across residential and commercial developments, and the pattern I see most consistently is this: teams that treat visualization as a technical task consistently underperform teams that treat it as a storytelling discipline.
The technical execution matters. Clean data, accurate geometry, and correct lighting are non-negotiable. But the projects that actually move buyers are the ones where someone has thought about who is looking at the image and what decision they’re being asked to make. A first-time buyer needs to feel at home in a living room. An investor needs to understand the scale and quality of finishes at a glance.
What I’ve found genuinely underrated is the data integrity phase. Nobody talks about it because it’s unglamorous, but a bad dimension in a source file costs more in delays and re-renders than the most advanced rendering software ever saves. Protect that phase and you protect the entire budget.
The other thing most guides skip: collaboration discipline. Visualization is interdisciplinary. Architects, marketing teams, and visualization artists rarely share the same vocabulary for feedback. Building a shared reference sheet, including sample images that define terms like “warm,” “airy,” or “premium,” before production starts removes an enormous amount of ambiguity. It sounds simple. Almost nobody does it.
Technology will keep changing. Real-time engines, AI-assisted texturing, and automated floor plan capture are all shifting what’s possible. The teams that win are the ones who adapt the process without losing sight of the buyer on the other end of the screen.
— Rendimension
See what professional visualization can do for your listings
Real estate professionals who want to move faster from concept to market-ready asset need more than good software. They need a partner who understands both the technical pipeline and the marketing outcome.

Rendimension specializes in photorealistic 3D rendering and architectural visualization for residential and commercial properties, handling everything from still renders and floor plan modeling to fully interactive virtual walkthroughs. With over 1,000 completed projects globally, the team brings both technical precision and a marketing-informed approach to every asset. Whether you’re launching a high-rise development or marketing a single luxury residence, Rendimension’s architectural visualization services are built to match your project scale and sales goals.
FAQ
What is step by step real estate visualization?
Step by step real estate visualization is a structured process of transforming architectural data into photorealistic still images, animated walkthroughs, or interactive tours. It follows defined stages from data validation and modeling through lighting, rendering, and final deployment.
How long does a real estate visualization project take?
Most professional visualization projects take two to four weeks for standard deliverables. Complex projects involving virtual reality experiences or large-scale developments can take six weeks or more, particularly when multiple revision rounds are required.
Why do virtual tours outperform static listing photos?
Listings with virtual tours receive 87% more views than those with static images alone. Immersive content gives remote buyers confidence in spatial relationships and property flow, which static photography cannot convey.
What data do you need before starting 3D visualization?
You need dimensioned floor plans, ceiling heights, window and door schedules, and site orientation data. Clean, validated source files prevent compounding errors in modeling and rendering.
How do you balance photorealism with virtual tour performance?
Static renders and real-time tours use different technical pipelines. Real-time tours require level-of-detail management and baked lighting to run smoothly on buyer devices, while still renders can use full global illumination without performance constraints.
Recommended
- Enhance Property Sales With 3D Renders In Real Estate 2026
- Real Estate Visualization Explained: 3D Techniques 2026
Related guides
Need professional real estate rendering services? Rendimension helps developers, agents, and investors visualize properties before construction with photorealistic 3D renders, walkthroughs, and floor plans. See our real estate rendering portfolio.