How to brief 3D visualization projects for better results

Vague briefs waste hours and produce renders that look like they could belong to any project. When architects and developers hand over a list of dimensions and material codes without communicating the feeling they want to create, the result is technically correct but emotionally flat. Specs-heavy briefs yield generic renders compared to briefs that communicate intent and atmosphere. The good news is that a smarter briefing approach takes less time than you think. This article walks you through everything you need to know, from structuring your first brief to avoiding the mistakes that quietly kill project momentum.
Table of Contents
- Understanding the impact of your brief
- Key elements to include in your brief
- Step-by-step process to brief your 3D visualization project
- Common mistakes and how to avoid them
- Rethinking the perfect 3D visualization brief: What most miss
- Take your 3D visualization projects further with Rendimension
- Frequently asked questions
Key Takeaways
| Point | Details |
|---|---|
| Briefs shape outcomes | A clear, balanced brief directly impacts the quality and creativity of 3D visualization projects. |
| Include moodboards | Moodboards and visual references help communicate your vision and guide creative direction. |
| Avoid over-specification | Too much technical detail stifles creativity; focus on the big picture and intended emotion. |
| Step-by-step matters | A structured briefing process ensures clarity, minimizes errors, and speeds up project approval. |
Understanding the impact of your brief
The brief is the single document that shapes everything your visualization team produces. It sets the tone, defines the goal, and tells the artist what success looks like before a single render is created. A weak brief forces the team to guess, and guessing costs everyone time and money.
Consider the difference between two approaches. A specs-heavy brief lists room dimensions, material codes, and camera angles. A high-level brief describes the mood of a Sunday morning in a light-filled apartment, the warmth a buyer should feel when they first see the image, and three reference photos that capture the right atmosphere. The second brief gives the artist permission to make creative decisions that serve the project. Emotion-focused briefs consistently outperform spec lists when it comes to producing compelling, memorable visuals.
Here is a quick comparison to illustrate the difference:
| Brief type | Focus | Typical outcome |
|---|---|---|
| Specs-heavy | Dimensions, materials, camera specs | Technically accurate, emotionally flat |
| Emotion-focused | Mood, narrative, visual references | Engaging, memorable, client-ready |
| Balanced | Core specs plus mood and references | Best results, fewer revision rounds |
A strong brief shares these traits:
- Clear project goal stated in one or two sentences
- Visual references or moodboards attached
- Intended emotion or atmosphere described in plain language
- Delivery format and resolution specified once, briefly
- Named point of contact for feedback
A weak brief does the opposite. It either drowns the artist in technical data or leaves everything open to interpretation. Both extremes create friction.
“The best render brief has no specs in it. It has a feeling, a story, and a clear sense of what the image needs to do for the audience.”
Poor briefing also affects timelines. When the first draft misses the mark, you enter a revision cycle that can add days or weeks to delivery. Investing thirty minutes in a thoughtful brief saves far more time downstream. For projects where quality matters, high quality 3D rendering starts with the quality of the brief, not the quality of the software. If you want a deeper grounding in what makes visualization work, the visualization guide covers the full picture.

Key elements to include in your brief
Knowing the impact of a good brief is one thing. Knowing exactly what to put in it is another. The goal is to give your visualization team enough direction to work confidently without removing the creative latitude that produces outstanding results.
Here are the core elements every brief should contain:
- Project overview: One paragraph describing the project type, location, scale, and intended audience. A luxury residential tower in Miami reads very differently from an affordable housing development in the Midwest.
- Project goal: What does this render need to achieve? Is it for a sales brochure, a planning submission, or an investor deck? The goal shapes every creative decision.
- Intended emotion: Describe how you want the viewer to feel. Words like “calm,” “aspirational,” “energetic,” or “intimate” give the artist a compass.
- Visual references: Attach three to five images that capture the look, feel, or lighting you have in mind. These do not need to be renders. Photographs, magazine spreads, or film stills all work.
- Moodboard: A simple collage of colors, textures, and spatial qualities communicates faster than paragraphs of text. Moodboards and references balance creative freedom with practical direction.
- Technical essentials: Format (JPEG, PNG, TIFF), resolution (print or screen), and number of views. Keep this section short.
- Timeline and milestones: When do you need the first draft? When is the final deadline?
Here is a quick reference table for technical specs:
| Spec | Recommended minimum | Notes |
|---|---|---|
| Resolution (print) | 300 DPI | For brochures and large format |
| Resolution (screen) | 72 to 150 DPI | For presentations and web |
| File format | TIFF or PNG | Lossless for client delivery |
| Views | 3 to 5 per project | Enough to tell the story |
Pro Tip: Resist the urge to specify every material code and exact camera focal length. Over-specification narrows the artist’s options and often produces renders that look mechanical rather than evocative. Trust the team with the creative decisions once you have set the emotional direction. Following visualization best practices means knowing when to step back. For a structured approach to the entire process, the step-by-step visualization resource is worth reviewing before you start.
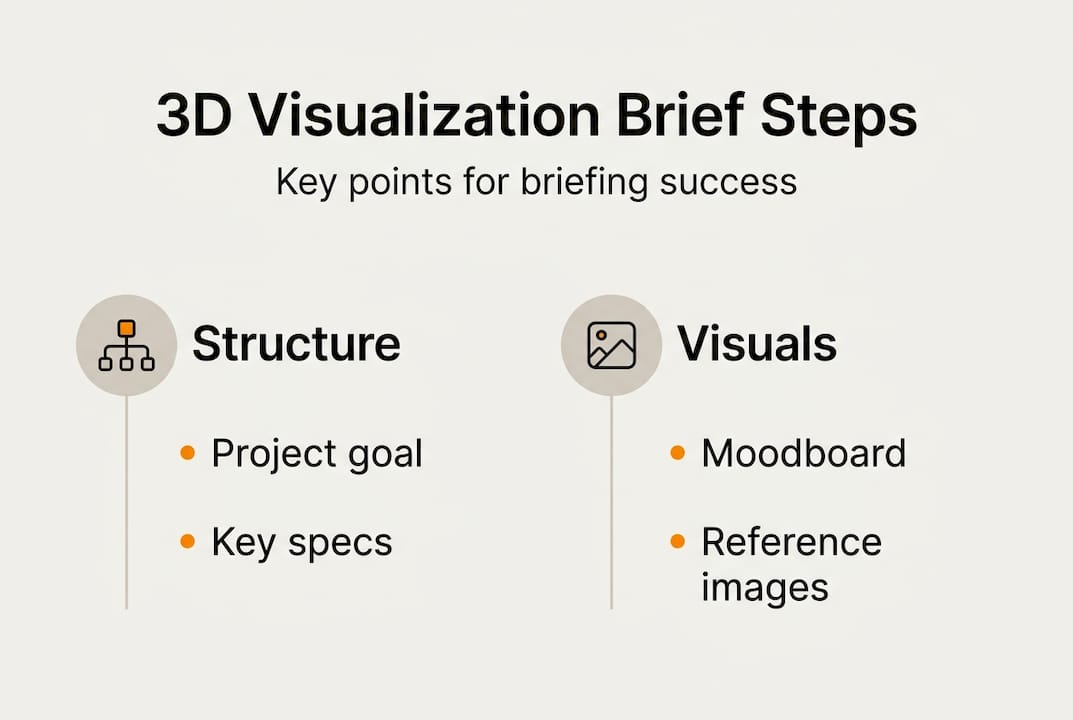
Step-by-step process to brief your 3D visualization project
With your elements gathered, the next step is putting them together in a format that is easy to read and act on. A well-structured brief takes the guesswork out of the handoff.
- Define your goal first: Before you open a document, write one sentence that answers this question: what does a successful render look like for this project? Everything else in the brief supports that sentence.
- Gather your references: Pull together images, precedents, and examples that capture the visual direction. Aim for variety. Include one image for lighting, one for materiality, and one for overall atmosphere.
- Build a simple moodboard: Use a tool like Milanote, Pinterest, or even a PowerPoint slide. Arrange your references with short labels. This becomes the visual anchor of your brief.
- Write the emotional direction: Two to three sentences describing how the finished render should make the viewer feel. This is the most important paragraph in your brief.
- Add the technical essentials: Format, resolution, number of views, and delivery deadline. Keep this to a bullet list.
- Structure the document clearly: Use headings. Put the goal and emotional direction at the top. Put technical specs at the bottom. Visualization teams read briefs quickly, so make the most important information impossible to miss.
- Send and invite questions: Share the brief and explicitly ask the team to flag anything unclear before work begins. A five-minute call at this stage can prevent a week of revisions.
Successful briefs combine high-level direction with the key details that keep the project on track. Projects that follow this structure see fewer revision rounds and faster approvals. If you want guidance on the production side, creating 3D renderings professionally requires the same discipline at every stage. For 2026 workflows, best practices in 3D design outlines how leading firms are structuring their processes.
Pro Tip: Use plain, visual language throughout your brief. Instead of writing “warm color palette,” attach a photo of a sunset-lit interior. Show, do not just tell. Teams align faster when they can see what you mean.
Common mistakes and how to avoid them
Even experienced architects and developers fall into predictable briefing traps. Recognizing them early saves significant time and frustration.
Mistake 1: Being too vague
Briefs that say “make it look modern and clean” give the artist nothing to work with. Every studio has a different definition of modern. Without references, you will receive the artist’s interpretation, not yours.
Mistake 2: Over-specifying everything
Over-specification stifles creativity and leads to renders that feel mechanical. When every camera angle, focal length, and material finish is locked down before the artist begins, there is no room for the creative problem-solving that makes great visuals.
Mistake 3: Skipping visual references
Text descriptions of mood and atmosphere are useful but limited. Missing moodboards and references are the single most common cause of first-draft misses. Attach images every time, without exception.
Mistake 4: Unclear feedback loops
Briefs that do not name a decision-maker or define the revision process create confusion. Specify who approves work and how many revision rounds are included.
Mistake 5: Changing direction mid-project
Scope creep in visualization projects often starts with a brief that was never fully agreed upon. Lock in the direction before work begins.
Here is how to course-correct if your brief is not producing results:
- Request a feedback call after the first draft, not an email chain
- Ask the artist specifically what information was missing or unclear
- Revise the brief to add the emotional direction and references that were absent
- Confirm alignment before approving the next round of work
“The brief is a living document. If the first draft is off, the brief is usually the reason.”
Pro Tip: Share an early draft of your brief with a colleague who is not close to the project. If they cannot describe the intended mood after reading it, the brief needs more work. Understanding the benefits of 3D visualization helps you set the right expectations from the start. Better briefs also directly speed project approvals by reducing the back-and-forth that delays stakeholder sign-off.
Rethinking the perfect 3D visualization brief: What most miss
Here is the uncomfortable truth most briefing guides skip: the industry’s obsession with technical checklists is actually holding projects back. Architects and developers spend hours perfecting spec sheets while the most important question goes unanswered. What story does this image need to tell?
The teams producing the most compelling renders in 2026 are not the ones with the most detailed briefs. They are the ones who communicate narrative and intent clearly, then trust their visualization partners to solve the creative problem. Briefs focused on emotion and intent consistently elevate results beyond what any technical checklist can produce.
Seasoned developers know that a render is not a technical document. It is a persuasion tool. It needs to make an investor feel confident, a buyer feel excited, or a planning committee feel reassured. That outcome is achieved through atmosphere, light, and narrative, not through precise material codes. The brief that wins is the one that communicates the why behind the project, not just the what. Explore how this plays out across real projects in the visualization case studies library.
Take your 3D visualization projects further with Rendimension
A well-crafted brief is the foundation of every successful render. But even the best brief benefits from a team that knows how to bring it to life with precision and creativity.

Rendimension has delivered over 1,000 projects globally, working with architects and developers who need more than technically correct renders. They need visuals that move audiences and close deals. Whether you are starting your first project or refining a process that is not delivering, the 3D rendering services at Rendimension are built around your brief, not a generic workflow. The visualization guide and step-by-step visualization resources give you the frameworks to brief smarter and get better results from every project.
Frequently asked questions
What makes a 3D visualization brief effective?
An effective brief balances project goals with visual references and emotional direction, giving the visualization team both structure and creative latitude. It answers what the render needs to achieve and how it should make the viewer feel.
How much technical detail should be included in a 3D render brief?
Include essential specs like format, resolution, and number of views, but keep that section short. Over-specification limits creativity and often produces renders that feel mechanical rather than compelling.
What tools or resources help create better briefs?
Moodboards and references are the most effective tools for communicating visual direction quickly. Platforms like Milanote or Pinterest make it easy to collate images and share them alongside your written brief.
How can I fix a brief that isn’t producing desired results?
Request a feedback call after the first draft, revise the brief to add emotional direction and visual references, and confirm alignment early before the next round of work begins.