Translating a design vision into something a client can genuinely feel is one of the hardest challenges in architecture and interior design. You can have the most considered spatial plan, the most refined material palette, and still lose the project because the client couldn’t see what you saw. Modern visualization technology has closed that gap dramatically, but the sheer number of tools, workflows, and techniques available can itself become an obstacle. This guide walks you through the full process, from selecting the right tools and building a solid preparation strategy, to executing a polished visualization pipeline and presenting work that wins client buy-in and drives real marketing results.
Table of Contents
- What you need: Tools, tech, and preparation
- Step-by-step workflow: From concept to captivating visuals
- Increasing impact: Advanced tips for client presentations and marketing
- Troubleshooting, edge cases, and future trends
- A professional perspective: Why hybrid and human-centered visualization wins today
- Level up your interior visualization with Rendimension
- Frequently asked questions
Key Takeaways
| Point | Details |
|---|---|
| Plan tools and workflow | Choose your tech stack and gather a clear project brief to set up a smooth visualization process. |
| Follow a proven pipeline | Take your concept from plan to photorealistic render by following a structured, step-by-step workflow. |
| Use immersive techniques | Adopt VR/AR and storytelling visuals to boost client engagement and sales conversion. |
| Prioritize realism and context | Enhance realism with authentic materials and lived-in details for effective presentations. |
| Embrace hybrid solutions | Blend human creativity and AI for speed and quality in today’s fast-evolving visualization landscape. |
What you need: Tools, tech, and preparation
Once you recognize the importance of translating ideas into visuals, the next step is having the right tools and a plan. The architectural rendering techniques pipeline for interior visualization typically moves through modeling, lighting, texturing, rendering, and post-processing. Each stage demands a specific type of software, and choosing the wrong tool at any stage slows everything down.
The types of 3D visualization available today span from static renders to fully immersive real-time environments, so your selection should match both your project complexity and your client’s technical comfort level.
| Tool | Category | Best for | Key strength |
|---|---|---|---|
| SketchUp | Modeling | Concept-stage design | Fast, intuitive massing |
| Revit | BIM/Modeling | Large commercial projects | Data-rich documentation |
| 3ds Max | Modeling/Rendering | High-detail interiors | Flexibility and plugin ecosystem |
| V-Ray / Corona | Rendering | Photorealistic output | Industry-standard quality |
| Enscape | Real-time rendering | Client walkthroughs | Instant feedback loop |
| ReRender AI | AI visualization | Rapid concept iteration | Speed from sketch to render |
As noted in how to visualize interior design, tools like SketchUp, Revit, and 3ds Max remain the backbone of professional interior visualization, each serving a distinct role depending on project scale and output requirements.
Essential preparation steps before you open any software:
- Gather finalized floor plans, elevations, and section drawings
- Compile a moodboard with material references, lighting inspiration, and furniture styles
- Clarify client goals: Is this for internal review, investor presentation, or public marketing?
- Define output formats early: still renders, 360 tours, VR, or video walkthrough
- Align on revision rounds and approval checkpoints before production starts
Pro Tip: A detailed project brief completed before modeling begins is the single most effective way to reduce costly mid-project changes. Ask clients to sign off on moodboards and reference images before you touch the model. This one step routinely cuts revision cycles in half.
A solid visualization guide for 3D renderings will also help you structure your brief and set realistic expectations with clients from day one.
Step-by-step workflow: From concept to captivating visuals
After assembling your toolkit and plans, you’re ready to walk through the actual creation process. A structured pipeline keeps quality consistent and prevents the kind of rework that eats into project margins.
- Import and set up geometry from your CAD or BIM files, establishing correct scale and orientation
- Block in lighting using real-world values, setting sun position, artificial light sources, and exposure
- Apply base materials to all surfaces, prioritizing large-area finishes like flooring, walls, and ceilings
- Populate the scene with furniture, fixtures, and props sourced from quality 3D asset libraries
- Refine materials and textures, adding bump maps, reflectance, and displacement for realism
- Run test renders at low resolution to check composition, lighting balance, and material accuracy
- Final high-resolution render, which for photorealistic output can take several hours per frame
- Post-process in Photoshop or Lightroom to adjust color grading, contrast, and atmosphere
The step-by-step visualization guide at Rendimension expands on each of these stages with practical examples. The standard 3D pipeline reduces coordination errors significantly, though photorealistic renders at full resolution can still take hours to days depending on scene complexity.

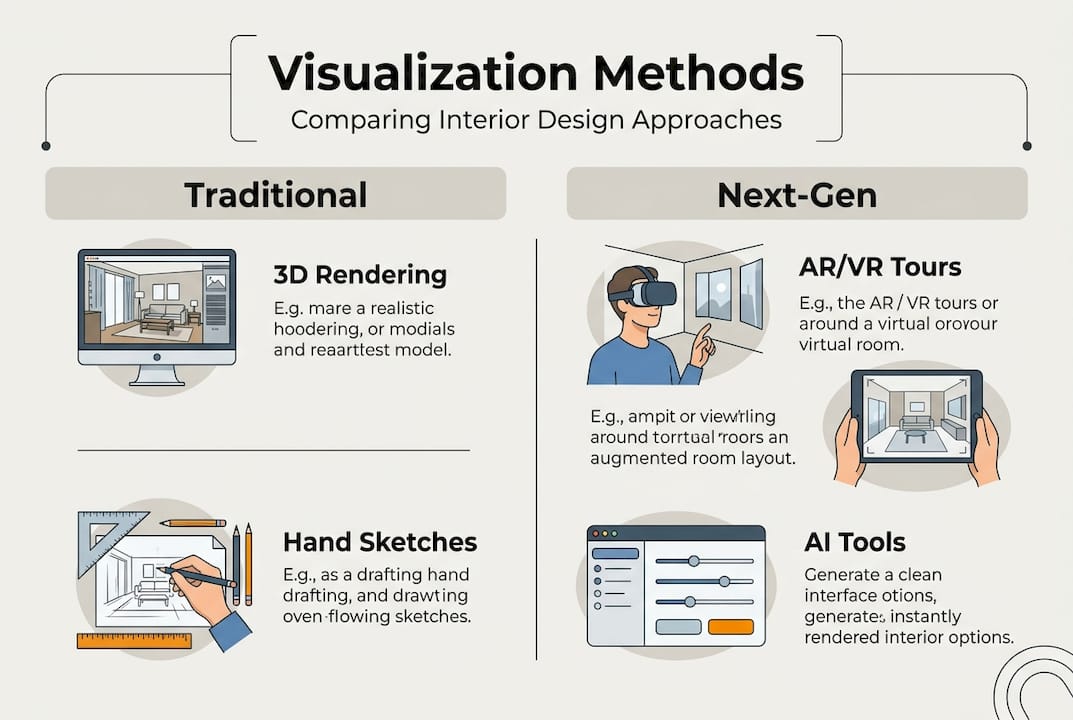
| Approach | Pros | Cons | When to use |
|---|---|---|---|
| CGI / 3D rendering | Highest quality, full control | Time-intensive, high cost | Final presentations, marketing |
| Traditional (hand/2D) | Fast concept sketches | Low realism, limited detail | Early ideation only |
| VR / AR immersive | Maximum client engagement | Requires hardware setup | Luxury, large-scale, or remote clients |
| AI-accelerated | Rapid iteration, low cost | Needs human QA for accuracy | Concept validation, early design rounds |
Properties marketed with AR/VR tours sell 20% faster and receive 49% more inquiries than those using static images alone. That statistic alone justifies investing in immersive output for any project where sales velocity matters. Pair your rendering approach with photorealism in architecture principles to ensure every output format performs at its best.
Increasing impact: Advanced tips for client presentations and marketing
Producing visuals is one thing, but maximizing their real-world impact requires focused techniques for emotional and marketing resonance. A technically flawless render that feels cold and empty will underperform a slightly less polished image that tells a compelling story.
Prioritizing photorealism and storytelling is the foundation of client connection in visualization. Here is what that looks like in practice:
- Realistic materials: Use physically based rendering (PBR) materials with accurate reflectance, roughness, and texture scale. A marble floor that tiles incorrectly destroys credibility instantly. For a detailed look at how material accuracy shapes luxury interiors, the marble interior workflow is a useful reference.
- Layered lighting: Combine natural daylight with ambient fill and accent lighting to create depth. Flat, even lighting is the fastest way to make a space look artificial.
- Lived-in props: Books on a shelf, a half-filled coffee cup, a throw blanket draped over a chair. These details signal habitation and make spaces feel real rather than staged.
- Human figures: Placing people in renders at correct scale anchors the space and gives clients an immediate sense of proportion and atmosphere.
Pro Tip: When presenting to clients, use human figures and lifestyle vignettes to steer the conversation toward how the space feels rather than how it looks. This shifts the discussion from technical critique to emotional response, which is where decisions actually get made.
“3D floor plans significantly boost buyer engagement and reduce time-on-market for new residential developments.” This finding from innovative real estate visualization research confirms what many developers already sense: spatial clarity sells.
For marketing new builds and luxury listings, 3D floor plan examples show how overhead spatial views complement hero renders by giving buyers a clear understanding of layout before they ever step on site. The benefits of 3D floor plans for real estate marketing are well documented, from higher click-through rates on listings to faster sales cycles. Pair these with 360-degree panoramas or VR walkthroughs to create a complete marketing package that works across digital platforms.
Troubleshooting, edge cases, and future trends
Even with the best planning and execution, advanced visualization can bring unique challenges. Here is how to handle the most common ones and future-proof your process.
Common pitfalls and how to avoid them:
- Showroom sterility: Scenes that look like furniture catalogs rather than lived-in spaces. Fix it by adding wear, asymmetry, and personal objects.
- Scaling for mobile: High-resolution renders and VR experiences often fail on mobile devices. Optimize texture sizes and polygon counts before delivery.
- LOD management in large scenes: Open-plan layouts need tonal separation to define zones visually, and large scenes require Level of Detail (LOD) management to stay performant on mobile and web platforms.
- Forgotten tonal separation: In open-plan spaces, without distinct tonal shifts between zones, the eye has nowhere to rest. Use material contrast, lighting variation, and rug placement to create visual anchors.
- Missing camera composition: Even a perfect scene can look flat with a poor camera angle. Use the rule of thirds, foreground framing elements, and slight lens distortion to add depth.
For complex open-plan projects, 3D floor plans for open layouts can help communicate spatial zoning before the full render is complete.
AI tools like ReRender AI can compress what used to take days of iteration into minutes, making them invaluable for early-stage concept validation. The emerging best practice is a hybrid workflow: use AI for rapid concept generation and iteration, then hand off to a human artist for final quality control, material accuracy, and storytelling refinement.
Looking ahead, Gaussian Splatting is emerging as a technique that converts real-world photography into navigable 3D environments with remarkable speed. Real-time AR overlays on mobile devices are also moving toward becoming a standard client presentation tool rather than a premium add-on. The examples of photorealistic renders being produced today with hybrid pipelines already rival what took specialized studios weeks just five years ago.
A professional perspective: Why hybrid and human-centered visualization wins today
With so many options and innovations available, it is tempting to chase the most technically advanced output at every stage. In practice, that approach often produces work that impresses other visualization professionals but leaves actual clients unmoved.
The real differentiator in 2026 is not which renderer you use. It is how well you understand what your client needs to feel in order to say yes. Hybrid human-AI workflows are emerging as best practice precisely because they free up human creative time for the decisions that matter most: composition, narrative, emotional tone, and spatial storytelling.
Obsessive realism is the most overrated trend in visualization right now. A render can be technically perfect and still fail to communicate the warmth of a material, the scale of a ceiling, or the way afternoon light will move through a space. That is a storytelling failure, not a technical one.
The professionals who consistently win projects are those who treat visualization as a communication tool first and a technical exercise second. They use 3D modeling for real estate and immersive formats not to show off their software skills, but to remove every possible barrier between a client and their emotional connection to a space. That is the work worth doing.
Level up your interior visualization with Rendimension
Put these strategies into practice faster and more effectively with the right visualization partner and tools.

Rendimension’s 3D rendering services cover the full spectrum of interior visualization needs, from photorealistic still renders and 3D floor plans to VR walkthroughs and real-time interactive experiences. With over 1,000 projects completed globally, the team brings both technical depth and a client-first process that mirrors the hybrid, human-centered approach outlined in this guide. Whether you need to accelerate concept validation or produce marketing-grade visuals for a luxury development, the step-by-step architectural visualization process at Rendimension is built to deliver precision at every stage.
Frequently asked questions
Which software is best for visualizing interior concepts in 2026?
Top modeling tools include SketchUp, Revit, and 3ds Max, paired with V-Ray, Corona, or Enscape for rendering, while AI tools like ReRender AI are gaining traction for rapid concept-to-render workflows. Your choice should match your project scale and the level of realism required.
How do VR and AR change interior visualization client presentations?
VR and AR let clients virtually walk through a design before anything is built, which dramatically increases emotional engagement and reduces the need for physical site visits. Properties with VR/AR tours sell 20% faster and generate 49% more buyer inquiries.
What is the difference between traditional and AI-driven visualization workflows?
Traditional workflows rely on manual modeling, texturing, and rendering steps that can take days per image. AI tools cut workflow time from days to minutes for concept generation, but human review remains essential for material accuracy and final quality.
How can you avoid sterile, unrealistic visualizations?
Add lived-in details like props, asymmetric arrangements, and realistic material wear to break the showroom effect. Avoiding showroom sterility requires intentional scene curation, not just technical rendering quality.
Recommended
- How To Visualize Floor Plans For Impactful Presentations
- Showcase Design Concepts With 3D Renderings: Complete Guide
- 7 Product Visualization Strategies For Architects And Designers
- Architectural Visualization Services In Miami: Rendimension
- Master the Marble Interior Design Workflow for Luxury Spaces – Marmorique