3D Walkthroughs: Transforming Project Presentations
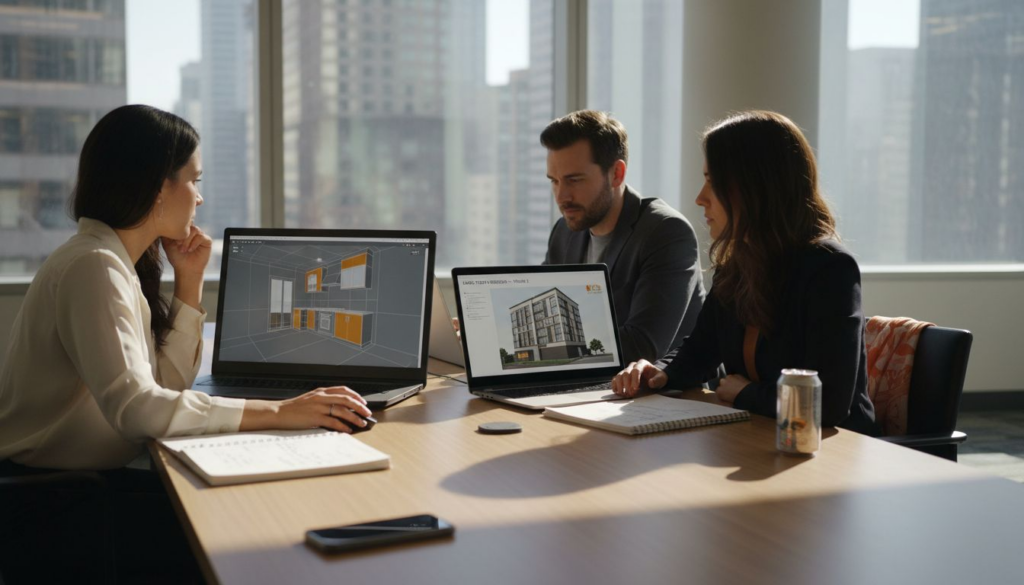
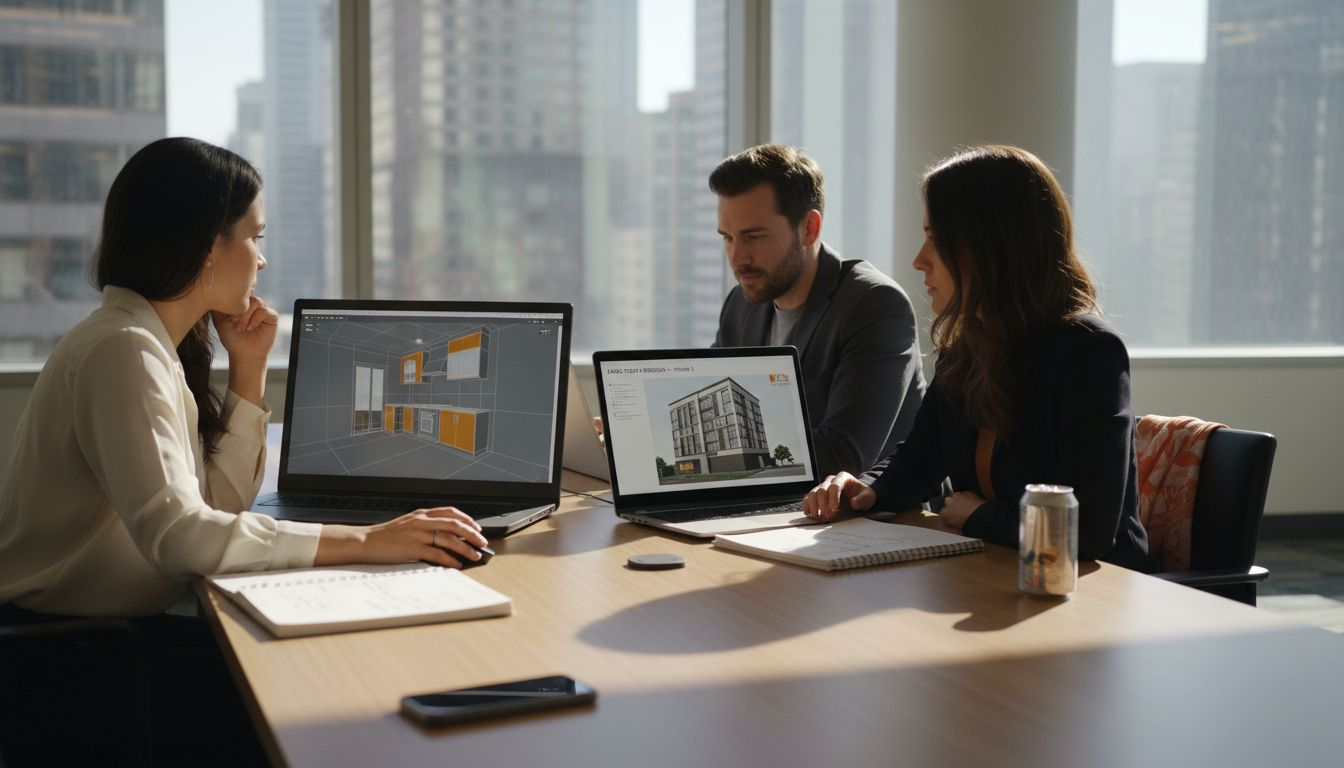
Misinterpretation of 2D drawings can slow down approvals and leave clients uncertain about proposed spaces. Architects and developers across North America are discovering that interactive, immersive experiences in 3D walkthroughs deliver clarity and confidence by letting stakeholders explore projects just as they would in reality. This article uncovers what truly sets photorealistic 3D walkthroughs apart, dispels common misconceptions, and highlights essential features for impactful presentations.
Table of Contents
- Defining 3D Walkthroughs and Misconceptions
- Types of 3D Walkthroughs for Presentations
- Step-by-Step 3D Walkthrough Creation Process
- Essential Features in Real Estate and Architecture
- Costs, Challenges, and Common Mistakes to Avoid
Key Takeaways
| Point | Details |
|---|---|
| 3D Walkthroughs Are Interactive | Unlike traditional static renderings, 3D walkthroughs offer real-time navigation, allowing users to explore spaces at their own pace. |
| Cost-Effective Option | Modern production techniques have made 3D walkthroughs more accessible, providing good value for residential and commercial projects. |
| Different Formats Serve Unique Purposes | Various walkthrough types like real-time, guided, and panoramic presentations cater to different audience needs and contexts. |
| Focus on Photorealism and Accuracy | Ensuring realistic lighting and spatial dimensions is crucial for establishing stakeholder trust and preventing design misunderstandings. |
Defining 3D Walkthroughs and Misconceptions
3D walkthroughs are far more than simple video animations of buildings. They are interactive, immersive experiences that allow stakeholders to navigate through a proposed project in real time, making informed decisions before construction begins.
Think of a 3D walkthrough as a guided tour through your project rendered in photorealistic detail. You control the pace, the viewing angles, and the camera movement, experiencing the space exactly as it will feel in person.
What 3D Walkthroughs Actually Are
A true 3D walkthrough combines several technical and creative elements:
- Real-time navigation through 3D environments with intuitive camera controls
- Photorealistic rendering showing materials, lighting, and textures as they’ll appear in reality
- Interactive features like the ability to toggle lighting conditions, seasons, or design options
- Spatial understanding that reveals how spaces flow, connect, and function at full scale
Unlike static 2D renderings, walkthroughs provide immersive spatial understanding that prevents misinterpretation of flat drawings. Stakeholders can walk through hallways, experience room proportions, and understand traffic flow in ways no floor plan ever could.
Common Misconceptions About 3D Walkthroughs
Many architects and developers hold beliefs about walkthroughs that simply don’t match reality. Let’s clear up the most damaging ones.
Misconception 1: They’re just fancy animations. Walkthroughs aren’t pre-recorded videos. They’re real-time interactive experiences where users control the camera and explore at their own pace. You could spend 30 seconds in a room or five minutes examining details.
Misconception 2: They’re too expensive for most projects. Modern 3D walkthrough production has become significantly more efficient. The cost-to-value ratio now favors developers—particularly for residential and commercial projects where buyer confidence and faster approvals justify the investment.
Misconception 3: They replace traditional renderings. False. Walkthroughs and static renderings serve different purposes. Marketing teams use both: stunning single images for advertisements and walkthroughs for immersive exploration. They complement each other.
Misconception 4: Only luxury projects need them. Any project benefits from reducing design ambiguity. Whether you’re pitching a mid-range residential development or a commercial office building, walkthroughs accelerate stakeholder buy-in and reduce costly design revisions.
Real-time walkthrough experiences resolve design conflicts faster than traditional presentation methods ever could.
Misconception 5: They require special equipment or VR headsets. Many walkthroughs work on standard monitors or tablets. While VR integration enhances the experience, it’s not mandatory. Most stakeholders explore walkthroughs on desktop screens or tablets at their own convenience.
The research on collaborative virtual environments shows that users working with interactive 3D representations demonstrate significantly better spatial comprehension and catch design issues earlier than teams reviewing 2D plans alone.
Pro tip: Position your walkthrough as a decision-making tool, not a marketing luxury. Frame it around reducing approval timelines and design revisions—metrics that resonate with budgets and timelines.
Types of 3D Walkthroughs for Presentations
Not all 3D walkthroughs serve the same purpose. Different stakeholders need different experiences, and choosing the right type determines whether your presentation lands or falls flat.
Architects, developers, and real estate agents each benefit from distinct walkthrough formats tailored to their specific audience and objectives.
Real-Time Interactive Walkthroughs
Real-time walkthroughs put control directly in your stakeholder’s hands. Users navigate through the 3D environment using keyboard, mouse, or touchscreen controls, exploring at their own pace.
These work best for:
- Design review meetings where you need to address specific concerns
- Client presentations where stakeholders want to explore details independently
- Internal team discussions about spatial flow and functionality
- VR experiences where immersion becomes the primary goal
Real-time walkthroughs allow users to pause, zoom in on materials, rotate the camera 360 degrees, and spend as much time as needed examining specific areas. This interactivity builds confidence because stakeholders aren’t passively watching—they’re actively exploring.
Guided Narrative Walkthroughs
These are choreographed experiences with predetermined camera paths and pacing. Think of them as a filmmaker directing viewers through the space with intentional timing, emphasis, and storytelling.
A guided walkthrough might:
- Showcase the project’s strongest features first
- Highlight material selections and design details at optimal moments
- Control pace to allow viewers time to absorb information
- Include synchronized narration or background music
- Emphasize key selling points for marketing purposes
Guided walkthroughs excel in architectural visualization presentations where you’re pitching to investors, municipal boards, or large audiences. They tell a story rather than simply showing a space.
Guided walkthroughs control the narrative; real-time walkthroughs empower the user. Choose based on your presentation goal.
Still-Frame Panoramic Walkthroughs
These capture 360-degree panoramic images at multiple key locations throughout a project. Viewers click through viewpoints like nodes on a map, seeing each location in full detail without continuous movement.
Use panoramic walkthroughs when:
- You need fast loading times on standard devices
- Mobile accessibility is critical for remote stakeholders
- You want lower file sizes for easy distribution
- Detailed exploration of specific rooms matters more than fluid movement
They’re practical for client reviews and virtual tours without requiring specialized software or hardware.
VR-Enabled Walkthroughs
Virtual reality walkthroughs transport viewers into the project using VR headsets. Users experience full 360-degree immersion with realistic scale and spatial relationships.
VR works exceptionally well for:
- High-stakes investor presentations where immersion justifies investment
- Large commercial or mixed-use projects with complex spatial relationships
- Residential projects where buyers want to “feel” the space before deciding
- Projects requiring emotional connection to secure funding or approvals
VR eliminates doubt about spatial scale and adjacency. A 12-foot ceiling feels different when you’re standing under it in VR versus viewing it on a monitor.
Comparison by Use Case
Different presentation contexts demand different approaches:
| Walkthrough Type | Best For | Key Advantage |
|---|---|---|
| Real-Time Interactive | Design reviews, client exploration | User control and flexibility |
| Guided Narrative | Investor pitches, marketing campaigns | Storytelling and controlled messaging |
| Panoramic | Mobile presentations, remote stakeholders | Fast loading, lightweight files |
| VR-Enabled | High-stakes presentations, experiential marketing | Immersive emotional impact |
Most successful presentations combine formats. Use a guided walkthrough for your initial pitch, then switch to real-time mode for detailed Q&A and exploration.
Pro tip: Match your walkthrough type to your audience’s technical comfort level and available time. VR requires dedicated space and time; panoramic walkthroughs work anywhere, anytime.
Step-by-Step 3D Walkthrough Creation Process
Creating a 3D walkthrough isn’t random. It follows a logical sequence from initial concept to final delivery, with each phase building on the previous one.
Understanding this process helps you manage timelines, budgets, and stakeholder expectations effectively.
Phase 1: Define Your Goals and Audience
Before any modeling starts, you need clarity on what the walkthrough accomplishes. Vague objectives lead to wasted time and revision cycles.
Ask yourself:
- What decision does this walkthrough need to support?
- Who’s watching it, and what matters most to them?
- What specific concerns do you need to address?
- Will this be marketing-focused or approval-focused?
A walkthrough for securing municipal zoning approval differs dramatically from one marketed to residential buyers. One emphasizes traffic flow and site integration; the other highlights aesthetic appeal and lifestyle benefits.
Phase 2: Develop Accurate 3D Models
3D modeling is where accuracy matters most. Models must reflect actual architectural designs, material selections, site context, and spatial relationships without exaggeration.
This phase includes:
- Converting architectural drawings into precise 3D geometry
- Modeling the building footprint and site context
- Creating landscape and streetscape elements
- Detailing interior finishes and fixtures
- Adding adjacent buildings and environmental context
Skipping detail here creates problems later. A 2-inch modeling error compounds through rendering and ultimately damages credibility.
Accurate 3D models are the foundation. Shortcuts here require costly revisions in later phases.
Phase 3: Render High-Quality Visuals
Rendering transforms 3D geometry into photorealistic images using specialized software. This step controls lighting, materials, textures, shadows, and atmospheric conditions.
Common rendering approaches:
- Real-time rendering engines (Unity, Unreal Engine) for interactive experiences
- Production renderers (V-Ray, Lumion) for maximum photorealism
- Hybrid approaches combining speed and quality
Rendering high-quality architectural images requires balancing computation time against visual fidelity. A 4K render might take hours; a mobile-optimized version minutes.
Phase 4: Animate Camera Paths and Transitions
This is where static 3D models become moving experiences. You choreograph the camera’s journey through the space, controlling speed, timing, and which features get highlighted.
Camera path decisions affect:
- Pacing (how quickly viewers move through spaces)
- Emphasis (which features viewers linger on)
- Emotional impact (dramatic angles versus practical ones)
- Narrative flow (the story the walkthrough tells)
Phase 5: Add Interactive Elements
Interactivity transforms passive viewing into active exploration. Users gain the ability to toggle features, adjust lighting conditions, switch design options, or control camera movement.
Common interactive features:
- Material and finish selection toggles
- Day/night lighting conditions
- Seasonal variations
- Floor plan overlays synchronized with 3D view
- Information hotspots with project details
Phase 6: Compile and Optimize
Final assembly involves integrating all components—models, renders, animations, interactivity—into a cohesive experience. File optimization ensures fast loading across devices without quality loss.
This includes:
- Compressing assets for web distribution
- Testing on multiple devices and browsers
- Optimizing load times
- Creating fallback options for older technology
Phase 7: Share and Gather Feedback
Distribution matters. A stunning walkthrough nobody can easily access doesn’t drive decisions.
Effective sharing methods:
- Cloud-based viewers requiring no software installation
- Email links for remote stakeholders
- On-site presentations with professional equipment
- Virtual reality setups for immersive experiences
- Mobile-optimized versions for tablet reviews
Pro tip: Schedule walkthrough creation early in your design process, not at the end. Using walkthroughs during design phases catches issues before they become expensive problems.
Essential Features in Real Estate and Architecture
Not every 3D walkthrough feature matters equally. Some drive decisions; others are nice-to-have extras that complicate production without adding value.
Focusing on essential features keeps your walkthrough compelling while staying on budget and schedule.
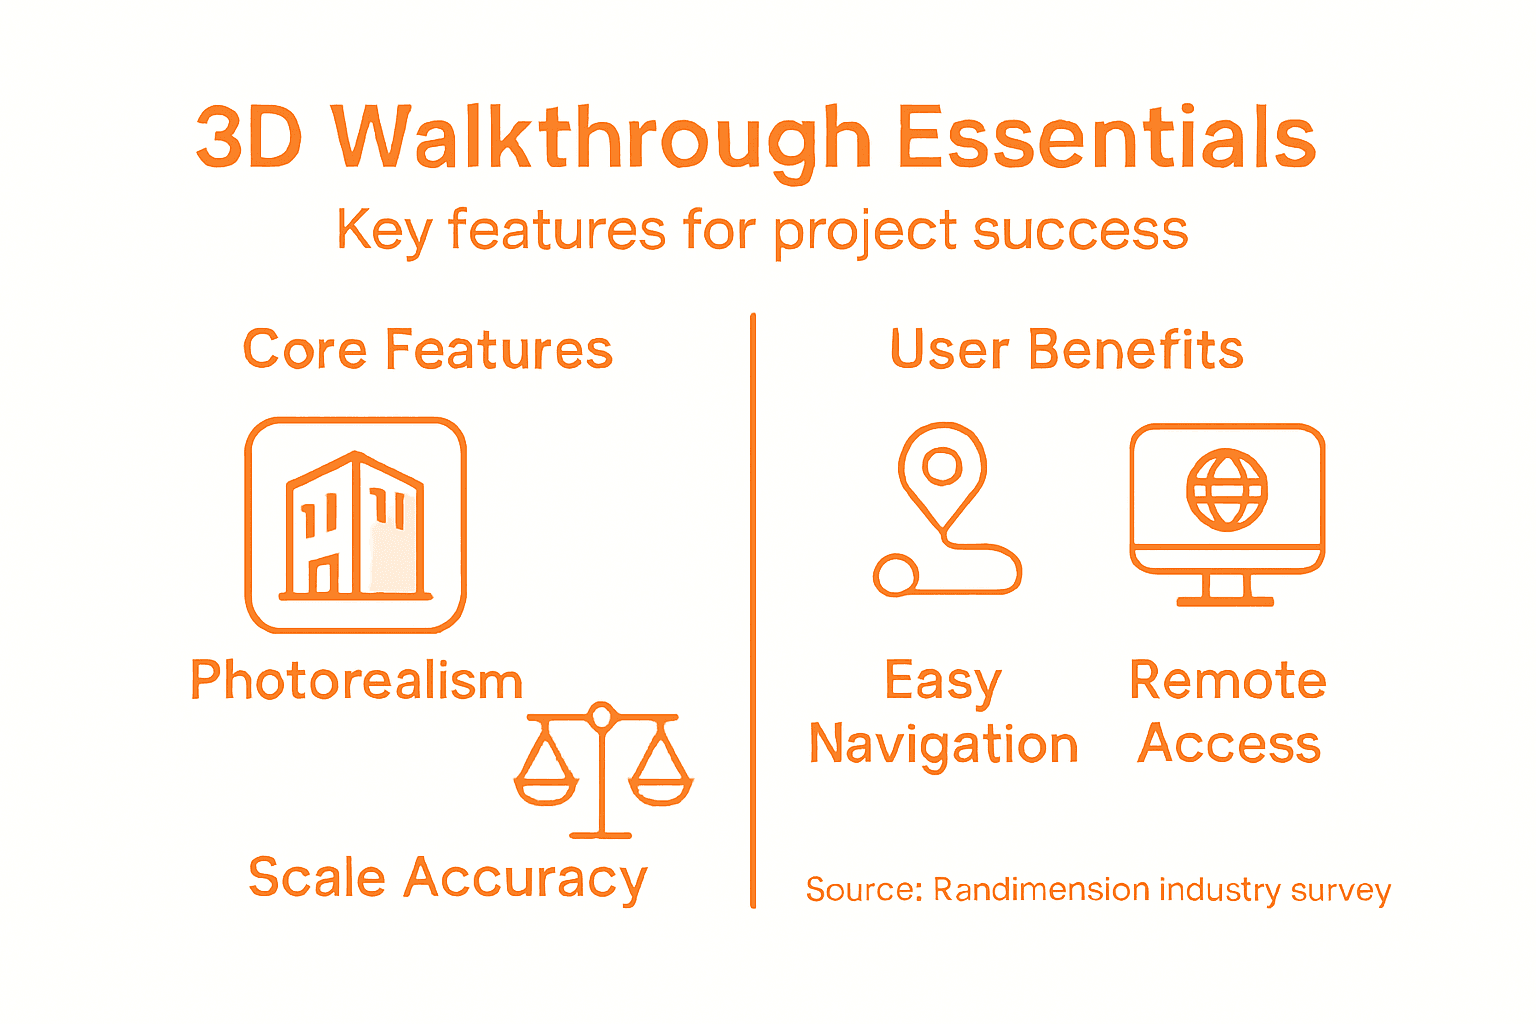
Photorealistic Visualization
Photorealism is non-negotiable. Stakeholders need to see materials, finishes, and lighting conditions as they’ll actually appear, not stylized or ambiguous interpretations.
Photorealistic features include:
- Accurate material textures with proper wear and aging
- Realistic shadows cast by actual sun angles and times of day
- Proper reflections in glass, water, and polished surfaces
- Accurate color reproduction without oversaturation
- Depth of field effects that mimic human vision
When a rendering looks fake, stakeholders question the entire project. Photorealism builds trust immediately.
Here is a summary of how 3D walkthrough features drive business outcomes:
| Feature | What It Does | Business Impact |
|---|---|---|
| Photorealism | Shows true materials and lighting | Builds trust, wins approvals |
| Interactive Navigation | Users explore spaces freely | Reveals issues early, reduces revisions |
| Real-Time Design Toggling | Instantly swap options | Accelerates stakeholder decisions |
| Remote Accessibility | Easy access on any device | Expands stakeholder reach |
| Accurate Scale | Dimensions match actual plans | Prevents costly misunderstandings |
Interactive Navigation Controls
Giving users control transforms passive viewing into active exploration. Interactive navigation means stakeholders move through spaces at their own pace, examining details that matter to them.
Essential navigation features:
- Smooth camera movement (WASD keyboard controls or mouse drag)
- Zoom capability for examining materials and details
- Free-look mode allowing 360-degree viewing
- Jump-to-location buttons for quick transitions
- Mobile touch controls for tablet and smartphone access
Let users explore. They’ll notice design issues and opportunities you might have missed.
Users exploring at their own pace catch details that guided tours overlook.
Realistic Lighting and Material Textures
Photorealistic material representation is what separates convincing walkthroughs from unconvincing ones. A granite countertop must look like granite, not plastic. Wood flooring needs visible grain and variation.
Priority textures for architecture projects:
- Facade materials (brick, stone, metal, glass)
- Interior finishes (flooring, wall coverings, trim)
- Landscaping (grass, trees, hardscaping materials)
- Furnishings and fixtures
Lighting deserves equal attention. Morning light differs dramatically from afternoon light. Show your project under conditions stakeholders actually care about.
Spatial Flow and Scale Accuracy
Dimensions must be exact. A bedroom that looks spacious on screen but proves claustrophobic in reality destroys credibility permanently.
Scale accuracy means:
- Ceiling heights reflecting actual specifications
- Room dimensions matching floor plans precisely
- Doorway widths and heights proportionally correct
- Furniture scaled to realistic dimensions
- Spatial relationships between rooms faithful to designs
Stakeholders develop spatial intuition from walkthroughs. Get scale wrong and approvals stall.
Remote Accessibility
Remote access matters more now than ever. Walkthroughs must function on standard devices without specialized software, allowing stakeholders to explore from home offices or job sites.
Accessibility requirements:
- Web-based viewing (no downloads or installations)
- Mobile optimization for tablets and smartphones
- Fast loading times (under 5 seconds)
- Compatibility with common browsers
- Offline viewing options for presentations without internet
Real-Time Design Modification
The ability to toggle design options instantly transforms walkthroughs from fixed presentations into exploration tools. Show different facade materials, interior color schemes, or landscape variations without separate files.
Toggleable options accelerate decisions:
- Material and finish alternatives
- Lighting conditions (day/night, seasons)
- Furniture layouts
- Design variants
- Feature toggles (amenities on/off)
Pro tip: Prioritize photorealism and accurate scale above all other features. Everything else serves these two foundations—cut features that compromise them.
Costs, Challenges, and Common Mistakes to Avoid
3D walkthroughs demand significant investment in time and resources. Understanding realistic costs and avoiding pitfalls separates successful projects from budget disasters.
Being prepared prevents expensive mistakes that derail timelines and stakeholder confidence.
Understanding Walkthrough Costs
Cost varies dramatically based on project scope, complexity, and desired quality level. A simple residential interior costs far less than a sprawling mixed-use development.
Typical cost factors:
- Project size (small residential versus large commercial)
- Modeling complexity (simple geometry versus intricate details)
- Rendering quality (standard resolution versus 4K photorealism)
- Animation requirements (guided paths versus interactive control)
- Interactive features (basic navigation versus multiple toggleable options)
- Timeline urgency (standard production versus expedited delivery)
Expect to invest between $5,000 and $50,000+ depending on these variables. Residential projects typically fall toward the lower end; complex commercial projects toward the higher end.
Cost doesn’t equal value. A $10,000 walkthrough that secures funding provides infinitely better return than a $30,000 walkthrough nobody watches.
Common Challenge: Scope Creep
Scope creep destroys budgets faster than any other factor. Vague briefs lead to endless revisions and feature additions that were never planned.
Prevent scope creep by:
- Writing detailed specifications before production starts
- Defining exactly which areas require modeling detail
- Specifying camera paths and interactive features upfront
- Limiting revision rounds in your contract
- Setting clear approval processes with stakeholder sign-off
Once production starts, every change costs time and money. The client who decides mid-project they want day/night toggles creates weeks of additional rendering work.
Detailed specifications prevent costly revisions. Vague briefs guarantee them.
Challenge: Inaccurate or Outdated Design Data
Walkthroughs built from incomplete or outdated drawings create fundamental problems. If your 3D models don’t match current designs, the entire walkthrough loses credibility.
This happens when:
- Architectural drawings weren’t finalized before modeling started
- Design revisions occurred without updating the 3D model
- Site surveys were incomplete or outdated
- Material specifications changed mid-project
Solution: Lock architectural designs before walkthrough production begins. Schedule walkthroughs after, not during, active design phases.
Common Mistake: Over-Complexity
Adding features doesn’t guarantee better results. Too many toggleable options, excessive detail in non-critical areas, or overly long guided sequences create confusion rather than clarity.
Think strategically about:
- Which areas actually need photorealistic detail
- What interactive features users actually need
- Appropriate animation pacing and timing
- Cognitive load on viewers navigating options
A simple, focused walkthrough beats a complicated one every time.
To help manage projects, here’s a comparison of typical 3D walkthrough pitfalls and proven solutions:
| Common Mistake | Resulting Problem | Effective Solution |
|---|---|---|
| Scope Creep | Unexpected costs and delays | Lock features and revision limits |
| Outdated Design Data | Loss of credibility | Use finalized, current drawings |
| Over-Complexity | User confusion | Focus on essential features |
| Ignoring Mobile Output | Poor mobile user experience | Optimize files and controls for mobile |
| Unrealistic Lighting | Stakeholder distrust | Use true-to-life lighting and color |
Mistake: Ignoring Mobile Optimization
Many stakeholders first experience walkthroughs on tablets or phones. If your walkthrough loads slowly or functions poorly on mobile devices, you’ve failed before starting.
Mobile requirements:
- File sizes optimized for mobile networks
- Touch-friendly interface controls
- Fast initial load times
- Battery-efficient rendering
- Responsive design across screen sizes
Mistake: Poor Lighting and Oversaturated Colors
Amateurish walkthroughs use dramatic, oversaturated lighting that looks cinematic but unrealistic. Stakeholders immediately recognize the artificiality and trust erodes.
Photorealism requires:
- Realistic lighting color temperatures
- Natural shadow falloff
- Subtle rather than dramatic contrast
- Accurate sky conditions
- Appropriate time-of-day lighting without exaggeration
Mistake: Ignoring Context
Buildings don’t exist in isolation. Walkthroughs showing only the structure without surrounding context create spatial disorientation.
Always include:
- Adjacent buildings and streetscape
- Landscape and hardscaping context
- Sky and environmental conditions
- Pedestrian and vehicle context at appropriate scales
Pro tip: Build walkthrough timelines with 20-30% buffer for revisions and unexpected challenges. Projects that feel rushed cut corners on quality that stakeholders immediately notice.
Elevate Your Project Presentations with Expert 3D Walkthroughs
Struggling to convey the full vision of your architectural or real estate project before construction begins The article highlights key challenges like achieving photorealism, ensuring accurate scale, and providing interactive navigation that truly engages stakeholders. Your goal is to deliver immersive, decision-driving walkthroughs that reduce costly revisions and accelerate approvals.
At Rendimension, we specialize in crafting high-quality, photorealistic 3D walkthroughs designed to tackle these exact pain points. Our services include accurate 3D modeling, real-time interactive walkthroughs, and VR-enabled experiences that bring your designs to life with precision and emotional impact. Let us help you transform complex designs into clear, persuasive visual stories that win stakeholder trust and speed project success.

Ready to transform your presentations and captivate your audience Start your journey with Rendimension today and experience the difference of professional architectural visualization tailored to your needs. Discover how our expert 3D walkthrough solutions can save you time and money while enhancing every phase of your project. Visit us now to learn more and get started.
Frequently Asked Questions
What are 3D walkthroughs?
3D walkthroughs are interactive, immersive experiences that allow users to navigate through a 3D model of a project in real time, providing a realistic representation of the final design.
How do 3D walkthroughs differ from traditional renderings?
Unlike traditional renderings, which are static images, 3D walkthroughs offer real-time interaction, allowing stakeholders to explore spaces and make informed decisions rather than just viewing a fixed perspective.
What types of 3D walkthroughs are available for presentations?
There are several types of 3D walkthroughs including real-time interactive walkthroughs, guided narrative walkthroughs, still-frame panoramic walkthroughs, and VR-enabled walkthroughs, each catering to different presentation needs and audience engagement levels.
What are the benefits of using a 3D walkthrough in project presentations?
3D walkthroughs enhance spatial understanding, reduce design ambiguity, and help stakeholders visualize the project accurately, leading to quicker approvals and fewer costly revisions.