Are your Maya renders missing that lifelike quality? Achieving photorealism is now within reach thanks to vray for maya and its groundbreaking 2026 features. Whether you are just starting out or you already create professional 3D images, this guide is designed to help you unlock the full potential of realistic rendering.
You will learn how to set up vray for maya, discover essential tools, explore advanced lighting and materials, and optimize every stage of your workflow. Step-by-step tutorials, expert tips, and real-world examples will guide you to professional results. Start mastering vray for maya today and elevate your visualizations.
Getting Started with Vray for Maya 2026
Embarking on your journey with vray for maya opens the door to industry-leading photorealism and creative control. Whether you're new to rendering or upgrading your toolkit, this guide will help you set up, configure, and optimize vray for maya 2026 with confidence.
What is Vray for Maya?
Vray for maya is a powerful, industry-standard renderer seamlessly integrated into Autodesk Maya. It excels at producing high-quality, photorealistic images through advanced global illumination, physically-based rendering, and hybrid CPU/GPU workflows.
Compatible with Maya 2026 and earlier versions, vray for maya also connects with 3ds Max, Rhino, SketchUp, and Blender. This flexibility makes it a top choice for studios working across multiple platforms.
Compared to Maya’s built-in Arnold renderer, vray for maya offers greater speed, deeper material libraries, and more robust lighting tools. Its strengths shine in architecture, product visualization, animation, and VFX, where realism and control are essential.
Many award-winning projects rely on vray for maya for their distinctive look. To dive deeper into achieving lifelike results, explore this Guide to Photorealistic Rendering.
System Requirements and Installation
Before installing vray for maya 2026, ensure your system meets the following specifications:
| Component | Minimum | Recommended |
|---|---|---|
| CPU | 4-core processor | Modern multi-core (8+) |
| GPU | NVIDIA GTX 1060 | NVIDIA RTX 3070/4070+ |
| RAM | 8GB | 16GB or more |
| Storage | 10GB free space | SSD (NVMe preferred) |
| OS | Windows 10/Mac/Linux | Latest OS, 64-bit |
GPU acceleration, especially with NVIDIA RTX series, significantly speeds up vray for maya renders. The software supports Maya versions 2019 through 2026.
To install:
- Download vray for maya from the Chaos website.
- Run the installer and follow prompts for Maya 2026.
- Activate your license online.
- Restart Maya and verify the Vray plugin is loaded.
If you experience issues, check your GPU drivers, confirm license activation, and review firewall settings. Typical problems include missing Vray menus or incomplete installations, often resolved by reinstalling or updating system drivers.
Initial Setup and Interface Overview
Once installed, integrating vray for maya into your workflow is straightforward. Access Vray from Maya’s main menu bar, where new toolbars and panels appear for rendering, materials, and lighting.
Key panels include:
- Vray Frame Buffer: Enhanced image preview and post-processing
- Material Editor: Manage and assign advanced Vray materials
- Light Lister: Control all scene lights from one panel
Customize your workspace by docking these panels for quick access. Run a test render using the Vray Frame Buffer to confirm everything is working correctly.
For beginners, explore the preset scenes and avoid overwriting default settings until you’re comfortable. Navigating vray for maya’s tools becomes intuitive with practice, and you’ll quickly discover features that streamline your rendering process.
Rendimension: Professional 3D Rendering Services
If you need professional-grade results from vray for maya, Rendimension is a trusted partner for high-quality visualizations. Their team specializes in architectural rendering, 3D walkthroughs, immersive VR experiences, and product visualization.
Having delivered over 1,000 projects worldwide, Rendimension offers fast turnaround, unlimited revisions, and flexible deliverables for both commercial and residential clients. Their award-winning portfolio demonstrates the power of vray for maya in real-world scenarios.
Whether you require a custom quote, a project consultation, or want to preview their photorealistic work, Rendimension ensures your concepts are realized with stunning accuracy and realism. Leverage their expertise to bring your vray for maya projects to life.
Essential Vray Features for Realistic Renders
Mastering realistic visualization in Maya starts with a deep understanding of the essential features that set vray for maya apart. Harnessing these tools will help artists produce lifelike renders that captivate and impress. Let us explore the core components that make up a professional workflow in vray for maya.
Vray Materials and Shaders
Materials are the foundation of photorealism in vray for maya. With physically-based shaders like VrayMtl, VrayBlendMtl, and VrayCarPaint, artists can create surfaces that mimic real-world properties. Vray’s material presets make it easy to achieve convincing glass, metal, and wood finishes right from the start.
Layered materials allow for complex surfaces, such as car paint with metallic flakes or aged marble. Subsurface scattering is essential for organic materials like skin and wax, capturing the way light softly diffuses beneath the surface.
Proper texturing and mapping are crucial. Seamless UVs and high-resolution textures help eliminate visible seams or stretching. For example, building a realistic chrome faucet or a polished marble countertop becomes achievable with these features.
Vray materials offer greater flexibility and accuracy compared to Maya Standard Surface. For a comprehensive look at these capabilities, see the V-Ray 6 for Maya Features overview from Chaos.
Lighting Techniques in Vray
Lighting defines the mood and realism of any render in vray for maya. Artists can choose from VraySun for outdoor daylight, VrayDome for HDRI-based environments, VrayRect for soft area lights, and VrayIES for precise architectural accenting.
Global Illumination (GI) settings, including Brute Force and Light Cache, simulate how light bounces naturally, enhancing realism. HDRI lighting is especially powerful for creating immersive, believable environments.
Light mixing in the Vray Frame Buffer lets users adjust lighting interactively, while color temperature and decay settings fine-tune the mood. A simple switch from daylight to a controlled studio setup can dramatically change the scene’s atmosphere.
GI options in vray for maya can improve render realism by up to 40 percent, ensuring every shadow and reflection is true to life.
Camera and Exposure Controls
Camera controls in vray for maya bring scenes to life with photographic precision. The VrayPhysicalCamera simulates real camera behavior, allowing depth of field, motion blur, and lens effects that add cinematic depth.
Control over exposure settings like ISO, shutter speed, and f-stop lets users match real-world lighting conditions. White balance and color grading can be set directly in the camera, streamlining the workflow.
For architectural projects, perspective correction ensures straight lines and accurate proportions. Artists can simulate professional photography, such as a shallow depth of field for product shots or dynamic motion blur for animation sequences.
With vray for maya, these camera features help bridge the gap between CG and reality, making renders indistinguishable from actual photographs.
Render Elements and Post-Processing
Render elements in vray for maya are essential for high-end compositing. By splitting a render into passes like diffuse, reflection, refraction, and Z-depth, artists gain complete control in post-production.
Multi-pass rendering enables fine-tuning of each aspect in software such as Photoshop or Nuke. The Vray Frame Buffer offers built-in denoising, color correction, and support for Look-Up Tables (LUTs), streamlining adjustments before exporting final images.
A typical workflow could involve adjusting reflections or shadows independently, preserving flexibility. Non-destructive editing ensures that changes do not compromise original render quality.
Professional artists rely on vray for maya’s robust post-processing tools to deliver polished, client-ready images efficiently.
Asset Management and Scene Organization
Efficient asset management is critical for large scenes in vray for maya. Organizing textures, proxies, and 3D assets prevents errors and streamlines collaboration.
Vray proxies are invaluable for handling high-poly objects like trees or furniture without slowing down the viewport. Scene layers and referencing keep complex projects manageable and easy to navigate.
For example, an architectural visualization may involve hundreds of assets. By using organized folders and clear naming conventions, teams reduce the risk of missing textures or lost files.
Data shows that organized scenes in vray for maya can reduce render errors by 30 percent, saving time and avoiding costly mistakes.
Advanced Rendering Workflows in Vray for Maya
Unlocking the full power of vray for maya means moving beyond basics and mastering advanced workflows. These techniques empower you to produce professional, photorealistic results while keeping efficiency at the forefront. Let’s explore how to optimize render settings, refine textures, harness lighting, render animations, and integrate seamlessly with Maya’s toolset.
Optimizing Render Settings for Quality and Speed
Optimizing vray for maya render settings is essential for balancing image quality with production speed. Start by choosing between bucket and progressive image samplers, as each has unique benefits for different scenes. Adjusting noise threshold and subdivisions helps achieve crisp results without excessive render times.
Adaptive sampling and automatic denoising, introduced in recent versions of vray for maya, allow the renderer to focus resources where they matter most. Leverage hybrid GPU and CPU rendering to maximize hardware potential. For example, switching from CPU-only to GPU acceleration can cut render times by up to 70 percent.
| Setting | Quality Impact | Render Time Impact |
|---|---|---|
| Bucket Sampler | High | Moderate |
| Progressive Sampler | Medium | Fast |
| Adaptive Sampling | High | Low |
| Denoising | High | Low |
Test different settings on sample frames before full renders. With the right approach, vray for maya can reduce overall render times by 50 percent while maintaining photorealistic output.
Photorealistic Texturing and UV Mapping
Achieving realism in vray for maya relies on seamless UV mapping and detailed textures. Start by unwrapping your models carefully to avoid stretching and seams. Use high-resolution PBR textures for materials like brick, wood, or fabric.
To streamline your workflow, consider using Vray’s support for bump, normal, and displacement maps. These add surface detail without increasing geometry. For a practical guide, see How to Prepare 3D Models for photorealistic results, which covers best practices from UV layout to texture assignment.
A typical workflow might look like:
# UV Mapping Example in Maya
select_object("Wall")
automatic_mapping()
layout_uvs(scale=1.0, padding=0.01)
apply_texture("Brick_PBR.jpg")
Careful asset prep ensures vray for maya delivers flawless, lifelike surfaces every time.
Advanced Lighting and Environmental Effects
Lighting is where vray for maya truly shines. Use VraySun and VraySky for daylight scenes, or VrayRect and VrayIES for studio setups. Global Illumination (GI) methods like Brute Force and Light Cache contribute to natural light bounce and realism.
Boost atmosphere with volumetric lighting or Vray Environment Fog, ideal for moody interiors or exterior dusk scenes. Caustics simulate sparkling light through glass and water, while weather effects like mist or rain add cinematic impact.
For example, adding “god rays” through windows or subtle haze in large spaces can increase render realism by 25 percent. Experiment with environmental settings to create immersive, dynamic visuals in vray for maya.
Animation Rendering with Vray
Rendering animations in vray for maya requires special considerations to ensure consistency across hundreds or thousands of frames. Always cache GI solutions to prevent flicker. Use distributed rendering or batch tools to divide the workload across multiple machines.
Set up your camera paths and scene changes carefully. For animated flythroughs, optimize geometry and textures to avoid bottlenecks. Vray for maya supports rendering sequences with stable lighting and smooth motion blur.
Tips for managing large frame sequences:
- Use Vray’s animation presets for GI.
- Monitor memory usage to prevent crashes.
- Test small frame ranges before committing to full renders.
Efficient animation workflows keep your projects on track and your results professional.
Integrating Vray with Maya’s Toolset
Vray for maya integrates seamlessly with advanced Maya tools such as XGen for hair, MASH for motion graphics, and nParticles for effects. You can assign Vray shaders to XGen hair for realistic fur or grass, and use proxies to manage massive instanced assets.
Combining vray for maya with other renderers like Arnold is possible in mixed pipelines. Export assets in universal formats for use across different software if needed.
For example, rendering XGen-generated hair with Vray shaders produces lifelike results suitable for close-up animation. This level of integration ensures vray for maya remains a top choice for studios requiring flexibility and quality.
Pro Tips and Troubleshooting for Vray in 2026
Mastering vray for maya in 2026 requires not just technical know-how but also practical strategies for solving issues and streamlining your workflow. Whether you are a beginner or an experienced user, these pro tips will help you unlock the full potential of your renders, save time, and avoid common pitfalls.
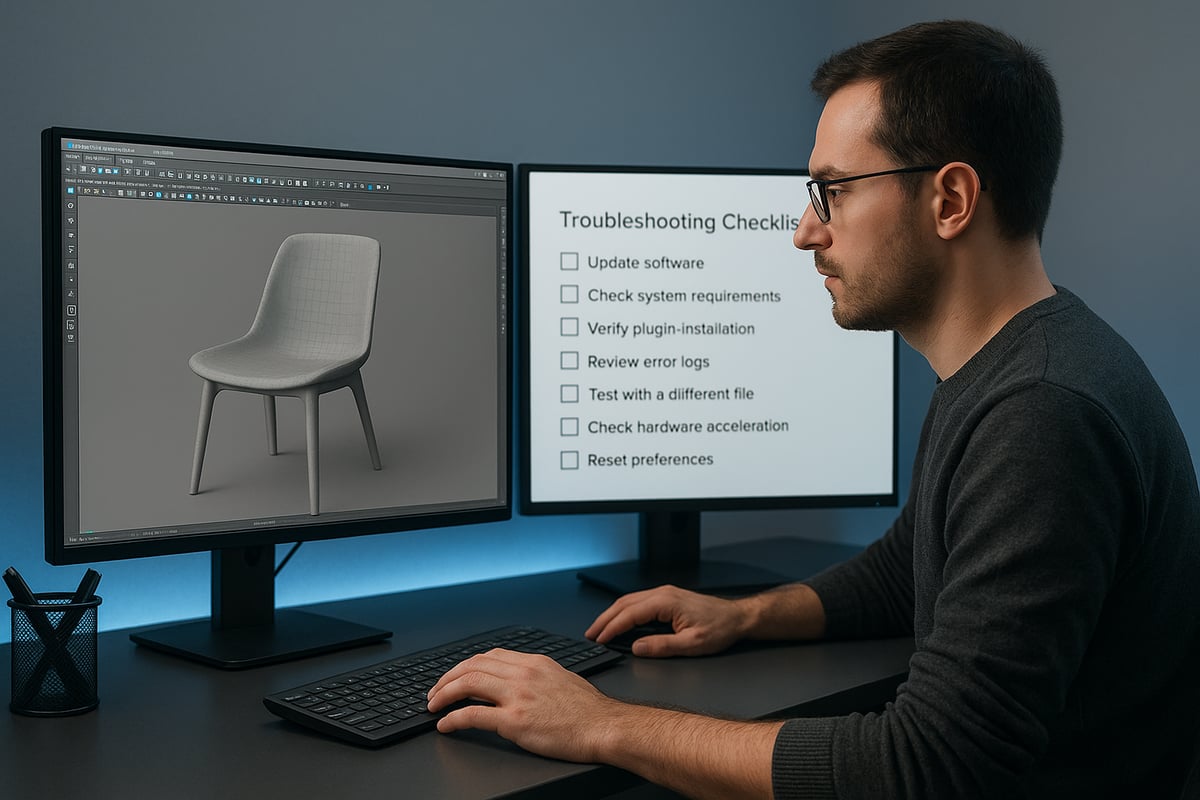
Common Rendering Issues and Solutions
Even seasoned users encounter challenges when working with vray for maya. Black or missing textures, flickering GI, and unwanted artifacts can disrupt your workflow. The root causes often relate to broken texture paths, insufficient memory, or outdated plugins.
To resolve black or missing textures:
- Double-check all file paths in the Hypershade and File nodes.
- Use Maya’s File Path Editor to relink assets.
- Convert textures to supported formats for vray for maya.
Fireflies and excessive noise often result from insufficient sampling or problematic light sources. Increase subdivisions in the VrayLight and adjust noise thresholds in the render settings. Updating to the latest version also helps, as new features like firefly removal introduced in V-Ray 7 for Maya Release can make a significant difference. If scenes crash or render slowly, monitor your system’s RAM usage and optimize heavy geometry with proxies.
For GI flicker in animations:
- Use cached GI solutions like Irradiance Map or Light Cache.
- Enable “use camera path” for consistent lighting across frames.
A table can help summarize solutions:
| Issue | Solution |
|---|---|
| Missing textures | Relink paths, use supported formats |
| Noise/fireflies | Increase samples, enable denoising |
| GI flicker | Cache GI, use stable settings |
| Crashes/memory | Optimize scene, use proxies, monitor RAM |
Staying proactive with vray for maya troubleshooting ensures smooth production and professional results.
Speeding Up Your Workflow
Efficiency is key when using vray for maya on complex scenes. Proxies and instances minimize memory usage for assets like trees or crowds. Use the Render Region tool to test specific areas without rendering the entire frame.
Additional workflow boosters:
- Delete unused nodes and history to streamline the scene.
- Lower polycount for distant or background objects.
- Use Maya’s Viewport 2.0 with Vray IPR for real-time feedback.
Iterative rendering—making small adjustments and testing frequently—can drastically reduce turnaround time. These habits help you achieve faster, high-quality results with vray for maya.
Best Practices for File Management and Backups
A well-organized project folder is essential for vray for maya users. Store all textures, references, and assets within the project directory to avoid broken links. Adopt a clear folder structure, such as:
/Project
    /scenes
    /images
    /sourceimages
    /textures
    /renders
Implement version control by saving incrementally (e.g., “scene_v01.mb,” “scene_v02.mb”). Automated backup scripts can safeguard your work and prevent data loss.
Regularly back up both scene files and rendered outputs to external drives or cloud storage. This discipline is crucial, as proper file management with vray for maya prevents up to 80% of lost work incidents.
Staying Updated with Vray and Maya
Keeping vray for maya and Maya itself up to date is vital for stability and access to new features. Visit the Chaos Group’s website for the latest updates, patches, and hotfixes. Engage with community forums to learn about recent improvements, such as enhanced GPU denoising and streamlined UI updates.
Participate in beta testing if you want early access to cutting-edge tools. Staying informed ensures your vray for maya workflow remains efficient and competitive.
Community Resources and Learning Paths
The vray for maya community is a rich source of knowledge and inspiration. Official Chaos documentation, tutorials, and webinars offer in-depth technical guidance. Autodesk forums and user groups provide troubleshooting support and peer advice.
Online courses and YouTube channels can help you refine your skills and stay current. Engaging in Vray render challenges or exploring articles like Photorealism in Architecture deepens your understanding of photorealistic visualization standards.
By leveraging these resources, you stay ahead in the evolving world of vray for maya.
Future Trends: Vray for Maya and Realism in 2026
The future of vray for maya is rapidly evolving, with new technologies set to redefine what is possible in 3D rendering. As artists and studios look ahead to 2026, several trends will drive photorealism, efficiency, and creative potential. These advancements will empower users to deliver more immersive and sustainable visualizations than ever before. For a deeper dive into how these trends will shape the industry, explore the Future of 3D Rendering.
AI and Machine Learning in Rendering
AI and machine learning are transforming vray for maya by automating complex tasks and dramatically improving render quality. The integration of AI denoisers enables artists to achieve noise-free images in seconds, even at lower sample rates, slashing render times. Machine learning algorithms now assist in material creation and light analysis, making it easier to achieve realistic results with less manual tweaking. For example, AI-powered tools can reduce noise by up to 80 percent, while predictive sampling adjusts render settings on the fly. By 2026, these technologies are expected to double productivity for 3D artists using vray for maya.
Real-Time and Interactive Rendering
The demand for real-time feedback is reshaping the vray for maya workflow. Features like Vray Vision allow instant preview of scenes, helping artists iterate lighting and materials quickly. GPU advancements provide live updates directly inside Maya, making client presentations and design reviews more interactive. Real-time rendering is especially valuable for VR walkthroughs and rapid prototyping. Studies show that real-time previews can cut revision cycles by 30 percent, enabling faster decision-making. As vray for maya continues to evolve, expect these interactive capabilities to become standard in all professional pipelines.
Cloud Rendering and Collaboration
Cloud-based rendering is revolutionizing how teams use vray for maya for large projects. By leveraging scalable resources, artists can render complex scenes without local hardware limitations. This approach supports remote collaboration, as teams in different locations can access and contribute to shared projects seamlessly. Cloud rendering also offers cost-effective scalability, letting studios pay only for the resources they use. Adoption has surged, with a 40 percent increase since 2024, as more professionals recognize the benefits of flexible, distributed workflows in vray for maya.
VR, AR, and Immersive Visualizations
Immersive technologies are expanding the possibilities of vray for maya, allowing users to export renders for VR and AR platforms. Creating 360 degree panoramas or interactive scenes lets clients experience designs in a fully immersive environment. Common use cases include real estate walkthroughs, product demos, and educational applications. For instance, architects can guide clients through virtual spaces, making approvals more efficient. Demand for VR and AR visualization with vray for maya is projected to grow 25 percent annually, reflecting the increasing importance of interactive experiences.
Sustainability and Efficiency in Rendering
Sustainability is becoming a core focus in the vray for maya ecosystem. Developers are introducing energy-efficient rendering techniques and optimizing workflows to minimize hardware usage. Cloud rendering offers a greener alternative to local rendering by reducing the energy footprint of on-premises systems. Artists are encouraged to adopt eco-friendly practices, such as optimizing scenes and using lower-power hardware when possible. Green rendering initiatives are gaining traction in 2026, helping the vray for maya community reduce its environmental impact while maintaining high-quality results.
