Unlock the full creative power of vray scatter to transform your 3D environments in 2026. This essential guide will help you master efficient scattering workflows, optimize your render performance, and achieve stunning photorealistic results with ease.
Discover how vray scatter streamlines the process of populating scenes, addresses common challenges, and enhances both realism and speed. Whether you are an aspiring artist or a seasoned professional, this comprehensive guide covers everything from fundamentals to advanced tips.
Ready to accelerate your workflow and elevate your renders? Dive in and start mastering vray scatter today.
Understanding Vray Scatter: Features and Capabilities
Unlocking the power of vray scatter begins with understanding its fundamental role in 3D visualization. Vray scatter is a specialized plugin designed for populating expansive environments with thousands or even millions of objects, such as trees, rocks, or urban features. Its primary purpose is to automate and optimize the distribution of assets across complex terrains, ensuring natural diversity without manual placement.
Compared to alternatives like Forest Pack Pro or Multi Scatter, vray scatter stands out for its seamless integration with Vray and its evolving feature set. Since its inception, the tool has revolutionized workflows for artists creating forests, cityscapes, and large outdoor scenes. For those new to digital environments, you can explore the basics of rendering and how vray scatter fits into the broader process in this guide: What is 3D rendering. For example, in architectural visualization, vray scatter enables rapid, realistic forest creation with minimal effort.
What is Vray Scatter?
Vray scatter enables artists to efficiently distribute massive numbers of objects throughout a scene with minimal memory usage. Its standout feature is support for scattering millions of assets, making it ideal for large-scale projects. The plugin integrates tightly with Vray Proxies, allowing users to manage heavy geometry without bogging down the viewport or rendering process.
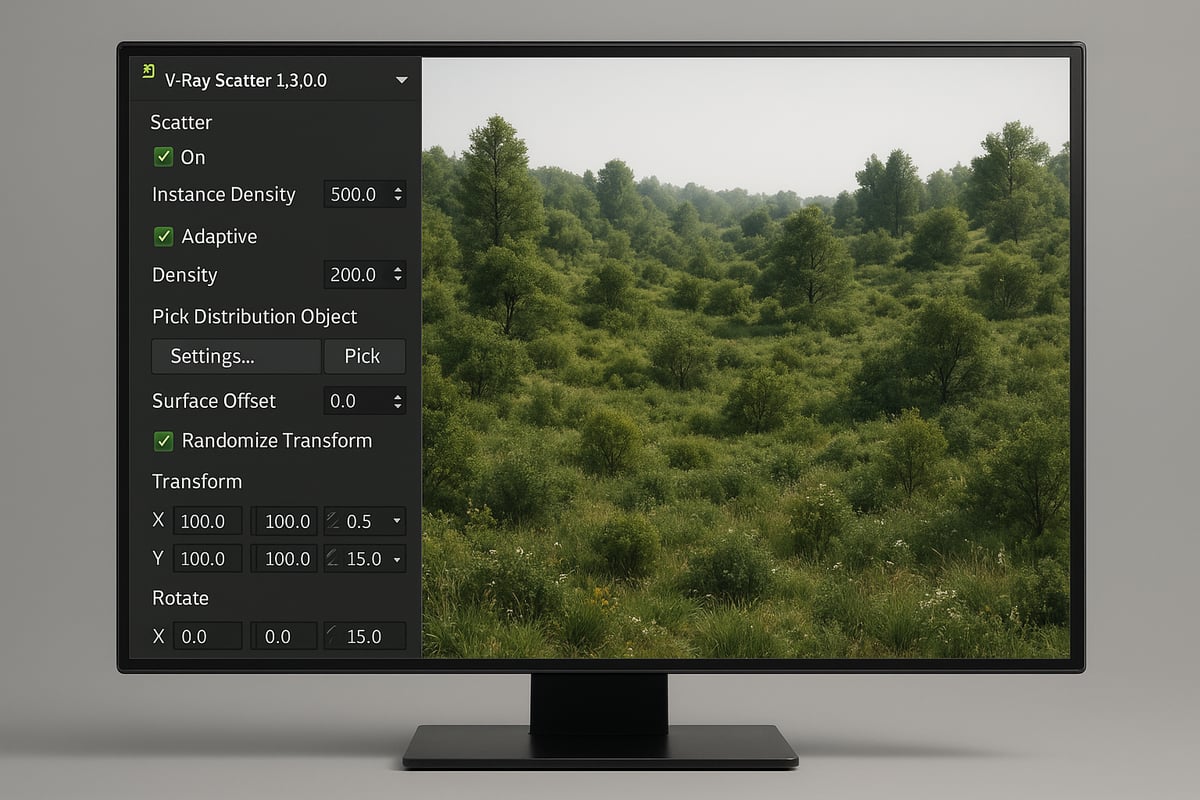
Randomization settings in vray scatter give users control over placement, rotation, scale, and distribution patterns. This flexibility ensures each scene remains unique and visually compelling. The tool’s compatibility with custom objects and extensive asset libraries further expands creative possibilities. Real-time preview capabilities allow artists to see changes instantly, streamlining the design process.
Core Features of Vray Scatter
Efficiency is at the heart of vray scatter’s appeal. By automating asset placement, users can save countless hours compared to manual methods. Natural, non-repetitive distributions lend authenticity to environments, dramatically improving scene realism.
Vray scatter also enhances render performance by optimizing memory and computational demands. The plugin handles complex terrains and vast architectural projects with ease. For instance, users on the CGArchitect forum have reported rendering scenes with over 50,000 trees, with only a 30 second increase in render time—a testament to the tool’s power.
Benefits of Efficient Scattering
The 2026 version of vray scatter introduces significant improvements for professionals and studios alike. Enhanced GPU acceleration delivers faster performance, making it possible to render even denser environments with ease. New UI and UX enhancements streamline the workflow, reducing setup time and minimizing errors.
Expanded compatibility now includes broader support for platforms like SketchUp and 3ds Max. Asset management tools have also been improved, making it simpler to organize and deploy large libraries across multiple projects. These upgrades make vray scatter an even more indispensable asset for anyone aiming to produce high-end, photorealistic visualizations.
Vray Scatter in 2026: What’s New?
In summary, vray scatter has evolved into a robust and flexible solution for scattering assets in 3D scenes. Its combination of speed, efficiency, and realism addresses the most pressing challenges faced by visualization professionals. Whether creating a lush forest for an architectural render or managing vast urban landscapes, vray scatter remains a top choice for achieving stunning results in 2026.
Step-by-Step Guide: Setting Up Vray Scatter for Maximum Efficiency
Unlocking the full capabilities of vray scatter begins with a streamlined, methodical setup. This step-by-step guide will walk you through preparing your scene, configuring scatter objects, perfecting distribution, optimizing performance, and reviewing your results. By following these best practices, you will achieve efficient, photorealistic environments while keeping your workflow fast and flexible.
Preparing Your Scene and Assets
To master vray scatter, start by organizing your 3D model for maximum efficiency. Group your terrain and objects logically, ensuring that layers are clearly labeled and easy to manage. This structure prevents confusion when adding scatter elements later in the process.
Use vray proxies for heavy geometry such as high-poly trees or rocks. Proxies dramatically reduce memory usage, allowing you to populate large areas without slowing down your scene. For example, in SketchUp, explode terrain groups to make them eligible for scattering, as discussed in user forums. This simple step ensures compatibility with vray scatter and prevents missing scatter instances.
Best practices for asset prep include:
- Keeping vegetation, rocks, and other scatter targets in separate groups or components.
- Assigning materials and textures before scattering.
- Testing proxy imports in a clean file before integrating into your main scene.
By laying a solid foundation, you guarantee vray scatter will perform smoothly and predictably throughout your workflow.
Creating and Configuring Scatter Objects
With your scene organized, select the base surface for vray scatter, such as a landscape mesh or terrain model. Initiate the scatter tool and assign your guest objects—trees, shrubs, rocks, or any compatible assets.
Apply vray scatter to your selection, then fine-tune settings to control how objects populate the surface. Adjust density sliders to increase or decrease the number of instances, and use falloff parameters to limit scattering to specific regions. For example, you might want denser vegetation near a building and sparser growth farther away.
Visual feedback is essential. Vray scatter provides colored boxes or viewport previews that show exactly where objects will appear. This immediate feedback lets you quickly spot errors and make adjustments before rendering.
Key configuration steps include:
- Assigning multiple guest objects for natural diversity.
- Tweaking distribution patterns (random, grid, or custom).
- Setting boundaries or exclusion zones for clearings or pathways.
By methodically configuring these options, you set the stage for a balanced, realistic environment.
Fine-Tuning Distribution and Randomization
To achieve natural variation, vray scatter offers randomization controls for placement, rotation, and scale. Use these options to break up repetitive patterns and mimic real-world ecosystems. For instance, randomly rotating trees prevents identical silhouettes, while scaling objects within a range adds organic diversity.
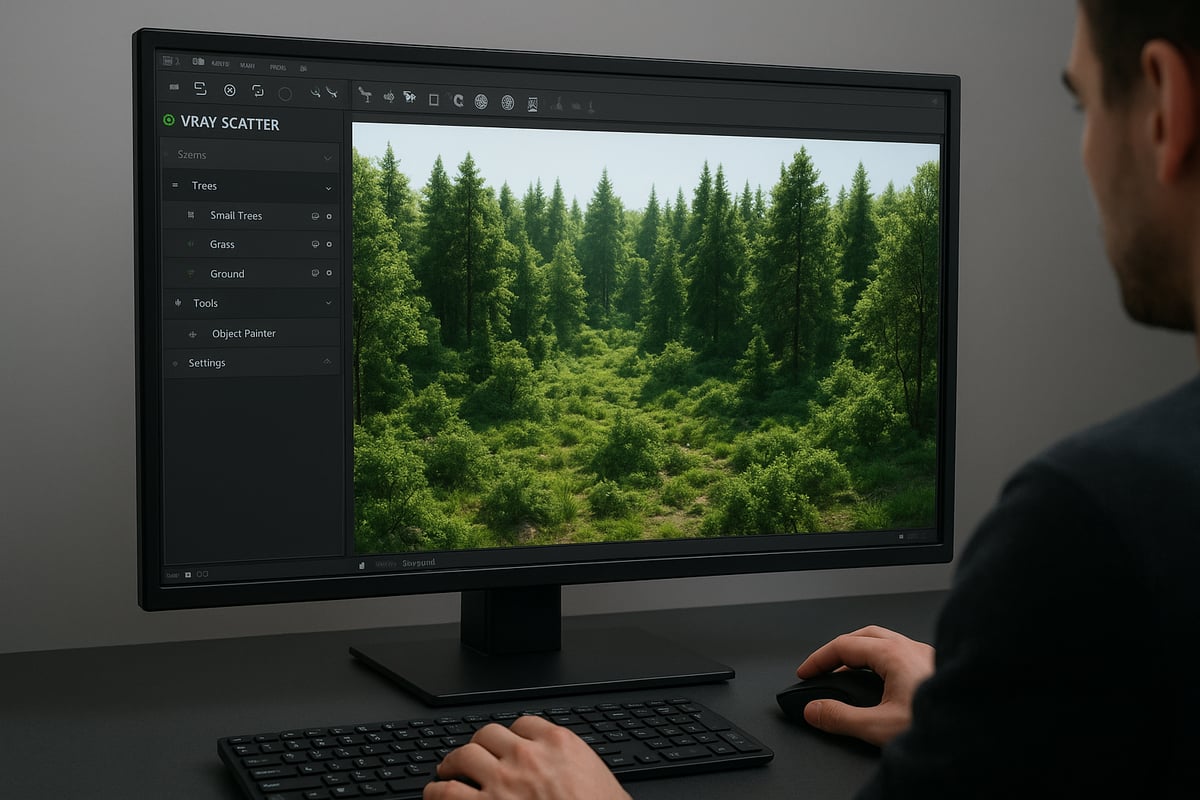
Layering multiple scatter systems allows you to build complexity. Start with a base layer of grass, then add shrubs, followed by taller trees. Each layer can have its own density and distribution, creating depth and realism. A common approach is staggering vegetation stages—placing younger plants in open areas and mature trees in dense clusters.
Consider camera distance: decrease detail for objects farther from the viewer. This technique, supported by the vray scatter community, improves performance without sacrificing visual quality.
Tips for effective randomization:
- Use unique seed values for each scatter system.
- Blend scatter masks to create natural transitions between environment zones.
- Regularly preview in the viewport to catch overlaps or gaps.
Fine-tuning these parameters ensures your vray scatter results look believable and visually rich.
Optimizing Render Performance
Efficient rendering is a key benefit of vray scatter. To minimize memory usage, always use proxies for heavy assets and disable global illumination (GI) on distant objects. This technique can significantly speed up render times, especially in scenes with thousands of trees or plants.
Balance scene complexity by adjusting the number of scatter instances and using lower-poly assets for background elements. Manage visibility by separating objects into layers and rendering only what is necessary for the final image.
For example, disabling GI on horizon trees can cut render times without impacting foreground realism. Community discussions, such as those found in Rendering Large Amounts of Trees in V-Ray, offer practical tips for handling scenes with 50,000 opacity-mapped trees, which can add just 30 seconds to your render.
Quick optimization checklist:
- Use proxies for all large assets.
- Separate scatter systems by distance from the camera.
- Adjust render settings for shadows and anti-aliasing based on object importance.
By applying these strategies, you harness the full power of vray scatter for large-scale environments.
Rendering and Reviewing Results
The final step with vray scatter is to run test renders, evaluate distribution, and refine settings. Start with low-resolution previews to check for missing or misplaced scatter objects. Use the “show scattered object” toggle in SketchUp or your chosen platform to troubleshoot visibility issues.
Iterate by adjusting density, randomization, or asset selection until you achieve the desired balance of realism and performance. Import preset vegetation files as needed, and shift positions to avoid obvious repetition. Each render cycle brings you closer to a photorealistic final result.
Remember, vray scatter is an iterative tool—refining your setup with each review ensures a polished outcome. Document settings and workflows for future projects to streamline your process even further.
By following these steps, you will consistently achieve stunning environments with vray scatter, ready for any architectural or visualization challenge.
Advanced Techniques: Customization, Layering, and Creative Uses
Unlocking the full potential of vray scatter requires more than basic setups. By mastering advanced techniques, you can create visually compelling, efficient, and highly customizable environments. Explore how to control patterns, layer assets, integrate libraries, and push creative boundaries with vray scatter.
Customizing Scatter Patterns and Masks
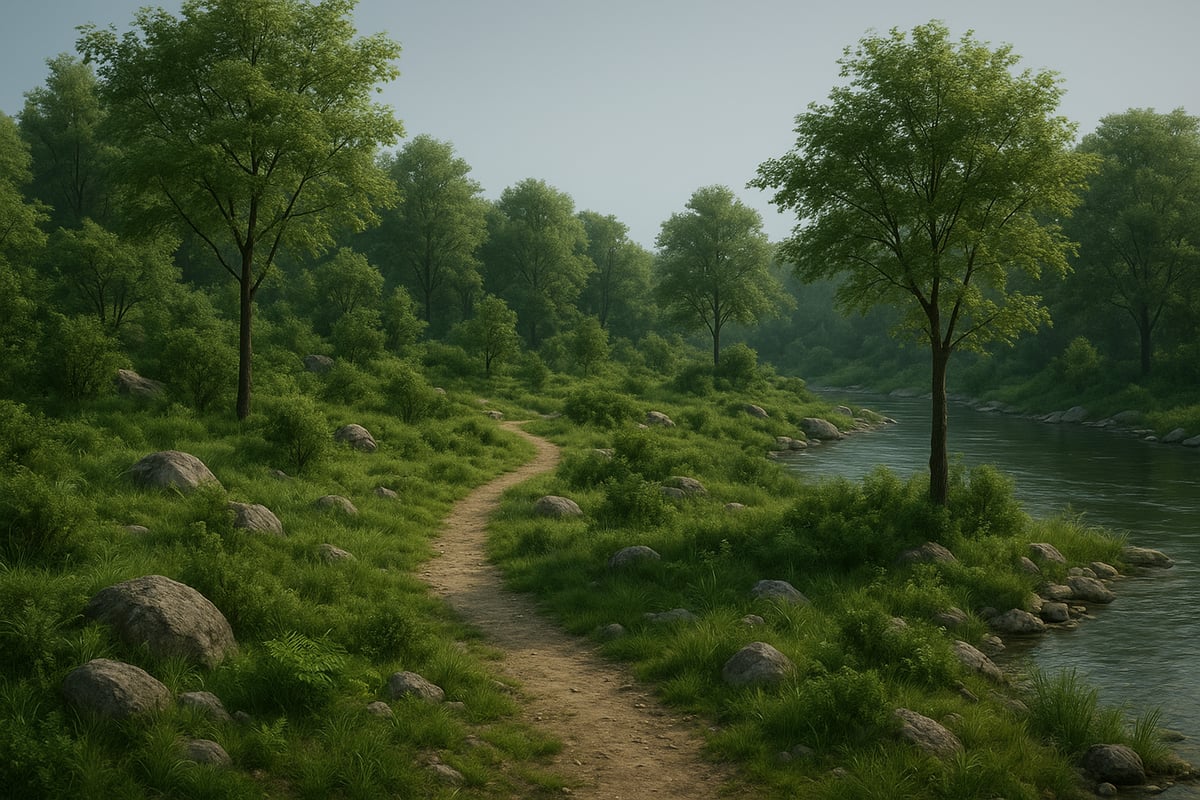
Customization is at the heart of creating believable scenes with vray scatter. Using custom masks and patterns lets you control exactly where assets appear, ensuring natural transitions and clearings.
To start, create black-and-white masks in your image editor, where white indicates areas for scattering and black prevents placement. Apply these masks within the vray scatter interface to designate dense forests, open meadows, or winding trails.
Techniques to try:
- Use gradient masks for soft transitions between vegetation densities.
- Paint custom shapes for rivers, roads, or architectural footprints.
- Combine multiple masks for layered complexity.
This hands-on approach guarantees that your scattered objects follow the unique topography and design intent of your project. With vray scatter, you can avoid repetitive patterns and achieve a tailored, organic look.
Layering Scatters for Realistic Environments
Layering multiple scatter systems is essential for building rich, multi-dimensional spaces with vray scatter. By stacking different asset types, you mimic the diversity found in real ecosystems.
Begin by assigning separate scatter systems for grass, shrubs, and trees. Adjust each system’s density and distribution to prevent overlap and ensure visibility. Prioritize taller vegetation to avoid occlusion of smaller assets.
Layering workflow:
- Scatter grass as the base layer.
- Add shrubs with moderate density.
- Top with trees, using larger distribution falloff.
For more guidance on structuring layered environments, refer to architectural visualization techniques that highlight practical strategies for combining assets effectively. This approach allows vray scatter to produce scenes that feel natural and immersive, supporting both visual interest and performance.
Integrating with Asset Libraries and External Models
Integrating high quality models from asset libraries greatly enhances the realism of your vray scatter projects. Most libraries, such as 3D Warehouse or Evermotion, offer ready-made proxies that are compatible with vray scatter.
Before importing, ensure your assets use consistent scale and material naming. Convert heavy geometry into vray proxies to optimize memory usage. Assign these proxies as scatter guests to populate your environments with diverse, photorealistic objects.
Best practices include:
- Test imported assets in a blank scene before large-scale scattering.
- Standardize material libraries for seamless blending.
- Organize proxies by category for efficient workflow.
By leveraging external models, vray scatter becomes a powerful tool for both speed and visual fidelity, adapting to any project size or complexity.
Scattering Non-Vegetation Objects
Vray scatter is not limited to plants. Use it to distribute rocks, benches, urban furniture, or even animated crowds across your scene. This flexibility opens creative opportunities in both architectural and product visualization.
For urban spaces, scatter benches, planters, or streetlights along paths. In product scenes, arrange multiple variants of items to illustrate diversity. Adjust rotation, scale, and distribution randomness for each object type.
Creative uses:
- Populate plazas with people or seating.
- Scatter debris and props in animation scenes.
- Create randomized layouts for retail or exhibition spaces.
This versatility makes vray scatter indispensable for projects demanding both realism and variety.
Animating Scattered Objects
Adding movement to scattered assets breathes life into 3D environments. Vray scatter works seamlessly with animation tools, allowing you to animate wind effects, growth cycles, or crowd dynamics.
To animate vegetation, link wind modifiers to tree proxies. For crowds, use animated character assets and randomize their placement. You can also animate scatter parameters over time for evolving landscapes.
Animation strategies:
- Swaying trees for outdoor walkthroughs.
- Moving crowds for urban simulations.
- Gradual growth of plants for time-lapse effects.
With vray scatter, animated scenes become more engaging and realistic, enhancing storytelling and client presentations.
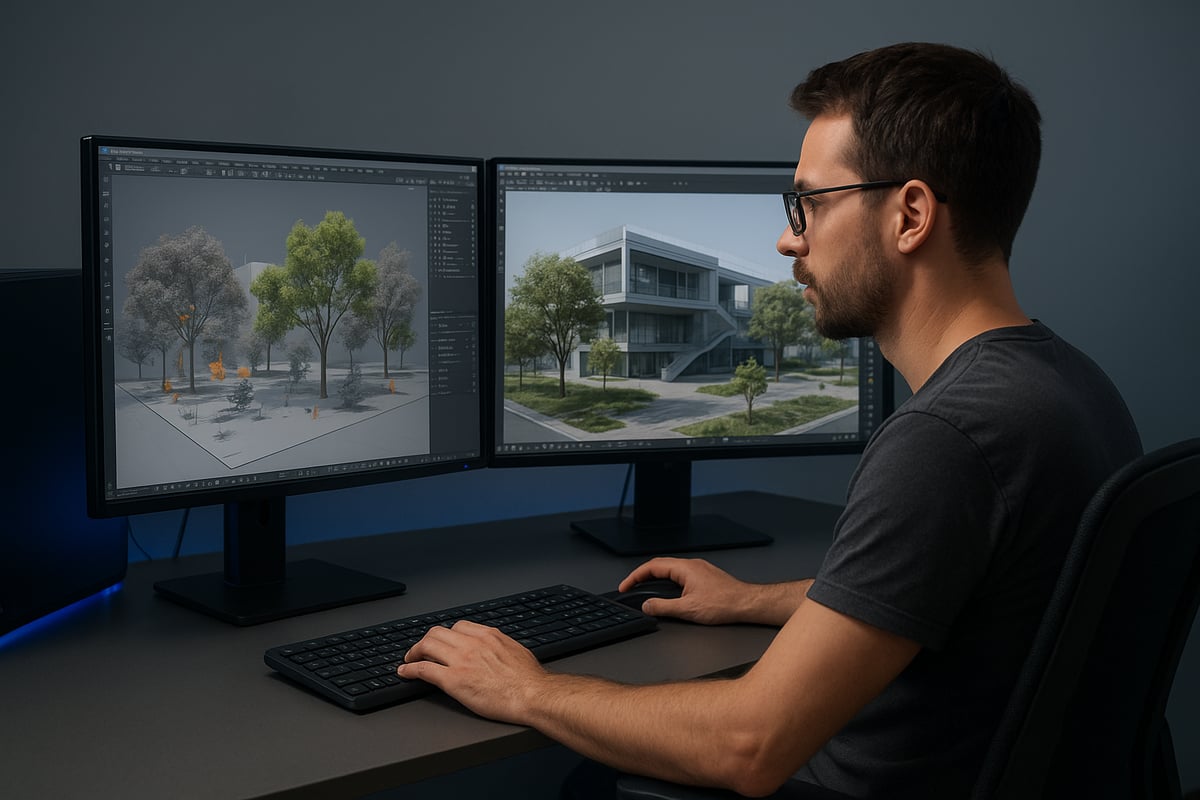
Case Study: Large-Scale Architectural Visualization
Consider a commercial development visualized with vray scatter. The project began with custom masks defining forest clearings and roadways. Multiple scatter systems layered grass, shrubs, and trees, while imported proxies ensured asset diversity.
The team optimized performance by using vray proxies and disabling GI for distant elements. Animated wind effects were applied to foreground trees, adding realism. The final renders showcased dense forests, open plazas, and active pathways, all achieved in under two minutes of render time.
Client feedback praised the natural look and efficient workflow. This case highlights how vray scatter, when combined with advanced techniques, delivers professional, photorealistic results on demanding projects.
Troubleshooting and Common Challenges in Vray Scatter
Troubleshooting vray scatter can feel daunting, especially when scenes become complex or assets go missing. Yet, most issues stem from a few common sources. Let us address these challenges head on, so your workflow remains efficient and frustration free.
Addressing Visibility and Application Issues
One frequent challenge with vray scatter is missing or invisible scattered objects. This often happens when the terrain or base surface is not properly grouped, or when scatter is applied to the wrong selection. Always ensure your terrain is exploded or grouped according to your 3D platform’s requirements.
If objects do not appear, try toggling visibility options like "show scattered object" in SketchUp, or double check that you have applied the scatter to the correct geometry. Common user errors include selecting the wrong object order or skipping the step of grouping land elements. For more foundational troubleshooting tips, consider reviewing 3D rendering fundamentals to understand how scene hierarchies affect visibility.
Optimizing for Heavy Scenes and Large Asset Counts
When working with vray scatter on large projects, system resources become a critical factor. Heavy scenes with tens of thousands of scattered assets can cause lag, crashes, or long load times.
To prevent these issues, monitor your RAM and GPU usage, and keep disk space available for cache files. Reduce viewport lag by disabling preview on distant scatter systems or working in layers. For large scale scattering, it is recommended to use at least 32 GB of RAM and a modern GPU with 8 GB or more VRAM. These steps help maintain stability and performance as your environment grows in complexity.
Handling Materials, Proxies, and Opacity Maps
Another common issue with vray scatter involves incorrect material assignments and proxy setup. Always double check that your Vray Proxies have the correct materials applied before scattering. Mixing geometry and opacity-mapped assets can impact both realism and render times.
Geometry based trees are more resource intensive but render with greater accuracy, while opacity-mapped trees use less memory but may introduce artifacts or longer render times. For example, a scene with 50,000 opacity-mapped trees can still render efficiently but requires careful optimization of proxy and material settings. Consistency is key for both performance and visual fidelity.
Render Settings and Quality Control
Balancing render quality and speed is crucial when using vray scatter. Adjust global illumination, shadow detail, and anti-aliasing to suit the importance of each object layer. Place higher detail assets in the foreground and reduce complexity for midground and background elements.
For horizon vegetation, lower GI quality and simplified materials can dramatically speed up renders without noticeable loss of realism. Always run test renders and iterate settings to find the right balance for your project’s needs. This approach ensures that both render times and output quality meet client expectations.
Expert Tips and Best Practices for Vray Scatter in 2026
Optimizing your workflow with vray scatter unlocks new levels of efficiency and realism for your 3D projects. Professionals in 2026 are using refined strategies to streamline asset management, boost render quality, and stay ahead of industry trends.
Workflow Optimization for Speed and Quality
Organizing your assets and presets is foundational for a fast and reliable vray scatter workflow. By maintaining a master file of proxy vegetation and scatter setups, you can quickly reuse configurations across multiple projects.
- Store commonly used assets in a dedicated library.
- Use templates for scatter presets to standardize setups.
- Batch process repetitive tasks, such as updating proxies or replacing scatter objects.
Efficient grouping and consistent naming conventions also help teams collaborate and troubleshoot more effectively, reducing time spent on scene preparation.
Achieving Photorealism with Minimal Resources
Photorealistic renders with vray scatter do not require excessive hardware if you leverage smart techniques. Use randomization features for variation in placement, rotation, and scale to avoid visible patterns.
- Layer different scatter systems for grass, shrubs, and trees.
- Apply high-resolution HDRI lighting for natural illumination.
- Enhance realism in post-processing with color grading and subtle depth of field.
Combining these methods allows you to achieve lifelike results even on modest workstations, keeping your scenes both beautiful and efficient.
Integrating Scattering in Collaborative Projects
For teams, managing vray scatter setups in shared environments is critical. Adopt a version control system to track changes and prevent asset conflicts.
- Share asset libraries and scatter presets through cloud storage.
- Reference external scenes to keep projects modular.
- Assign clear roles for asset management and scatter configuration.
This approach ensures consistency and reduces errors, especially when multiple designers contribute to large-scale visualizations.
Keeping Up with Vray Scatter Updates and Community Resources
Vray scatter evolves rapidly, so staying current with new features and best practices is essential. Engage with forums like CGArchitect, Reddit, and Chaos Forums for troubleshooting and inspiration.
- Read release notes for every update.
- Learn from community-shared case studies and scripts.
- Follow tutorials on advanced scattering methods.
For a deep dive into recent enhancements, including Chaos Scatter improvements, see the V-Ray 7 New and Updated Features overview. Staying informed helps you maximize the plugin’s capabilities.
Comparing Vray Scatter to Competing Solutions
When evaluating scattering plugins, vray scatter stands out for its balance of performance, usability, and integration. Here’s a comparison of top solutions:
| Feature | Vray Scatter | Forest Pack Pro | Multi Scatter |
|---|---|---|---|
| Ease of Use | High | Medium | Medium |
| Performance | Excellent | Excellent | Good |
| Integration | Native Vray | 3ds Max | 3ds Max |
| Community | Strong | Strong | Moderate |
User feedback highlights vray scatter’s efficiency and streamlined interface, making it a preferred choice for both beginners and experts.
Future Trends in Scattering and Visualization
The future of vray scatter and 3D visualization is bright, with AI-assisted scattering and procedural generation gaining traction. Real-time rendering and VR integration are poised to become standard in architectural workflows.
- Watch for AI-driven asset placement tools.
- Expect deeper integration with VR platforms.
- Anticipate procedural tools for even faster scene creation.
For an in-depth look at emerging technologies, read the Future of 3D rendering article. Staying ahead of these trends ensures your workflows remain cutting-edge.
