Essential Guide to 3d Studio Max Render Techniques 2026
The world of design, architecture, and entertainment has been transformed by the power of 3d studio max render technology. In 2026, demand for more realistic visualizations and advanced rendering techniques is at an all-time high. Whether you are a seasoned professional or an aspiring enthusiast, mastering 3d studio max render tools is essential for producing top-tier visuals.
This essential guide will demystify the latest methods, settings, and workflows in 3ds Max. You will discover core rendering concepts, explore built-in and third-party render engines, and learn how to optimize your workflow. Advanced techniques, troubleshooting strategies, and insights into future trends will empower you to create truly stunning visual outputs.
Understanding the Fundamentals of Rendering in 3ds Max
Rendering is the process that transforms a digital 3D scene into a finished image or animation. In the context of 3d studio max render workflows, this step is essential for visualizing designs, communicating ideas, and producing realistic animations. Whether you are creating architectural visualizations or cinematic effects, the quality of your render directly impacts how your audience perceives your work.
If you are new to 3d studio max render pipelines, it helps to understand the foundational concepts. Rendering involves simulating how light interacts with objects, materials, and environments to produce a lifelike result. For a deeper dive into these core principles, you can explore this What Is 3D Rendering? resource for additional context.
The 3ds Max interface is designed to streamline the 3d studio max render process. At its core, the rendering workspace includes panels for scene objects, material editors, lighting controls, camera views, and render output settings. The rendering pipeline typically follows this structure:
- Geometry: Models and objects built in the scene
- Materials: Surface properties and textures applied to geometry
- Lighting: Natural and artificial light sources shaping the scene’s mood
- Cameras: Define composition, perspective, and focus
- Output: Final rendered images or animation sequences
Mastering each stage in the 3d studio max render pipeline ensures your visuals are both accurate and compelling. You can quickly switch between camera angles, adjust lighting setups, or fine-tune material properties, all within an integrated workspace.
Rendering in 3ds Max can be categorized by both workflow and hardware. The two main approaches are real-time rendering, which provides instant feedback and is ideal for interactive design, and offline rendering, which focuses on photorealism but requires more processing time. You can also choose between CPU and GPU rendering, depending on your system’s capabilities and project requirements.
- Real-time rendering: Fast, interactive previews, suitable for design reviews
- Offline rendering: High-quality, detailed outputs, used for final production
- CPU rendering: Relies on processor power, often more flexible for complex scenes
- GPU rendering: Leverages graphics cards, significantly speeding up many 3d studio max render tasks
Understanding these options helps you select the right method for your specific workflow.
A solid grasp of rendering terminology is vital. Some key terms in any 3d studio max render workflow include:
- Anti-aliasing: Reduces jagged edges for smoother visuals
- Global illumination: Simulates indirect lighting and natural light bounce
- Ray tracing: Traces paths of light for realistic reflections and shadows
- Sampling: Determines how many rays or calculations are used per pixel
- Noise reduction: Cleans up graininess in renders for a polished result
Render settings and presets in 3ds Max let you balance image quality and speed. For quick drafts, you might lower sampling or resolution, while final projects demand higher settings. Presets tailored for interiors, exteriors, and animations help standardize results and save time.
Choosing the right output format and resolution is another key step. Common formats for 3d studio max render outputs include PNG, TIFF, JPEG, and EXR. Higher resolutions are used for print or large displays, while lower resolutions suit web or preview purposes.
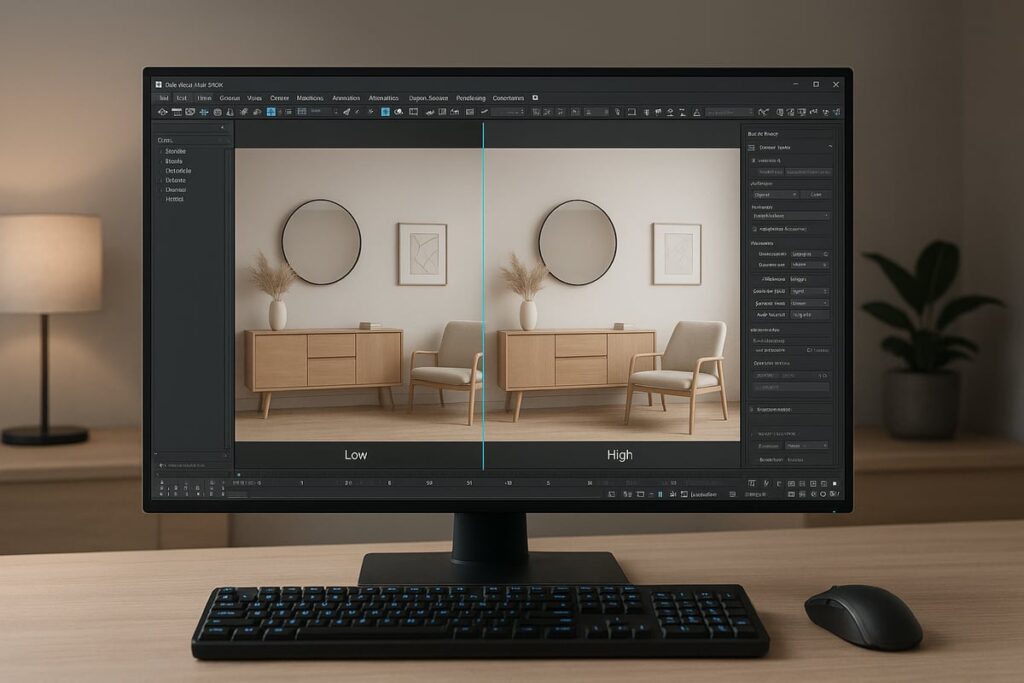
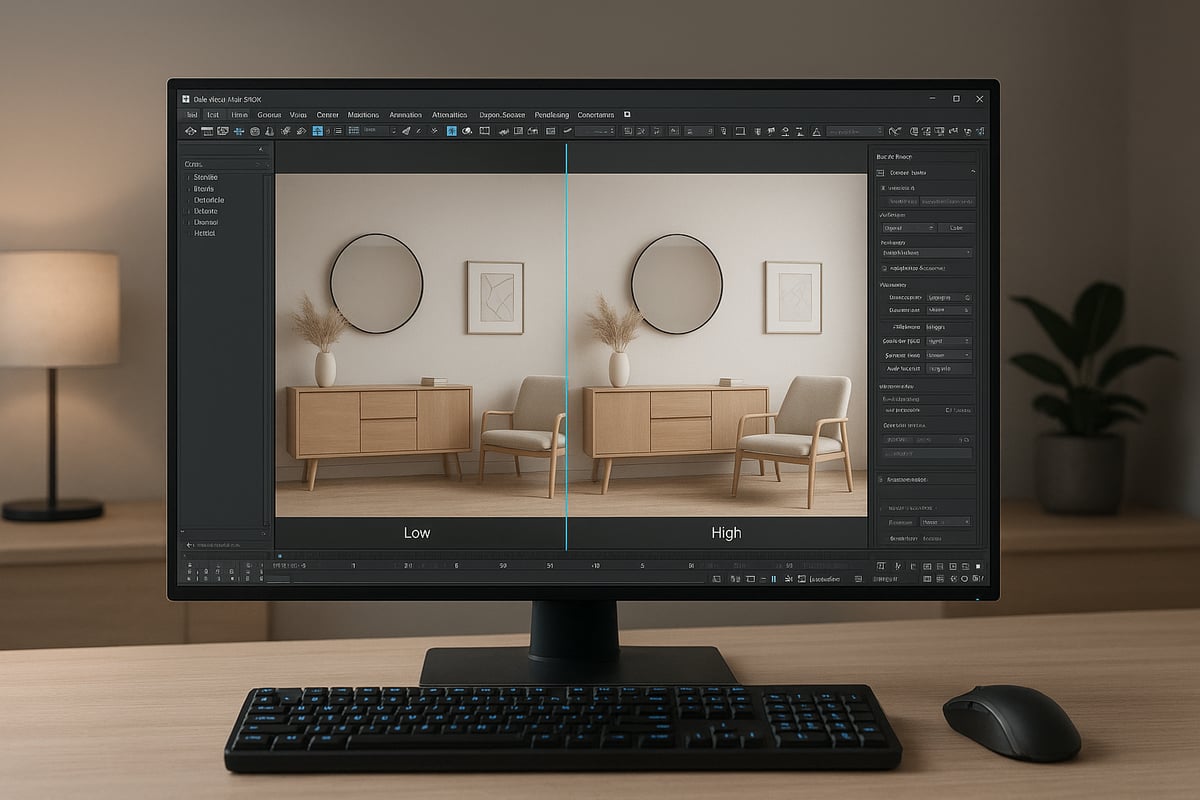
Consider a simple comparison: rendering the same scene at low versus high sampling settings. The higher sampling version will display fewer artifacts and smoother gradients, though it takes longer to compute. This illustrates why render optimization is so important.
The industry is moving steadily towards photorealism and efficiency in 3d studio max render projects. Recent surveys show a growing preference for render engines and pipelines that deliver both speed and high fidelity. Standardized settings and streamlined workflows are helping professionals meet rising expectations for quality and turnaround times.
Exploring Built-in and Third-Party Render Engines
The power of 3d studio max render capabilities lies in its versatile engine support. As demands for realism and speed grow, knowing your options in 2026 is essential. Both built-in and third-party render engines offer unique strengths for achieving professional results in visualization, animation, and design.
Built-in Render Engines in 3ds Max
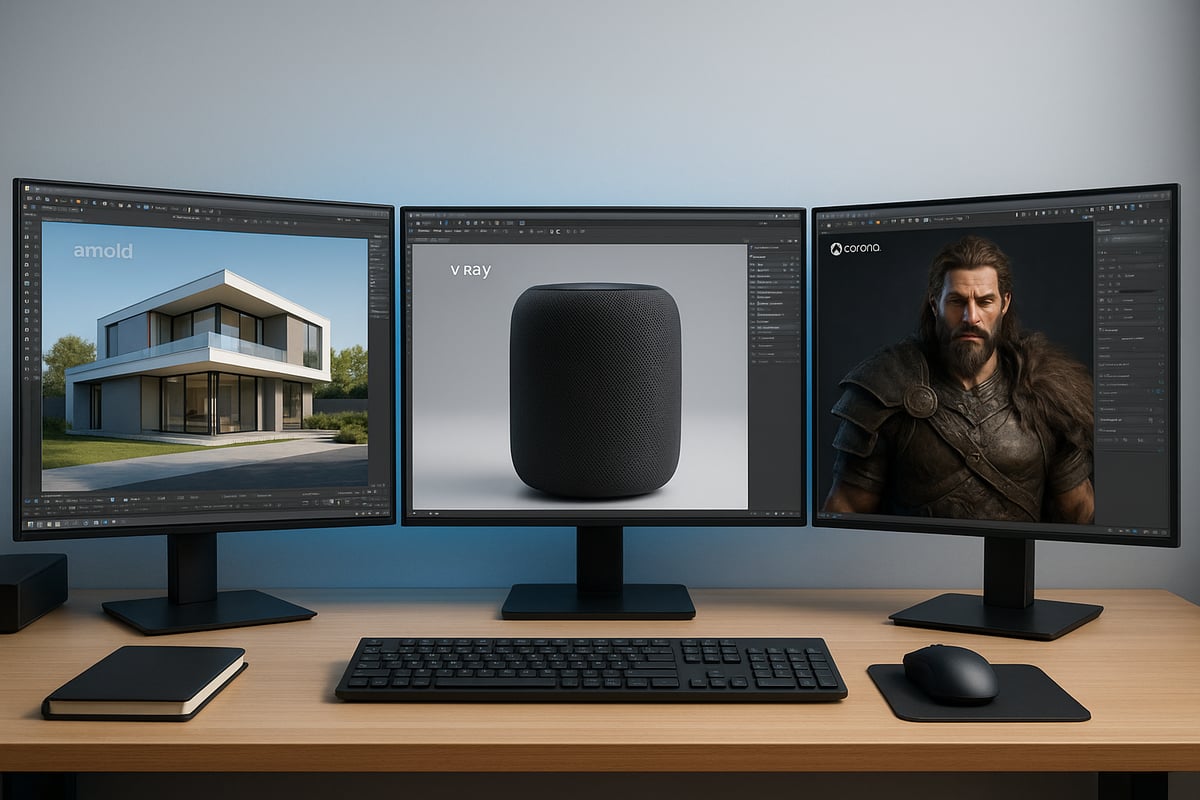
3ds Max ships with several powerful render engines, each tailored for specific workflows. The main built-in engines are Arnold, Scanline, and ART Renderer.
Arnold Renderer is the default, known for advanced ray tracing and photorealism. It excels in global illumination and supports GPU acceleration, making it ideal for demanding 3d studio max render tasks.
Scanline Renderer is a legacy engine, valued for its speed and compatibility. It is often used for quick previews, stylized effects, or when working with older projects.
ART Renderer (Autodesk Raytracer) is optimized for design visualization, offering fast, physically accurate results with minimal configuration.
Table: Built-in Render Engine Comparison
| Engine | Strengths | Weaknesses | Best For |
|---|---|---|---|
| Arnold | Photorealism, GPU support | High resource usage | Animation, VFX, architecture |
| Scanline | Fast, simple, low memory | Limited realism | Drafts, legacy workflows |
| ART | Easy setup, design focused | Fewer advanced features | Product, architectural renders |
Comparing Built-in Render Engines
Each built-in engine has unique features. Arnold stands out in 3d studio max render pipelines for its quality and flexibility, while Scanline delivers speed for less complex scenes. ART strikes a balance between ease of use and physical accuracy.
When considering which engine to use, evaluate the project's complexity, time constraints, and desired realism.
Top Third-Party Render Engines
For many professionals, third-party renderers expand the creative potential of a 3d studio max render. Leading options in 2026 include V-Ray, Corona Renderer, Redshift, and Octane.
- V-Ray is widely adopted for its speed, realism, and flexible workflow. It handles large scenes efficiently and supports both CPU and GPU rendering.
- Corona Renderer is praised for its intuitive interface and stunning photorealistic results, especially in architectural visualization.
- Redshift is a GPU-accelerated engine, ideal for fast previews and animation pipelines.
- Octane Render is known for unbiased rendering and real-time feedback, perfect for product visualization and creative experimentation.
For a comprehensive overview of the most popular engines and their latest innovations, see the Top Render Engines for 3ds Max 2026.
Choosing the Right Render Engine
Selecting the best engine for your 3d studio max render depends on several factors:
- Project type (interior, exterior, animation)
- Desired realism and speed
- Hardware resources (CPU/GPU)
- Ease of use and learning curve
- Integration with existing workflows
Matching the engine to your project's needs ensures optimal results and efficient production.
Workflow Integration and Switching Engines
Modern 3ds Max allows seamless switching between render engines from the Render Setup dialog. After installing a third-party engine, it appears in the renderer list, making it easy to adapt your 3d studio max render workflow.
Adopt best practices like saving presets and testing small regions to ensure consistency when changing engines. This approach minimizes surprises and maximizes quality.
Industry Data and Emerging Trends
In 2026, Arnold and V-Ray dominate the 3d studio max render market, with Corona and Redshift gaining ground. Real-time rendering, GPU acceleration, and hybrid workflows are now standard, enabling faster iteration and more creative freedom.
Staying current with render engine advancements is key to maintaining a competitive edge in visualization.
Step-by-Step Workflow: From Scene Setup to Final Render
Mastering the 3d studio max render process means understanding each stage from initial scene setup to the polished final image. Whether you're new to 3ds Max or refining your professional workflow, following a structured path ensures consistent, high-quality results. Let’s walk through a proven workflow that streamlines your rendering process for any project.
Workflow Overview Table
| Step | Key Actions | Tools/Settings |
|---|---|---|
| Scene Preparation | Organize assets, layers, references | Layer Manager, Groups |
| Camera Setup | Choose focal length, composition | Physical Camera |
| Lighting | HDRI, artificial, sunlight systems | Light Objects, HDRI |
| Material Creation | Apply PBR, procedural, custom shaders | Material Editor |
| Render Settings | Sampling, resolution, denoising | Render Setup Panel |
| Batch Rendering/Passes | Manage multiple outputs, passes | Batch Render, Passes |
Scene Preparation
Every successful 3d studio max render begins with meticulous scene preparation. Start by importing or modeling all necessary assets, then organize them using layers, groups, and named selections. This keeps your project manageable, especially for complex architectural or animation scenes.
Reference external files for large textures or linked objects to keep your scene lightweight. Always clean up unused geometry or materials to optimize performance. Consistent naming conventions and a tidy layer structure make collaboration and troubleshooting much easier.
Camera Setup
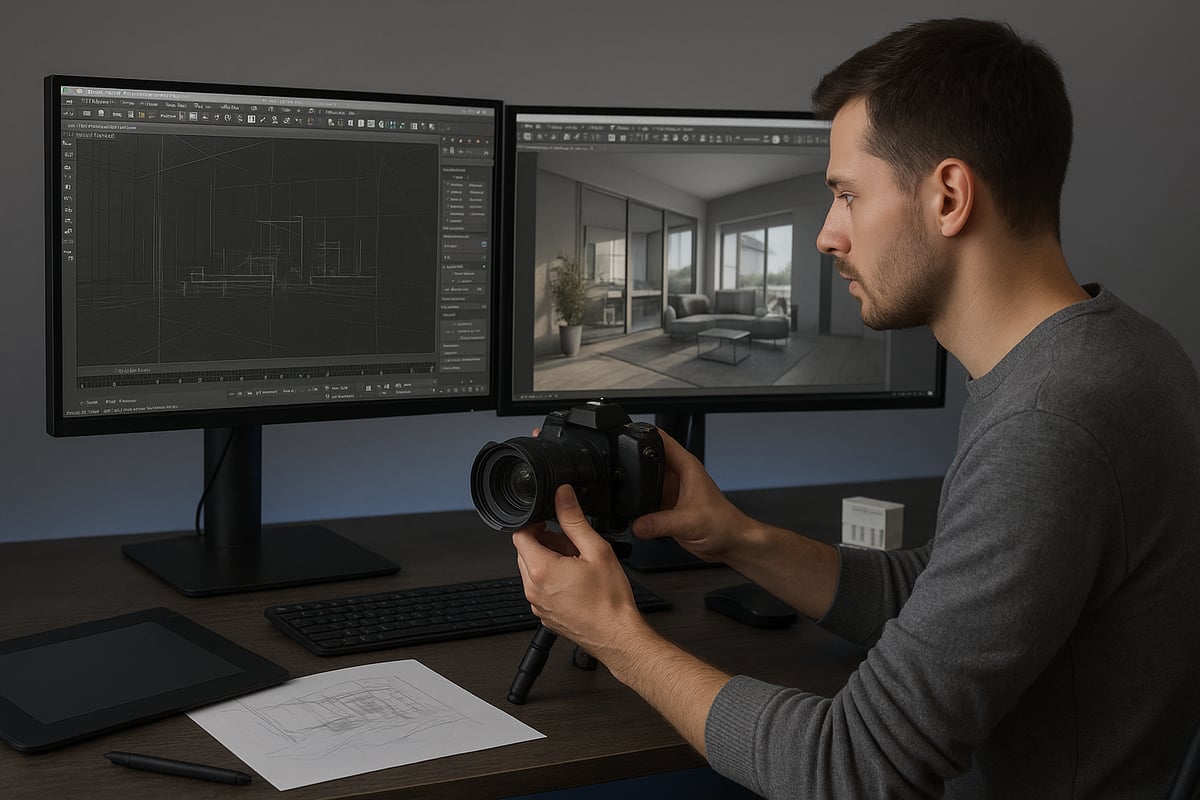
Next, set up your camera to define the viewer’s perspective. Use the Physical Camera in 3ds Max for realistic behavior and advanced controls. Select an appropriate focal length to match the scale and style of your scene, such as wide angles for interiors or telephoto for details.
Adjust the depth of field to add realism and focus the viewer’s attention. Compose your shot using the rule of thirds or leading lines to create visual interest. Test multiple camera positions to find the most compelling viewpoint for your 3d studio max render.
Lighting Techniques
Lighting transforms your 3d studio max render from flat to photoreal. Begin with an HDRI map for natural ambient light, or set up artificial lights using spot, area, or IES lights for precise control. For daylight scenes, use the Sunlight System to simulate accurate sun and sky conditions.
Balance your lighting by adjusting intensity, color temperature, and shadows. Combine different light sources to achieve depth and atmosphere. Render quick previews to check for unwanted shadows or blown-out highlights before moving to final settings.
Material Creation
Materials define the look and feel of every surface in your 3d studio max render. Use the Material Editor to assign physically based (PBR) materials for realism, or create custom shaders for unique effects. Fine-tune properties like reflection, glossiness, bump, and displacement to match real-world references.
Layer materials for complex surfaces, such as glass with condensation or aged metal. Test materials under your scene lighting, as colors and reflections can change dramatically. Procedural textures save memory and provide flexibility for large-scale projects.
Render Settings and Optimization
Optimizing render settings is crucial for balancing image quality and render time. In the Render Setup panel, set your desired resolution and choose the best sampling method for your project. Higher sample rates reduce noise but increase render time, so find a balance that suits your needs.
Enable denoising and adaptive sampling to speed up the process without sacrificing quality. Adjust ray tracing settings for reflections and global illumination as needed. Save custom presets for different project types to streamline future workflows.
Batch Rendering and Render Passes
Batch rendering allows you to queue multiple views or animation frames, saving time and effort. Set up batch jobs in the Render Setup dialog, and specify unique settings for each output as required.
Render passes break your 3d studio max render into separate elements, such as diffuse, specular, and shadows. This approach offers greater flexibility during post-production, as you can fine-tune each component individually. Use the Render Elements tab to select and manage passes.
Example: Complete Workflow Breakdown
Let’s consider a sample workflow for an interior architectural scene. Begin by importing CAD plans and organizing geometry into layers for walls, furniture, and fixtures. Place a Physical Camera at eye level, framing the main living area.
Add an HDRI sky for ambient lighting, then layer in area lights to simulate ceiling fixtures. Assign PBR materials to surfaces, referencing real-world samples for wood, fabric, and glass. In the Render Setup panel, set a resolution of 1920×1080, enable denoising, and use adaptive sampling.
Initiate a test render to check lighting and materials, then adjust settings as needed. Once satisfied, set up batch rendering for multiple camera angles and activate render passes for post-production control. For a deeper dive into visualization workflows and techniques, see 3D Visualization and Rendering Insights.
Tips for Iterative Testing and Preview Rendering
- Use region rendering to test small areas before committing to a full 3d studio max render.
- Save incremental file versions to avoid losing progress.
- Regularly check for overlapping geometry or missing textures.
- Preview different lighting and material setups quickly with low-quality draft renders.
By refining your workflow and leveraging these techniques, you’ll streamline your 3d studio max render process and consistently produce professional, visually stunning results.
Advanced Rendering Techniques for Realism and Creativity
Unlocking the full potential of 3d studio max render requires embracing advanced techniques that push the boundaries of both realism and creativity. In this section, we explore how to harness the latest rendering methods and workflows for photorealistic and stylized results.
Photorealistic Rendering: Achieving True-to-Life Visuals
Photorealistic rendering is at the heart of every high-end 3d studio max render workflow. Techniques like global illumination simulate how light bounces between surfaces, creating soft, realistic shadows and indirect lighting. Caustics add another layer of realism, capturing the way light refracts and focuses through glass or water.
Subsurface scattering (SSS) is essential for rendering organic materials such as skin, marble, or wax. SSS captures how light penetrates and diffuses within a material, resulting in lifelike softness. For a deeper dive into lighting strategies and indirect illumination in 3ds Max, see Implementing 3ds Max for Design Visualization.
Fine-tuning these features allows artists to achieve stunning realism, making 3d studio max render outputs indistinguishable from real-world photography.
Non-Photorealistic Rendering: Creative Stylization
Not all projects demand photorealism. Non-photorealistic rendering (NPR) techniques within 3d studio max render workflows enable unique visual styles, such as toon shading, watercolor, or hand-drawn effects.
Artists can use custom shaders, line rendering, and post-processing filters to achieve distinctive aesthetics. Stylized rendering is often used for architectural visualizations, product design concepts, and animation. The flexibility of 3d studio max render allows for seamless switching between photorealistic and NPR approaches, making it a versatile tool for creative professionals.
Experimenting with NPR can set your work apart, offering clients and audiences fresh visual experiences.
Advanced Material Workflows
Materials are the backbone of any compelling 3d studio max render. Modern workflows leverage multi-layered shaders for complex surfaces, such as car paint, metals, or fabrics. Displacement maps add geometric detail by modifying surface topology at render time, while procedural textures create infinite variation without heavy file sizes.
Subsurface scattering plays a crucial role in advanced material creation, especially for translucent objects. The 2026 release of 3ds Max introduces enhanced shader tools and improved displacement algorithms, as detailed in 3ds Max 2026 New Features.
Mastering these workflows empowers artists to achieve both realism and creative expression in every 3d studio max render project.
Mastering Lighting and Volumetric Effects
Lighting defines the mood and realism of a 3d studio max render. Techniques such as light mixing let artists adjust intensity and color in real time, optimizing scenes efficiently. Color grading provides the finishing touch, ensuring visual consistency and style.
Volumetric effects, including fog, god rays, and atmospheric haze, add depth to scenes. Using volumetric lighting, artists can simulate sunlight streaming through windows or mist enveloping a landscape. These techniques are crucial for cinematic storytelling and architectural visualization.
Fine control over lighting ensures each 3d studio max render stands out, whether for stills or animations.
Render Elements, Compositing, and Animation
Breaking a 3d studio max render into multiple passes—such as diffuse, specular, and shadow—gives artists flexibility in post-production. Render elements can be composited in software like Photoshop or After Effects, allowing for refined adjustments without re-rendering the entire scene.
Animation rendering introduces new challenges, such as motion blur and frame management. Properly setting up render passes and handling depth of field ensures smooth, high-quality animated sequences. Leveraging these features streamlines workflows and elevates the final output of any 3d studio max render.
Case Studies and Industry Data
Recent case studies highlight the impact of advanced techniques on 3d studio max render quality. For example, architectural firms have achieved lifelike visualization using global illumination and SSS, while animation studios leverage NPR for unique storytelling.
A 2026 survey of 3ds Max professionals showed that over 80% regularly use advanced lighting, multi-layered materials, and render elements in their pipelines. This data confirms the growing importance of innovation and mastery in every 3d studio max render.
By adopting these advanced methods, artists and studios remain at the forefront of the industry, delivering exceptional results to clients and audiences alike.
Troubleshooting and Best Practices for Flawless Renders
Achieving a flawless 3d studio max render requires a systematic approach to troubleshooting and a commitment to best practices. Even seasoned professionals encounter issues that can disrupt the rendering process or compromise quality. Addressing these challenges efficiently is essential for maintaining both creative vision and project deadlines.
Common Rendering Issues and Solutions
Every 3d studio max render project can face technical hurdles. Common issues include excessive noise, visual artifacts, flickering in animations, or memory errors during long render sessions.
- Noise often results from low sampling rates. Increasing sample settings or enabling denoising algorithms can significantly improve clarity.
- Artifacts may stem from overlapping geometry or incorrect material assignments. Carefully inspect object intersections and verify material setups.
- Flickering typically occurs in animated renders when global illumination or light cache settings are not properly configured. Stabilize lighting solutions by using consistent cache settings across frames.
- Memory errors can arise in complex scenes with high-resolution textures or dense geometry. Optimize assets, reduce texture sizes, and enable proxies to lower memory demands.
Maintaining a checklist for these issues helps ensure each 3d studio max render meets quality standards.
Managing Large Scenes and Preventing Crashes
Large projects can push 3d studio max render capabilities to their limits. To prevent crashes, segment scenes using layers or XRefs, and utilize proxies for repeating objects. Regularly purge unused assets to keep file size manageable.
Consider hardware upgrades, such as increasing RAM or leveraging GPU rendering, to support complex scenes. Save versions frequently and use auto-backup features to avoid data loss in case of unexpected shutdowns.
Ensuring Color Accuracy and Gamma Correction
Color consistency is vital for a professional 3d studio max render. Always enable gamma correction in both the viewport and output settings to avoid washed-out or overly dark results. Calibrate monitors using trusted tools and match color profiles between 3ds Max and image editing software.
Export test frames and compare them across different devices to detect discrepancies early, ensuring the final deliverable matches the intended look.
Best Practices for Render Management
Efficient render management safeguards project integrity. Adopt clear naming conventions for scenes, assets, and output files. Implement a versioning system to track changes and facilitate rollbacks if issues arise.
Schedule regular backups to both local and cloud storage. Document key settings and workflow steps, enabling team members to replicate or troubleshoot the 3d studio max render process easily.
For comprehensive troubleshooting strategies and workflow mastery, consider enrolling in 3ds Max 2026 Essential Training, which covers advanced rendering techniques and common problem-solving scenarios.
Real-World Troubleshooting Scenarios and Expert Tips
User reports from recent 3ds Max versions indicate that noise and memory errors are the most frequent issues, followed by material mismatches and lighting inconsistencies.
When encountering persistent noise, review sampling and denoising settings. For memory errors, simplify geometry and compress textures. If color shifts occur, double-check gamma settings and color profiles.
Expert tip: Save incremental versions before major changes, and test render small regions to identify issues without waiting for full outputs. These steps help maintain consistent quality in every 3d studio max render.
Article written using RankPill.