Vray For MacBook Air Guide: Best Practices For 2026
Imagine unlocking the full creative power of vray for macbook air in 2026. With the latest Apple Silicon, you can render professional visuals anywhere, even on the go.
This guide will walk you through proven best practices to maximize performance and achieve studio-quality results. Whether you are an architect, designer, or 3D artist, you will find actionable steps tailored for the modern MacBook Air.
Discover how to navigate compatibility, installation, optimization, workflow tweaks, troubleshooting, and the future of rendering on portable hardware. Ready to transform your mobile rendering experience? Let’s get started.
Understanding Vray Compatibility with MacBook Air in 2026
Unlocking the full potential of vray for macbook air starts with understanding compatibility in 2026. The landscape of Apple hardware and 3D rendering software is evolving rapidly. Let us explore the essential aspects to ensure seamless setup and optimal performance.

Vray System Requirements and MacBook Air Hardware
To run vray for macbook air efficiently in 2026, it is crucial to match system requirements with your device specs. Vray’s minimum specs call for at least 8GB RAM, a modern Apple Silicon CPU (M2 or newer), and a GPU supporting Metal API. Recommended specs include 16GB unified memory, an M4 chip, and SSD storage for faster asset loading.
Apple Silicon advancements, especially in the M4 generation, bring significant performance gains. Unified memory architecture ensures that both CPU and GPU share resources efficiently, which is vital for rendering tasks. ARM architecture improves energy efficiency and supports future Vray optimizations.
Performance benchmarks on the latest models show that the M4 MacBook Air can handle medium-complexity scenes at reasonable speeds. For more details, the MacBook Air M4 Performance Review offers in-depth benchmarks relevant for Vray workloads.
Older Intel-based MacBook Airs face compatibility limitations, including lack of official support and slower render times. Always check the Chaos Group’s official statements for current support policies before installing vray for macbook air.
Supported 3D Software and Vray Integrations
Vray for macbook air supports several major 3D platforms on macOS. The most common are:
- SketchUp Pro 2026 (full Vray plugin support)
- Rhino for Mac (Vray plugin available)
- Cinema 4D (native integration)
Each platform may have specific plugin versions, so always match your 3D software version with the correct Vray release. Compatibility is best on macOS Sonoma and Sequoia, with active development for newer OS releases.
For example, running Vray for SketchUp Pro 2026 on a MacBook Air delivers a stable experience, though complex scenes may require optimization. Autodesk 3ds Max and Maya are not natively supported on macOS, so cross-platform workflows may need file exchanges or cloud services.
Keep in mind that vray for macbook air is best used with supported platforms and up-to-date plugins to avoid workflow interruptions.
Licensing and Activation on macOS
Licensing vray for macbook air offers flexibility. Options include:
- Standalone licenses (tied to a single machine)
- Subscription models (monthly or yearly)
- Educational licenses (discounted for students and educators)
Activation is straightforward on macOS. Users typically log in to their Chaos account, download the license server, and activate online or offline. For those managing licenses across multiple devices, the Chaos License Server allows floating licenses within a network.
Common issues involve network errors or misconfigured license servers. For instance, a floating license error on MacBook Air is often fixed by restarting the license server or ensuring firewall settings allow communication. If vray for macbook air fails to activate, check for typos in credentials and verify your internet connection.
Updates, Support, and Community Resources
Staying current with updates is essential for stable vray for macbook air operation. Updates are accessible directly through the Chaos Group’s download portal. Always back up your settings before major updates.
Mac users benefit from dedicated Chaos Group support channels, including ticket systems and live chat. Community forums, such as the Chaos and Autodesk forums, are invaluable for troubleshooting and sharing tips. These platforms allow MacBook Air users to post rendering questions and receive guidance from both staff and experienced peers.
To stay informed on compatibility updates, subscribe to Chaos Group newsletters or forum announcements. This ensures your vray for macbook air setup remains future-proof.
Key Considerations Before Installation
Before installing vray for macbook air, evaluate your project needs against your device’s capabilities. For small to medium projects, the MacBook Air is often sufficient. For large-scale, high-res rendering, consider supplementing with cloud rendering or upgrading to a MacBook Pro.
Storage space is another critical factor. Rendering projects and caches can consume significant disk space, so plan for external or cloud storage. Always back up important files before starting major render jobs.
If you expect to handle massive scenes or frequent high-res output, assess whether vray for macbook air meets your requirements or if a higher-end workstation is justified.
Step-by-Step: Installing and Setting Up Vray on MacBook Air
Unlocking the full capabilities of vray for macbook air starts with a smooth installation. Whether you are new to 3D rendering or upgrading your workflow, following these clear steps ensures your setup is fast, stable, and optimized for your MacBook Air.
Preparing Your MacBook Air
Before installing vray for macbook air, ensure your device is ready for a seamless experience. Start by updating your macOS to the latest version, such as Sonoma or Sequoia, to maximize compatibility and security.
Free up disk space by removing unused files and applications. Aim for at least 30GB of available storage for Vray, 3D assets, and cache files. Adjust your security and privacy settings in System Preferences to allow installations from identified developers.
- Update macOS to the latest supported version.
- Clean up and optimize storage.
- Modify security settings for third-party plugins.
- Back up essential files to iCloud or an external drive.
Taking these steps helps prevent interruptions and data loss during the vray for macbook air installation process.
Downloading and Installing Vray
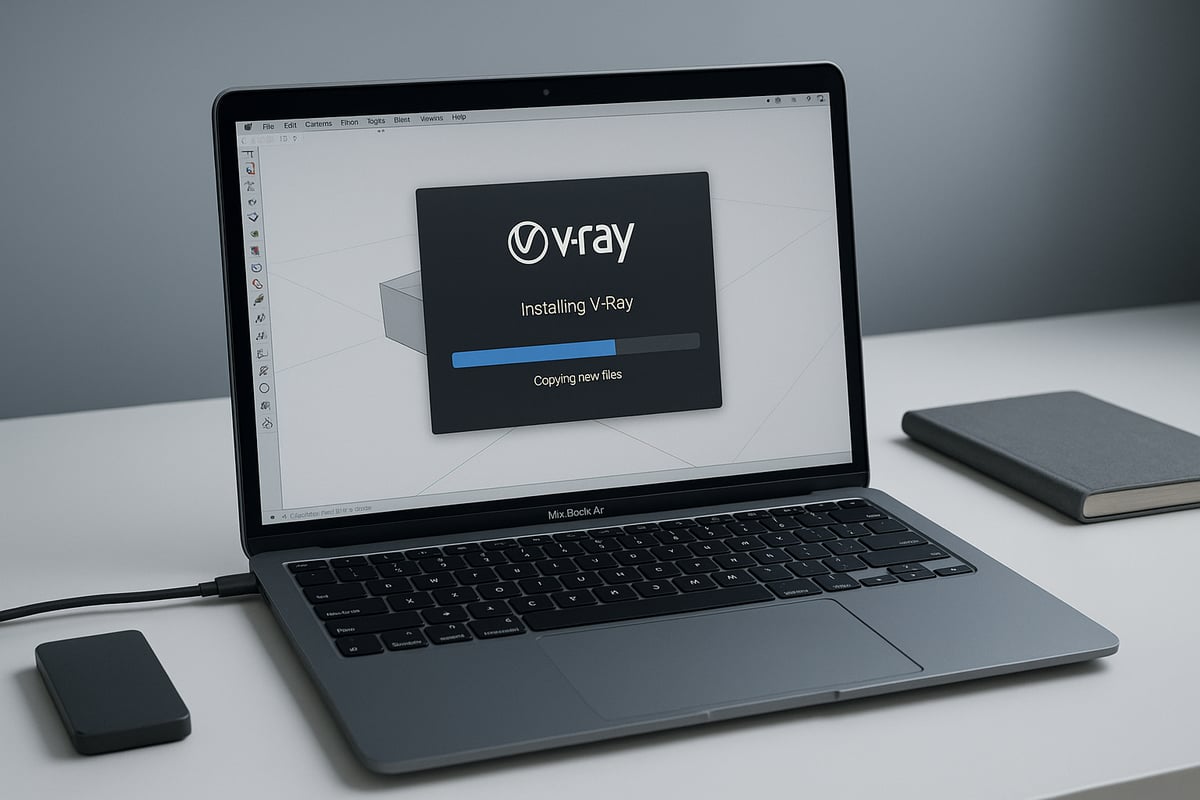
Downloading vray for macbook air is straightforward when using official channels. Visit the Chaos Group website and select the installer that matches your 3D software, such as SketchUp, Rhino, or Cinema 4D.
Run the downloaded installer and follow the prompts in the installation wizard. During setup, grant any requested permissions in macOS, including access to Documents and Application Support folders. For a detailed walkthrough specific to SketchUp, refer to the SketchUp 3D rendering guide.
- Download the correct Vray version for your 3D platform.
- Open the installer and follow on-screen instructions.
- Grant necessary permissions when prompted.
Completing these steps ensures vray for macbook air is installed correctly and ready for configuration.
Initial Configuration and Plugin Setup
After installation, configure vray for macbook air to match your workflow. Begin by launching your 3D application and confirming that Vray appears as an active plugin.
Set default directories for assets, textures, and output renders. This keeps your projects organized and speeds up file access. Adjust initial render settings to suit the MacBook Air’s hardware, starting with lower quality and gradually increasing as needed.
- Link Vray to your 3D software via plugin manager.
- Define asset and output directories (e.g.,
/Users/yourname/Documents/VrayAssets). - Customize default render settings for performance.
Tailoring these settings helps vray for macbook air deliver stable performance from the very first project.
Activating Your Vray License
Activating vray for macbook air is essential before you can render. Launch the Chaos License Server and sign in using your Chaos account credentials. Choose your license type—standalone, online, or educational—and follow the activation steps.
Common activation issues include incorrect login details or firewall restrictions. If you encounter errors, restart your MacBook Air and recheck your network connection. For multiple licenses, ensure each seat is properly assigned and activated.
- Open Chaos License Server.
- Log in and select your license.
- Troubleshoot by checking network and account status.
Once activation is successful, vray for macbook air is ready for rendering tasks.
Verifying Installation and Running a Test Render
To confirm vray for macbook air is fully operational, open your 3D software and verify Vray integration in the plugins or extensions list. Load a sample scene and run a test render, monitoring the process for any errors or warnings in the Vray log files.
Compare the output with default and optimized settings to gauge performance. If issues arise, check plugin paths and permissions, or consult the log for troubleshooting clues.
- Confirm Vray plugin is loaded in your 3D app.
- Run a sample render and review results.
- Check Vray logs for errors or missing assets.
This final step ensures vray for macbook air is ready for professional rendering projects.
Optimizing Vray Performance on MacBook Air
Unlocking the best performance from vray for macbook air requires a focused approach. With Apple Silicon advancements, you can achieve impressive render speeds, but optimization is key. Follow these proven strategies to make the most of your hardware and create professional-quality visuals.
Essential Performance Tweaks for MacBook Air
Fine-tuning vray for macbook air starts with balancing render quality and speed. Lowering global illumination bounces and reducing ray tracing depth can cut render times significantly. Adjust resolution and sampling settings based on your project’s needs, and use Vray’s built-in denoiser for quick previews without sacrificing visual fidelity.
For a comprehensive list of tweaks, refer to V-Ray Optimization Techniques. These strategies, including progressive rendering and smart use of denoising, are particularly useful on lightweight devices like the MacBook Air.
Scene optimization matters. Simplify geometry, merge overlapping meshes, and limit the use of high-resolution textures. Always preview at lower settings before committing to final renders.
Managing RAM, CPU, and GPU Resources
Resource management is crucial for vray for macbook air users. Monitor system usage in Activity Monitor while rendering. This helps you identify if RAM or CPU is being maxed out.
Apple Silicon’s unified memory means both CPU and GPU share the same pool. Opt for at least 16GB RAM for complex scenes, though 8GB suffices for lighter projects. Compare performance:
| MacBook Air Model | RAM | Scene Complexity | Render Time |
|---|---|---|---|
| M4 Base | 8GB | Low/Medium | Fast |
| M4 Upgraded | 16GB | High | Faster |
Avoid overheating by rendering in cool environments and enabling Energy Saver settings. If you notice throttling, pause rendering to let the system cool.
Workflow Tips for Efficient Rendering
An organized workflow maximizes vray for macbook air efficiency. Break large scenes into smaller, manageable layers. This reduces memory load and makes troubleshooting easier.
Use proxies and instancing for repeating objects, such as furniture or vegetation. Batch rendering allows you to queue multiple scenes overnight, making the most of your device’s uptime.
Follow a scene optimization checklist:
- Remove unused assets
- Compress textures
- Group related objects
- Minimize displacement and subdivision modifiers
These practices keep your workflow smooth and prevent unexpected slowdowns.
Leveraging Cloud and Network Rendering Options
For projects beyond the limits of vray for macbook air, cloud and network rendering are invaluable. Vray Cloud integration lets you upload scenes and offload intensive tasks, freeing your MacBook Air for other work.
Setting up network rendering is straightforward. Connect your MacBook Air to more powerful desktops or external render nodes on your network. This hybrid approach saves time and reduces local hardware strain.
Consider cloud rendering for final outputs or high-resolution animations. It is cost-effective and ensures deadlines are met without overtaxing your laptop.
Troubleshooting Common Performance Bottlenecks
Even with careful setup, vray for macbook air might encounter bottlenecks. Slow renders often result from excessive light sources, high-poly models, or missing textures.
Check Vray logs for error messages. If you experience crashes, reduce scene complexity or check for corrupted assets. Missing textures can cause significant slowdowns, so ensure all assets are linked correctly.
If performance dips unexpectedly, restart your MacBook Air and clear temporary files. Consistent troubleshooting keeps your workflow on track.
Regular Maintenance and Updates
Maintaining vray for macbook air performance means regular updates. Keep both Vray and your 3D software current to benefit from bug fixes and new features.
Clean up caches and temporary files weekly. Back up your render settings and custom presets to avoid loss during updates. Automate maintenance tasks using macOS Shortcuts or third-party utilities.
Scheduled maintenance ensures long-term stability and consistent render speeds.
Advanced Optimization for Power Users
Power users of vray for macbook air can push efficiency further with automation. Use scripting to batch process renders or automate repetitive tasks.
Customize render presets for different project types, such as architectural visualization or product design. Third-party utilities can monitor CPU temperatures and optimize performance dynamically.
Integrate Vray with Apple Shortcuts to streamline tasks like launching batch renders or organizing output folders. These advanced strategies enable you to maximize every ounce of performance from your MacBook Air.
Best Practices for Professional-Quality Renders on MacBook Air
Achieving top-tier visuals with vray for macbook air is possible when you follow proven strategies tailored to its hardware. Professional-quality results rely on optimizing your workflow, managing resources, and making smart choices at every stage of your project. Let’s explore the best practices that empower you to deliver polished, client-ready renders directly from your MacBook Air.
Balancing Quality and Render Times
Finding the right balance between speed and visual fidelity is crucial when using vray for macbook air. Start by selecting render presets that align with your project's goals, such as draft settings for previews and higher quality for finals. Utilize adaptive sampling and set noise thresholds to reduce unnecessary calculations.
For architectural visualization, use moderate global illumination and limit reflection/refraction depths. Refer to expert resources like this Guide to photorealistic rendering for detailed tips on achieving realism without overloading your MacBook Air. Always communicate with clients about expected render times and quality, especially when working with lightweight hardware.
Asset Management and Scene Organization
Efficient asset management is essential for smooth performance with vray for macbook air. Organize your project folders logically, separating textures, models, and output files. Compress large textures to 2K or below to reduce memory usage, and use linked assets rather than embedding them in scenes.
A sample folder structure:
/ProjectName
    /Scenes
    /Textures
    /Assets
    /Renders
Maintain a clean library by removing unused files. This approach streamlines collaboration and prevents missing assets during final renders.
Lighting and Material Strategies
Lighting and materials play a pivotal role in the output quality of vray for macbook air. Use simple lighting rigs for test renders, then switch to more complex setups for finals. Take advantage of Vray’s material editor to create realistic surfaces, but avoid excessive layering or high-resolution maps that can slow down your device.
For daylight scenes, leverage Vray’s Sun and Sky system. For interiors, use a combination of area lights and portals to achieve even illumination. Keeping material complexity in check ensures faster feedback and more stable renders.
Post-Processing and Compositing
Professional workflows with vray for macbook air include thoughtful post-processing. Render key elements separately using the Vray Frame Buffer, such as diffuse, specular, and shadow passes. This gives you flexibility when making adjustments in Photoshop or Affinity Photo.
Set up reusable presets for common adjustments, like color correction or sharpening, to save time on future projects. Quick post-production edits not only refine the look but also allow rapid client feedback without re-rendering the entire scene.
Collaboration and File Sharing
Seamless collaboration is possible with vray for macbook air by adopting smart file-sharing practices. Use cloud storage solutions for large scenes and texture files, ensuring everyone on your team has access to the latest versions. Sync asset libraries across devices to prevent missing files during group projects.
When working with Windows-based collaborators, export assets in standard formats and test compatibility before final delivery. This proactive approach minimizes workflow interruptions and keeps your projects on track.
Troubleshooting and Solving Common Issues
Running Vray for MacBook Air can be smooth, but occasional issues may arise. This section reviews the most frequent problems users face and offers practical solutions, so you can keep your projects moving forward with minimal downtime.
Installation and Activation Problems
Setting up Vray for MacBook Air sometimes leads to installation failures or activation issues. These problems may stem from outdated macOS versions, insufficient permissions, or network restrictions.
To resolve common installation and activation errors:
- Ensure your macOS is compatible and fully updated.
- Run the installer as an administrator.
- Temporarily disable security software that may block plugin installation.
- Double-check your license credentials before activation.
If you encounter persistent issues, resetting Vray configuration files or cleaning up system caches can help. For more guidance on optimizing your Mac for smoother installations, see these macOS performance tips.
Rendering Errors and Crashes
Even after successful setup, you might experience rendering errors, sudden crashes, or incomplete outputs with Vray for MacBook Air. These issues are often linked to out-of-memory errors, complex scenes, or plugin conflicts.
Troubleshooting steps include:
- Simplifying scenes by reducing polygon count or texture sizes.
- Monitoring RAM and CPU usage during renders.
- Updating both Vray and your 3D application to the latest versions.
- Checking for missing textures or corrupted assets.
If a render fails, review the error logs generated by Vray for clues. The Rendering Time Issues on MacBooks forum thread offers real-world solutions from other users facing similar problems.
Compatibility and Plugin Conflicts
Compatibility issues may arise after macOS or 3D software updates, or when using multiple rendering plugins together on Vray for MacBook Air. These conflicts can prevent Vray from loading or functioning as expected.
To troubleshoot:
- Verify that all plugins and Vray versions are up to date.
- Disable other rendering plugins temporarily to isolate the problem.
- Review official compatibility notes from Chaos Group before upgrading your system.
If Vray stops working after a system update, reinstalling both the plugin and your 3D application can often resolve the conflict. Keep backups of your custom settings to streamline recovery.
Getting Help and Support
When self-troubleshooting does not resolve your Vray for MacBook Air issues, official support and community resources are invaluable. Access the Chaos Group support portal for ticket-based help, or consult your 3D software’s help center.
For peer advice, browse active forums and knowledge bases. When submitting a support ticket:
- Include your MacBook Air model, macOS version, and full error details.
- Attach relevant log files or screenshots.
- Describe steps already taken to resolve the problem.
Combining official resources with community wisdom ensures you find solutions faster and return to rendering with confidence.
Future Trends: Vray and Rendering on MacBook Air Beyond 2026
As we look ahead, the evolution of vray for macbook air is closely tied to Apple's ongoing hardware innovation. Each new generation of MacBook Air, especially with the anticipated M5 chip, brings increased processing power and improved GPU performance. These advancements enhance real-time previewing and reduce render times. Vray's development team continues to refine the engine for ARM architecture and Metal API, ensuring seamless compatibility and optimization. For professionals considering upgrades, reviewing performance benchmarks and official support for new MacBook Air models is essential. These steps help users maximize the capabilities of vray for macbook air in their workflow.
Apple Silicon Roadmap and Vray Development
Recent hardware updates have made vray for macbook air more powerful than ever. The transition to Apple Silicon, especially the M4 and upcoming M5 chips, brings improvements in speed, energy efficiency, and advanced graphics processing. Metal API integration enables better utilization of the GPU, resulting in smoother render previews and faster final outputs. Benchmark tests predict that the M5 chip will further reduce render times, making it easier for designers to achieve professional-quality results on the go. Staying informed about these hardware and software advancements is crucial for anyone relying on vray for macbook air for daily production work.
AI and Cloud Integration in Rendering
Artificial intelligence is rapidly transforming the way vray for macbook air is used. Vray now includes AI-powered denoising and upscaling tools, which accelerate preview rendering and improve final image quality. Cloud-based rendering is also gaining traction, offering the flexibility to offload intensive tasks and access powerful remote resources. This shift enables users to handle complex projects without being limited by local hardware. For a deeper look at these innovations, explore the Future of 3D rendering trends and discover how AI and cloud technologies are shaping the next generation of rendering workflows.
Evolving Best Practices for Mobile Rendering
Remote work and collaboration tools are redefining how teams use vray for macbook air. Integration with VR and AR technologies is becoming more common, allowing designers to present immersive experiences directly from their laptops. Sustainability is also a growing priority, with energy-efficient rendering settings and cloud-based workflows minimizing environmental impact. By adopting these best practices, architects and designers can stay ahead of industry trends and ensure their vray for macbook air setup remains adaptable, efficient, and ready for the future.