Realistic Blender Renders Guide: Achieve Stunning Results in 2026
Imagine achieving realistic blender renders that rival professional photography, all within reach thanks to Blender’s rapid evolution in 2026. This guide is designed to help artists and designers unlock new levels of realism using the latest tools and advanced techniques. Step by step, you’ll learn how to set up your scene, master materials, perfect lighting, finesse camera work, choose the best rendering engines, and apply expert post-processing. Stunning visuals are more accessible than ever, so dive in to master the skills and features that will elevate your work to industry-leading standards.
Understanding Realism in Blender Renders
Unlocking the secrets behind realistic blender renders begins with understanding the foundations of photorealism. Achieving authenticity in 3D art means more than just technical skill. It requires attention to visual cues, physical accuracy, and emotional resonance that mirrors the real world.
Defining Photorealism in 3D Art
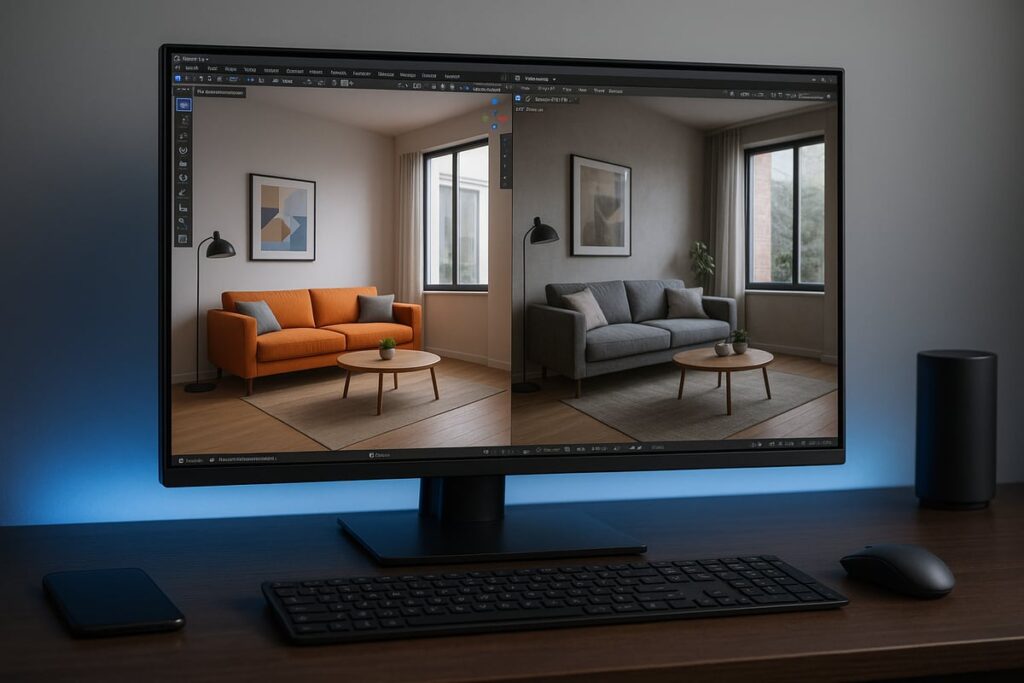
What sets realistic blender renders apart from stylized creations? The answer lies in the pursuit of visual authenticity. Photorealism is achieved when a digital render is indistinguishable from a real photograph, thanks to accurate lighting, textures, and materials. Unlike stylized art that exaggerates or abstracts, photorealistic work aims for true-to-life representation.
In 2025 and 2026, several Blender artists received awards for renders that captured everyday scenes with such precision that viewers could not tell they were computer-generated. These works often evoke an emotional response, drawing the viewer into the scene. Notably, over 60% of top-rated Blender projects on ArtStation in 2025 were tagged as “photorealistic,” highlighting the growing demand for realism in digital art.
The Evolution of Blender’s Rendering Capabilities
The journey toward realistic blender renders has accelerated, especially since 2024. Major updates like Cycles X brought real-time ray tracing and adaptive sampling, making it easier to achieve photorealistic results. AI-powered denoising has dramatically reduced noise, while expansive material libraries allow artists to work faster and more efficiently.
Compared to other industry-standard renderers, Blender has closed the gap in both speed and quality. According to the Future of 3D Rendering, innovations in global illumination and GPU acceleration have made Blender a top choice for professionals. These advancements ensure that artists can push the boundaries of realism with each new release.
Core Principles: Lighting, Materials, and Composition
Realistic blender renders rely on a strong foundation of physically based rendering (PBR) workflows. Using real-world references is essential for accuracy, helping artists match colors, textures, and lighting conditions. Mastering the use of PBR materials ensures that surfaces react to light just as they would in a photograph.
Composition also plays a critical role. Techniques like the rule of thirds, leading lines, and depth of field guide the viewer's eye and add depth to scenes. Even the most detailed model can fall flat if the composition lacks balance or focus.
Common Mistakes and How to Avoid Them
Even experienced artists can stumble when aiming for realistic blender renders. Overusing post-processing effects can lead to unnatural results. Applying unrealistic textures or making lighting errors may push a scene into the “uncanny valley,” where it looks almost real but feels off.
To avoid these pitfalls:
- Limit heavy filters or glare effects.
- Always compare renders with real-world references.
- Seek feedback from peers and iterate on your work.
Learning from real-world examples and continuously refining your process are crucial for improvement.
The Role of Hardware and Software in Achieving Realism
The quality of realistic blender renders often depends on the hardware and software behind them. In 2026, GPU rendering outpaces CPU rendering in both speed and efficiency. Performance benchmarks show that high-fidelity Blender work requires at least a mid-range GPU and 32GB of RAM for optimal results.
Cloud rendering solutions are becoming more popular, offering scalable resources for complex projects. These solutions can save time and reduce costs, especially for businesses needing multiple high-resolution renders. Choosing the right hardware and software setup ensures that artists can pursue realism without technical bottlenecks.
Step 1: Preparing Your Scene for Realism
Embarking on the journey toward realistic blender renders begins with strategic scene preparation. Whether you are visualizing architecture, products, or cinematic moments, careful planning sets the stage for photorealistic results. Each step, from gathering references to optimizing assets, paves the way for professional-grade realism.
Reference Gathering and Planning
The foundation of realistic blender renders is built on solid references. Start by collecting high-resolution images, sketches, and mood boards that match your project's style and subject. Tools like PureRef or Milanote make organizing these visuals straightforward, letting you quickly compare details and maintain consistency.
For example, architectural visualization projects thrive when artists study real-world materials, lighting, and spatial relationships. By referencing actual buildings and interiors, you can capture nuances that elevate your scenes. This step ensures authenticity and helps avoid creative guesswork, which often leads to less convincing results.
Accurate Modeling Techniques
Accurate modeling is essential for achieving realistic blender renders. Always work to real-world scale, as even minor discrepancies can break immersion. Use Blender’s modifiers, such as Subdivision Surface and Bevel, to introduce subtle edge softness and intricate details.
Suppose you are modeling a kitchen. Carefully measure cabinet dimensions, appliance sizes, and hardware placement. Small touches, like rounded corners or slight imperfections, make the scene feel authentic. Consistent attention to scale and proportion throughout the modeling process is what sets apart professional work from amateur attempts.
Asset Management and Scene Organization
Efficient asset management is crucial for complex, realistic blender renders. Linking and appending assets from external libraries keeps your workflow non-destructive and flexible. Within Blender 4.x, leverage collections to group objects logically—such as separating furniture, lighting, and structural elements.
Pros often use layered organization strategies, which not only help with version control but also streamline collaboration. According to recent statistics, artists using linked libraries have reported a 30% faster workflow. This approach minimizes errors and makes updates seamless, especially on large-scale projects.
Scene Optimization for Performance
Scene optimization is vital when aiming for realistic blender renders without sacrificing performance. High polygon counts can slow down both viewport navigation and final renders. Use instancing for repeating objects, such as chairs or plants, to reduce memory usage.
Introduce proxies or Levels of Detail (LODs) for complex assets. This technique allows you to work efficiently in the viewport and switch to high-resolution models only at render time. Optimized scenes lead to shorter render times and a smoother creative process, letting you focus on perfecting realism.
Rendimension: Professional 3D Rendering Services
For artists and businesses seeking the highest level of realistic blender renders, Rendimension delivers professional 3D visualization and rendering solutions. Their team specializes in architectural, product, and immersive VR projects, ensuring each render meets photorealistic standards.
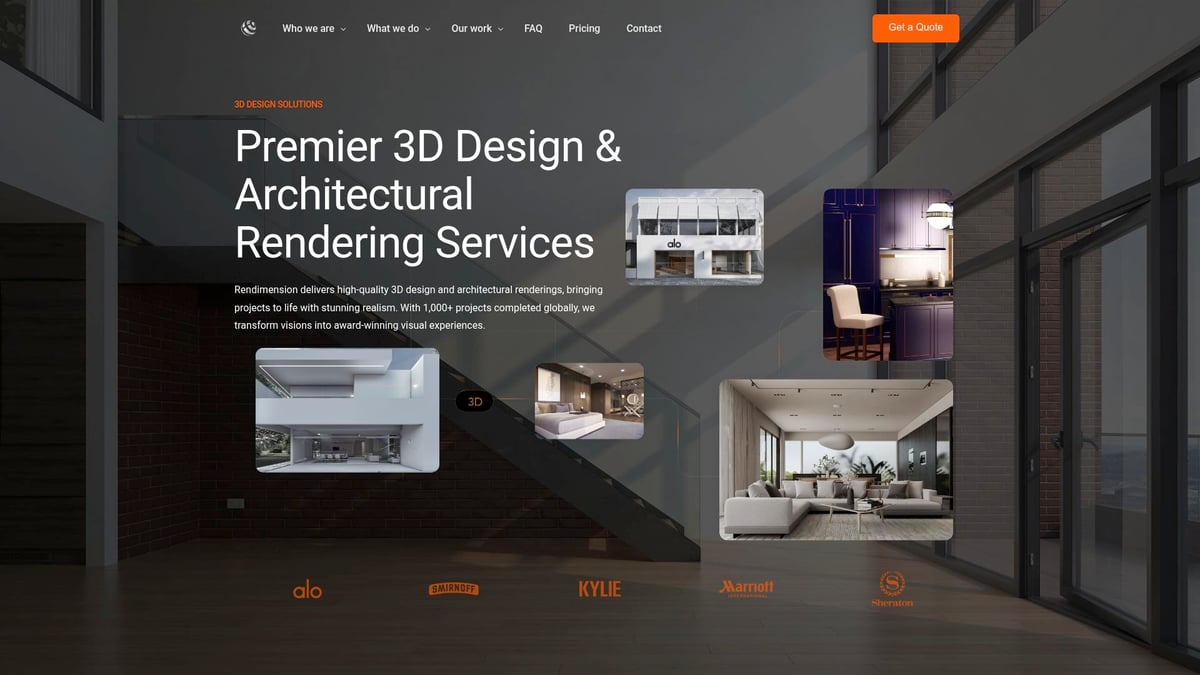
Clients benefit from a collaborative process, rapid turnaround, and industry recognition for award-winning realism. If you require expert results or have tight deadlines, partnering with Rendimension allows you to focus on design while experts handle the technical execution. Explore their services to bring your vision to life with unmatched quality.
Step 2: Mastering Materials and Textures
Achieving truly realistic blender renders begins with mastering materials and textures. The surface qualities of every object, from wood to metal, glass, or skin, determine how light interacts with your scene. In 2026, Blender’s advanced tools empower artists to create surfaces that are nearly indistinguishable from real life. By following a structured approach, you can elevate your renders to professional standards.
Physically Based Rendering (PBR) in Blender
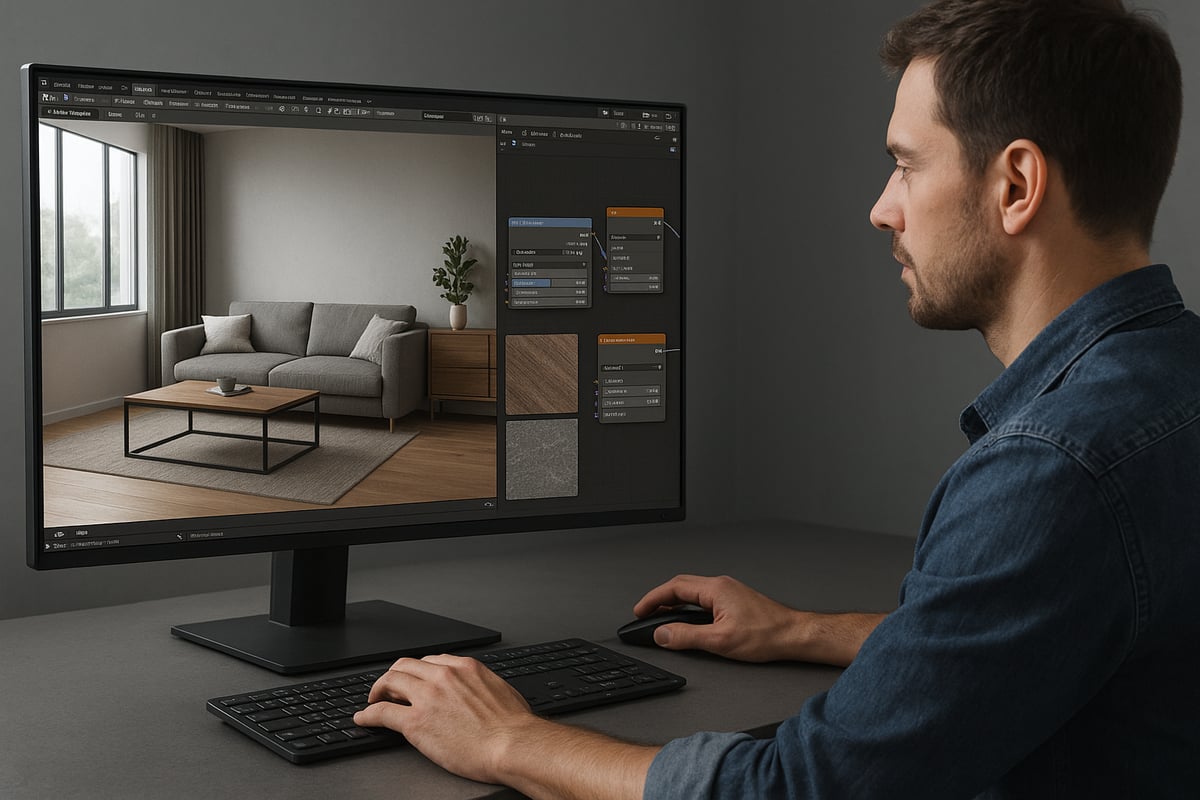
Physically Based Rendering, or PBR, is the foundation of realistic blender renders. It ensures that materials behave as they would in the real world, responding accurately to light and shadow. In Blender, PBR workflows rely on shader nodes that simulate physical properties such as albedo (base color), roughness, normal, and metallic values.
A typical PBR setup uses the Principled BSDF shader, which streamlines the process. For example, to create a lifelike wood surface, you combine a detailed albedo map with roughness and normal maps to capture subtle grain and imperfections. Metal materials use metallic and specular maps for accurate reflections.
Small details, such as micro-scratches or fingerprints, can be added using additional normal or bump maps. Consistent use of PBR principles is essential for realistic blender renders.
Creating and Importing Realistic Textures
High-resolution textures are critical for achieving realism. Top artists source textures from platforms like Quixel, Poliigon, or CC0 libraries, ensuring each surface has unique, lifelike details. Custom textures can be painted directly in Blender or edited in external applications before import.
Proper UV unwrapping is crucial. It aligns the texture to the 3D model without stretching or visible seams. Artists often use Blender’s UV tools combined with manual adjustments for the best results. Texture painting and projection mapping offer flexibility, letting you fix imperfections directly.
Data shows that 80 percent of top-rated renders use either custom or scanned high-quality textures. For realistic blender renders, always prioritize texture quality and accuracy.
Advanced Material Techniques
Pushing realism further requires more than basic textures. Layered materials, subsurface scattering, and anisotropy simulate complex surfaces such as skin, glass, and brushed metals. Blender’s Principled BSDF shader supports these effects, making it easier to create convincing materials.
For instance, skin materials benefit from subsurface scattering, which mimics how light penetrates and scatters beneath the surface. Glass uses a combination of transmission and IOR settings, while fabrics often require a mix of roughness and sheen. Mastering these techniques is vital for realistic blender renders and aligns with the highest professional standards, as seen in 3D Visualization and Rendering Services.
Experimenting with node setups and studying real-world references will help you achieve the subtlety needed for top-tier results.
Texture Baking and Optimization
Efficient scenes depend on baked textures, especially for complex or animated projects. Baking normal, ambient occlusion (AO), and displacement maps transfers high-resolution detail onto lower-poly models, dramatically improving performance without sacrificing quality.
Reducing texture size, when appropriate, helps keep file sizes manageable. For game-ready assets, artists bake details into textures, while cinematic renders may use higher resolutions for close-up shots. Blender’s baking tools streamline this process, allowing for quick iteration and testing.
For realistic blender renders, always balance optimization with visual fidelity. Test baked assets in the final scene to ensure no quality is lost.
Procedural Texturing and Node Wizardry
Procedural texturing unlocks infinite variation with minimal resource use. Blender’s node editor lets you create complex surfaces using mathematical patterns, noise, and color ramps. Procedural marble, wood grain, or terrain can be generated and adjusted on the fly.
Combining procedural methods with image-based textures often yields the most convincing results. For example, use a procedural mask to blend between two photo textures, creating subtle transitions and avoiding repetition.
Procedural approaches are especially valuable for large environments or assets that require variation. They are indispensable for realistic blender renders, offering flexibility and performance benefits.
Overcoming Common Material Pitfalls
Even advanced artists can fall into traps like plastic-looking surfaces, visible tiling, or unrealistic reflectivity. Comparing your materials to real-world references is the best way to catch these issues early. Use iterative testing and seek feedback from peers or online communities.
Pay attention to scale and proportion in textures, ensuring scratches or surface details are appropriately sized. Avoid over-relying on glossy or metallic effects unless they are true to the material. For realistic blender renders, subtle imperfections and careful observation are key.
Continuous learning and adaptation will help you avoid common mistakes and achieve results that stand out in professional portfolios.
Step 3: Lighting for Maximum Realism
Lighting is the cornerstone of realistic blender renders. Mastering light transforms flat 3D scenes into vivid, lifelike images. Every choice, from the type of lamp to the direction of a shadow, plays a crucial role in achieving photorealism.

Types of Lighting in Blender
Blender offers several light types for artists aiming for realistic blender renders. The sun lamp is ideal for outdoor scenes, casting parallel rays and crisp shadows. Area lights provide soft, even illumination, perfect for studios or product shots. Point lights emit light in all directions from a single point, mimicking bulbs or candles, while spot lights project focused beams, useful for accenting features.
HDRI environments have become a staple for realistic blender renders. They wrap your scene in 360-degree real-world lighting data, capturing subtle color shifts and natural shadow gradients. For example, a product render benefits greatly from an HDRI sky, adding authenticity and depth that standard lamps alone cannot achieve.
Physically Accurate Lighting Techniques
Achieving physically accurate lighting is fundamental for realistic blender renders. Artists should apply the inverse square law, meaning light intensity diminishes with distance, just as in the real world. Adjusting color temperature is equally vital, as warm or cool tints influence a scene’s mood and realism.
Modern Blender versions, especially with the advancements in Blender 5’s rendering engines, have made these techniques more accessible and powerful. Features like real-time global illumination and enhanced Cycles efficiency allow for more accurate simulation of natural lighting. According to Blender 5 revolutionizes rendering engines with unprecedented improvements, Cycles now delivers a 40 percent increase in efficiency, making it easier to achieve photorealistic results with complex lighting setups.
Using Light Portals and Caustics
For interior scenes, light portals are essential in realistic blender renders. They guide indirect sunlight through windows, boosting brightness and reducing noise in shadowed spaces. This technique is especially effective in architectural visualization, where natural daylight must fill rooms convincingly.
Simulating caustics—those intricate patterns of light created by glass and water—adds another level of authenticity. Caustics can be achieved by enabling specific settings in Blender’s Cycles engine. For instance, rendering sunlight streaming through a glass of water onto a surface brings a touch of realism that viewers subconsciously recognize from the real world.
Balancing Light and Shadow
The interplay of light and shadow is critical for realistic blender renders. Overexposed highlights or crushed shadows can break the illusion, so balance is key. Use fill lights to soften harsh contrasts and bounce cards to reflect light into darker areas, just as a photographer would on set.
Adopting real-world photographic techniques, such as bracketing exposure and adjusting white balance, helps match the dynamic range and color accuracy found in professional photos. This careful attention to detail ensures every part of your render feels believable and visually pleasing.
Volumetrics and Atmospheric Effects
Adding volumetric effects like fog, god rays, or dust elevates realistic blender renders to cinematic heights. Volumetrics introduce depth, softening distant objects and creating a sense of space. For example, a landscape with morning mist or an interior with sunbeams cutting through haze gains a mood that pure lighting cannot achieve alone.
Performance is a consideration, as volumetric rendering can be demanding on hardware. Optimize by using lower resolution volumes and only enabling them where necessary. The result is a more immersive, atmospheric scene that draws viewers in.
Lighting for Storytelling and Mood
Lighting is not just technical—it tells stories in realistic blender renders. The use of colored gels, strategic shadow placement, and color grading directs the viewer’s attention and sets the emotional tone. A character lit from below feels mysterious, while soft side lighting suggests gentleness.
Case studies show that dramatic lighting choices can transform simple scenes into award-winning renders. Experimenting with color, intensity, and direction lets you imbue each project with its own unique atmosphere, making your work stand out in any portfolio.
Step 4: Camera Setup and Composition Techniques
Achieving realistic blender renders is not just about materials and lighting. Camera setup and composition are essential for making your scenes feel authentic and immersive. Understanding how to use Blender’s camera tools can elevate your work from ordinary to extraordinary.
Camera Types and Settings in Blender
Selecting the right camera is a foundational step for realistic blender renders. Blender offers both perspective and orthographic cameras. Perspective cameras mimic real-world lenses, adding depth and spatial realism, while orthographic cameras are best for technical or stylized shots.
Adjusting focal length, sensor size, and lens distortion helps match real camera characteristics. For example, a 35mm lens creates a natural field of view, commonly used in architectural and product visualization. Use Blender’s depth of field and sensor settings to replicate DSLR behaviors accurately.
Understanding the basics of 3D rendering, as explained in What is 3D Rendering, can help you make informed choices about camera setup. Always test different settings and compare with photographic references to achieve true realism in your scenes.
Framing and Composition Rules
Composition is the secret ingredient in realistic blender renders. Key rules like the rule of thirds, golden ratio, and leading lines help guide the viewer’s eye and create balanced, engaging images.
Layering your scene into foreground, midground, and background adds depth. For architectural exteriors, strong composition can transform a simple building into a breathtaking visual story. Use Blender’s guides and overlays to align your elements precisely.
For more on how composition impacts realism in architectural visualization, check out How 3D Rendering Transforms Architecture. Analyze award-winning renders to see how professionals apply these principles for maximum impact.
Depth of Field and Motion Blur
Depth of field (DoF) is a powerful tool for realistic blender renders. By blurring areas outside the focus plane, you can mimic how cameras capture real-world scenes. Subtle DoF effects make objects pop and add photographic authenticity.
Motion blur is equally important in dynamic scenes. It conveys movement and prevents static, artificial-looking frames. In Blender, enable DoF in the camera settings and adjust the f-stop for desired blur intensity. For motion blur, set shutter speed values that reflect real camera behavior.
Compare your rendered images with real DSLR photographs. This side-by-side analysis will reveal whether your depth of field and motion blur settings enhance realism or need adjustment.
Animation and Camera Movement
Animation techniques bring realistic blender renders to life. Smooth camera paths, like dolly, pan, tilt, and crane shots, provide cinematic motion and help tell your visual story. Keyframing the camera in Blender allows you to choreograph complex movements with precision.
When creating animated walkthroughs, especially for real estate or product demos, pay close attention to pacing and transitions. Subtle camera shake or focus pulls can add a human touch, making the viewer feel present in the scene.
Mastering these animation principles enables you to create not just still images, but immersive, photorealistic experiences with realistic blender renders.
Step 5: Rendering Engines and Post-Processing
Achieving realistic blender renders requires more than just excellent modeling or texturing. The final touches—your choice of rendering engine, precise settings, and post-processing workflow—make the difference between a good render and a photorealistic masterpiece. This section explores the crucial steps to ensure your renders stand out in 2026.
Choosing the Right Rendering Engine
Selecting the right engine is vital for realistic blender renders. In 2026, Cycles X remains the benchmark for physically accurate results, while Eevee provides fast, real-time previews. Third-party engines like Octane and Redshift offer GPU acceleration and unique features, but may require additional setup.
Below is a comparison of key engines:
| Engine | Strengths | Use Case |
|---|---|---|
| Cycles X | Photorealism, PBR | Final renders |
| Eevee | Speed, previews | Animation, look-dev |
| Octane | GPU, realism | High-end, cinematic |
| Redshift | Speed, flexibility | Large scenes, VFX |
Your choice depends on your project’s needs and the level of realism you aim to achieve.
Optimizing Render Settings for Quality and Speed
Balancing render quality and speed is essential for realistic blender renders, especially with 4K outputs and complex scenes. Key settings include sample counts, adaptive sampling, and denoising. Higher sample counts reduce noise but increase render times, so test different values.
Blender 4.1 introduces performance enhancements, like GPU-accelerated OpenImageDenoise and smarter compositor nodes. For more details, see Blender 4.1 introduces performance enhancements and new features. Optimize tile sizes, enable persistent data, and adjust light paths for efficiency.
A sample configuration for interiors:
samples = 2048
denoising = True
tile_size = 256
light_paths = 12
Iterate settings for the best balance of speed and fidelity.
AI-Powered Denoising and Upscaling
Modern AI denoisers have revolutionized realistic blender renders. Tools like Intel OIDN and NVIDIA OptiX are now standard in Blender, cutting render times by up to 40 percent. These denoisers effectively clean up noise without losing detail, even at lower sample rates.
Super-resolution upscaling algorithms let you create large, print-ready images without sacrificing sharpness. For best results, use denoisers in the compositor and upscaling tools post-render. Always check the output for artifacts or loss of fine detail, especially in areas with subtle gradients and reflections.
Compositing and Post-Processing in Blender
Blender’s compositor is a powerhouse for achieving realistic blender renders. Render passes like diffuse, glossy, and ambient occlusion give you granular control. Use nodes for color correction, glare, bloom, and even subtle lens effects.
Integrating external editors such as Photoshop or Affinity Photo can add an extra polish layer. Typical post-processing steps include:
- Color balance and contrast adjustments
- Adding atmospheric haze or depth
- Subtle lens flares or bloom for realism
Always keep your edits non-destructive by working in layers or with adjustment nodes.
Color Grading and Final Touches
Color grading is the secret sauce for realistic blender renders. Use lookup tables (LUTs), curves, and color wheels to match the mood of your reference photography. Adjust highlights, midtones, and shadows for cinematic impact.
Compare your render’s color palette to real-world photos for consistency. Non-destructive workflows let you revert or tweak grades as needed. The goal is to create visual harmony that enhances realism and emotional impact.
Output Formats and Deliverables
Delivering your realistic blender renders in the right format is crucial for quality retention. For web, use high-quality JPEG or PNG, balancing file size and compression. For print or animation, EXR and TIFF formats offer higher bit depth and color accuracy.
| Output Type | Format | Bit Depth | Use Case |
|---|---|---|---|
| Web | JPEG | 8-bit | Online portfolios |
| TIFF | 16/32-bit | Posters, brochures | |
| Animation | EXR | 32-bit | VFX, compositing |
Always check color space settings and export at the highest necessary quality for your client or platform.
Troubleshooting Common Rendering Issues
Even in 2026, troubleshooting is part of achieving realistic blender renders. Common issues include fireflies, noise, and memory errors. Reduce fireflies by clamping direct and indirect lighting, and use denoising nodes strategically.
If you experience slow renders, check for excessive subdivision, high-res textures, or unoptimized light paths. The Blender community forums and release notes are invaluable for support. For advanced techniques, research innovations like RayGauss: Volumetric Gaussian-Based Ray Casting for Photorealistic Novel View Synthesis to stay ahead in the field.