Maya rendering stands as one of the most powerful processes in 3D visualization, transforming raw geometry and materials into photorealistic images that bring architectural projects and design concepts to life. Whether you're working on architectural visualization, product design, or animation projects, understanding the fundamentals and advanced techniques of maya rendering can significantly impact the quality and efficiency of your final deliverables. This comprehensive guide explores the essential components, workflows, and best practices that professionals use to achieve stunning results.
Understanding Maya's Rendering Architecture
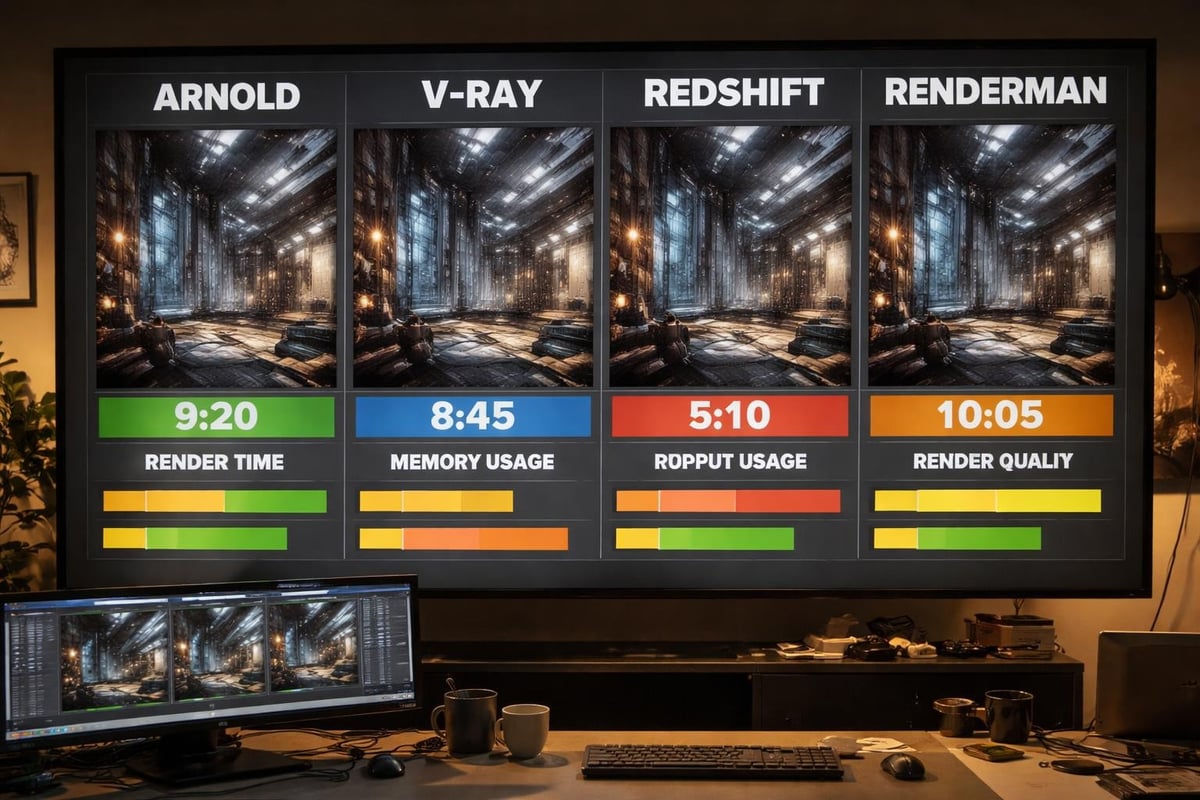
Maya offers multiple rendering engines, each designed for specific use cases and output requirements. The choice of renderer fundamentally shapes your workflow, render times, and final image quality. Arnold, Maya's default production renderer since 2017, delivers physically accurate results through ray tracing technology. This industry-standard engine excels at handling complex lighting scenarios and material interactions.
Maya Software renderer remains available for legacy projects and specific technical requirements. While less commonly used in modern production pipelines, it offers compatibility with older scenes and predictable results for certain rendering tasks.
Third-party renderers integrate seamlessly into Maya's ecosystem. V-Ray provides fast, high-quality output with extensive material libraries. Redshift leverages GPU acceleration for rapid iteration cycles. Pixar's RenderMan offers advanced photo-realistic capabilities that have powered countless feature films and visual effects sequences.
Selecting the Right Renderer
Your project requirements dictate the optimal rendering solution. Architectural visualization typically demands physically accurate lighting and materials, making Arnold or V-Ray excellent choices. Product visualization benefits from the fast turnaround times offered by GPU renderers like Redshift.
| Renderer | Best For | Key Strength | Typical Use Case |
|---|---|---|---|
| Arnold | Film & Arch Viz | Physical accuracy | High-end architectural renders |
| V-Ray | Commercial | Speed & versatility | Product visualization |
| Redshift | Real-time feedback | GPU acceleration | Iterative design work |
| RenderMan | VFX & Animation | Advanced shading | Complex material systems |
Consider your hardware capabilities alongside project deadlines. GPU renderers require powerful graphics cards but deliver faster preview renders. CPU-based solutions like Arnold scale efficiently across multiple processors, making them ideal for final production renders that prioritize quality over speed.
Optimizing Scene Setup for Efficient Rendering
Proper scene organization forms the foundation of successful maya rendering workflows. Clean hierarchy structures enable faster scene navigation and simplified render layer management. Group related objects logically, separating architectural elements, landscape features, and decorative details into distinct hierarchies.
Implementing best practices for setting up renders streamlines your production pipeline. Create render collections that organize objects by material type, render priority, or visual importance. This approach allows selective rendering of scene elements, reducing memory overhead and computation time.
Geometry Optimization Techniques
- Polygon reduction on distant or background objects decreases render calculations
- Proxy substitution replaces high-resolution models with simplified versions during camera setup
- Instance usage for repetitive elements like vegetation or architectural details minimizes memory consumption
- Subdivision optimization applies adaptive tessellation only where camera proximity demands detail
Professional architectural visualization requires balancing visual fidelity with practical render times. Evaluate each object's contribution to the final image. Background elements visible through windows may need only 20% of the polygon density compared to foreground architectural features.
Mastering Lighting Fundamentals
Lighting quality separates amateur renders from professional visualization. Maya rendering achieves photorealism through accurate light behavior simulation, requiring thoughtful light placement and parameter adjustment. Physical sky systems provide realistic outdoor illumination with automatic sun angle calculation and atmospheric effects.
Three-point lighting remains fundamental for product and interior visualization. The key light establishes primary illumination direction and mood. Fill lights soften shadows and reveal detail in darker areas. Rim lights separate subjects from backgrounds, adding depth and dimensional quality to rendered images.

Advanced Lighting Strategies
Lighting and rendering tutorials demonstrate the impact of light temperature and intensity on atmosphere. Warm lighting (2700K-3200K) creates inviting residential interiors. Cool lighting (5000K-6500K) suits commercial and medical facilities. Color temperature consistency across light sources prevents unrealistic color casts.
Portal lights accelerate interior rendering by directing sampling toward windows and openings. This optimization technique reduces noise in challenging lighting scenarios where bright exterior light enters dark interior spaces. Position portal lights precisely at window boundaries to maximize effectiveness.
Global illumination settings determine how light bounces between surfaces. Higher bounce counts increase realism but extend render times exponentially. Architectural visualization typically requires 3-5 diffuse bounces for accurate light distribution. Specular bounces handle reflective surfaces, with 2-3 bounces sufficient for most scenarios.
Material Development and Shader Networks
Material quality directly impacts the believability of maya rendering output. Physically Based Rendering (PBR) workflows ensure materials respond correctly to lighting conditions. Base color, roughness, and metallic properties form the foundation of PBR materials, with additional maps controlling fine surface details.
Building complex shader networks enables sophisticated material effects. Layered shaders combine multiple materials through masks, creating realistic weathering, dirt accumulation, and surface variation. The aiStandardSurface shader in Arnold provides comprehensive controls for dielectric and metallic materials.
Essential Material Components
- Albedo/Base Color: Defines the fundamental color without lighting information
- Roughness/Glossiness: Controls surface micro-detail affecting light scattering
- Normal Maps: Simulates geometric detail without additional polygons
- Displacement: Generates actual geometric detail from grayscale height information
- Opacity: Handles transparent and translucent materials like glass and fabric
Texture resolution significantly affects both render quality and memory usage. 4K textures suit hero objects and close-up views. Background elements function well with 2K or 1K resolution. Implement UDIM workflows for managing multiple texture sets on complex architectural models.
Camera Settings and Composition Principles
Camera configuration in maya rendering mirrors real-world photography principles. Focal length selection dramatically alters perspective and spatial relationships. Wide-angle lenses (24-35mm) emphasize space and depth, ideal for interior architectural visualization. Standard lenses (50-70mm) provide natural perspective matching human vision.
Depth of field adds cinematic quality and directs viewer attention. Configure f-stop values between f/2.8 and f/5.6 for selective focus effects. Architectural exteriors often use f/8 to f/16 for deeper focus, maintaining sharpness across foreground and background elements.
| Camera Setting | Architectural Exterior | Architectural Interior | Product Close-up |
|---|---|---|---|
| Focal Length | 24-35mm | 24-50mm | 85-105mm |
| F-Stop | f/8-f/16 | f/4-f/8 | f/2.8-f/5.6 |
| Focus Distance | 1/3 into scene | Entry point | Product center |
Composition Techniques
Apply the rule of thirds by positioning key architectural elements along grid intersections. Leading lines guide viewer attention through the composition toward focal points. Foreground elements create depth and scale reference, particularly effective in exterior architectural renders.
Camera height significantly influences perceived space. Eye-level cameras (5.5-6 feet) provide natural, relatable views. Lower cameras emphasize verticality and grandeur, suitable for showcasing building height. Elevated cameras reveal spatial relationships and site context.
Render Settings and Output Optimization
Maya rendering quality depends heavily on sampling settings that balance noise reduction against computation time. Adaptive sampling focuses computational resources on complex areas while reducing samples in simple regions. Set minimum samples to 1-3 and maximum samples to 8-16 for preview renders, increasing to 64-256 for final production output.
Resolution settings align with final delivery requirements. 4K resolution (3840×2160) serves high-end presentations and large-format printing. Full HD (1920×1080) remains standard for digital presentations and web delivery. Consider rendering oversized (110-120% final resolution) to allow cropping flexibility during post-production.
Render Layer Management
Separate render layers provide flexibility in post-production and accelerate iteration. Beauty pass captures the complete rendered image. Shadow pass isolates shadow information for independent adjustment. Reflection pass enables selective reflection intensity control. Ambient occlusion pass enhances contact shadows and surface detail.
Render passes extend creative control in compositing. Diffuse, specular, and indirect lighting passes allow precise balance of lighting components. Z-depth passes enable depth-based effects like atmospheric fog. Object ID passes facilitate object-specific color correction.
Cryptomatte generates automatic masks for every object and material, eliminating manual masking work. This technology streamlines post-production workflows, particularly valuable for complex architectural visualization requiring client revisions.
Managing Large-Scale Projects
Architectural visualization projects often involve extensive scenes with millions of polygons. Scene referencing maintains manageable file sizes by linking external assets rather than embedding geometry. Update referenced files independently without opening master scenes, enabling collaborative workflows across team members.
Best practices for large simulations apply equally to complex architectural scenes. Implement level-of-detail systems that swap geometry based on camera distance. Distant buildings may render as simple boxes with projected textures, while foreground architecture displays full geometric detail.
Network Rendering Solutions
Distributed rendering leverages multiple computers to accelerate output. Deadline, Royal Render, and Thinkbox manage render farms, distributing frames or tiles across available machines. Cloud rendering services provide on-demand computing resources for peak workloads without hardware investment.
Optimize render submissions by grouping similar frames and balancing computational loads. Submit test frames before full sequences to catch errors early. Implement automatic notification systems that alert completion or failure, preventing wasted rendering time.
Avoiding Common Rendering Pitfalls
Post-processing mistakes frequently undermine otherwise excellent maya rendering work. Over-sharpening creates artificial halos around edges. Excessive contrast crushes shadow and highlight detail. Apply adjustments subtly, comparing frequently against reference photography.
Anti-aliasing settings deserve particular attention. Insufficient sampling creates jagged edges on geometric boundaries. The Filter setting controls how samples blend, with Gaussian filters providing smooth results suitable for architectural visualization. Adjust filter width between 2.0-3.0 pixels for optimal edge quality.
Quality Control Checklist
- Verify correct color space for all texture maps
- Check normal map orientation matches renderer requirements
- Confirm displacement bounds prevent geometry clipping
- Review shadow ray depth for transparent material accuracy
- Validate reflection and refraction depth settings
- Ensure render region matches final output aspect ratio
Test renders of critical areas prevent surprises during final production. Render tight crops around complex materials, intricate geometry, and challenging lighting situations. These focused tests consume minimal time while revealing potential issues early in the production cycle.
Integrating Maya Rendering into Production Pipelines
Successful maya rendering workflows integrate seamlessly with broader production requirements. Establish naming conventions for files, render layers, and output images. Consistent naming enables automatic compositing setups and simplifies asset management across projects.
Version control systems track scene file iterations and prevent data loss. Git handles scene files and scripts, maintaining complete project history. Implement automated backup systems that preserve work-in-progress and final approved renders.
Documentation captures technical decisions and settings for future reference. Record camera settings, lighting configurations, and material parameters for each approved render. This knowledge base accelerates similar projects and ensures consistency across visualization series. Resources like the Maya quick start guide provide foundational knowledge that teams can build upon with project-specific requirements.
Standardize output file formats based on post-production requirements. EXR format preserves maximum quality and dynamic range for professional compositing. PNG offers lossless compression suitable for delivery renders. JPEG provides small file sizes for client review and web presentation, though with quality compromises.
Mastering maya rendering requires understanding technical fundamentals while developing artistic sensibility for lighting, composition, and material quality. The techniques and workflows outlined here provide a foundation for producing professional-quality architectural visualization and 3D rendering projects. When your projects demand exceptional quality and expert execution, Rendimension brings years of specialized experience in architectural visualization, transforming your concepts into stunning photorealistic renders that captivate clients and win approvals. Our team combines technical mastery with artistic vision to deliver visualizations that exceed expectations.
